Frequentlyasked questions.
Setup Zendesk Custom Objects
Unlock the full potential of your Zendesk experience with our latest addition — native support for Zendesk Custom Objects. This groundbreaking solution empowers retailers to extend agnoStack's Customer Insights and Order Insights with your own Advanced Data from internal systems or additional platforms not natively integrated by agnoStack.
The following guide covers the end-to-end process to adding your own Extended Data using Zendesk Custom Objects. If you are looking to utilize our free Elastic Path Composer integration capabilities instead (or in addition), please visit our guide to Configure & Set Up Elastic Path Composer as an Integration Provider.

Enable Zendesk Custom Objects
Before you can use leverage Zendesk Custom Objects, an admin must enable the feature within your Zendesk Account (NOTE: Custom Objects are available on Support Enterprise plans and all Zendesk Suite plans).
This is only a one time setup and if you are leveraging Custom Objects, this has already been completed. To turn on Custom Objects in your account, within the Zendesk Admin Center, click Objects and rules in the sidebar and then select Custom objects > Objects following by clicking Get started.
Configure Custom Objects Types
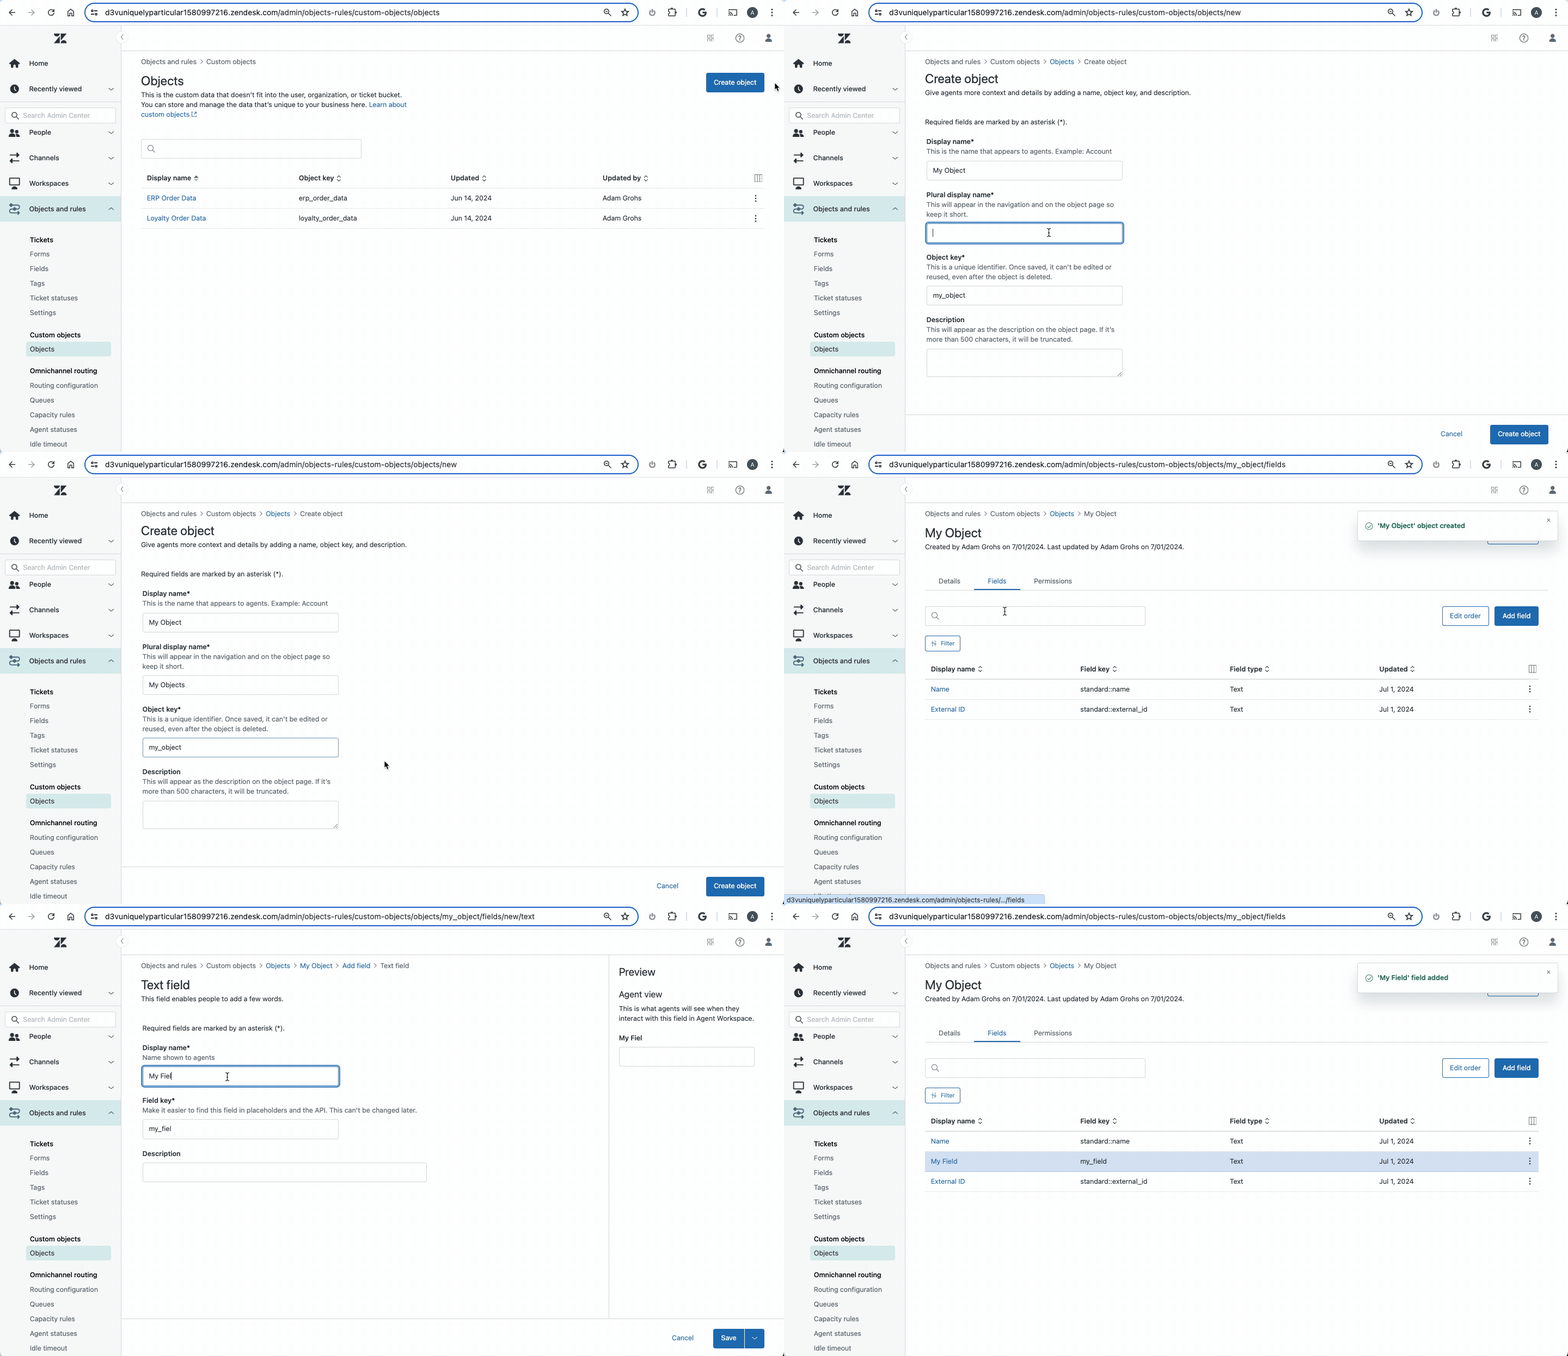
Once Custom Objects are enabled, you can navigate within the Zendesk Admin Center, clicking Objects and rules in the sidebar and then selecting Custom objects > Objects followed by clicking the Create Object button to setup any new Custom Objects. agnoStack supports the ability to link one or more Custom Object to an Order or Customer within the agent Advanced Data panels.
While creating your new Custom Object Type, take note of the "Object Key" as you will need this later to connect into you agnoStack configuration. NOTE: you can always go back and get this key at any time later on.

After you've created you Custom Object Type, click on the Fields tab to now set up any custom Data Fields for this object type that you want to be able to be able to add. For each new Custom Object Field, click on the Add Field button and select from one of the available Field Types before entering a Display Name and clicking Save.
Add Custom Object Data
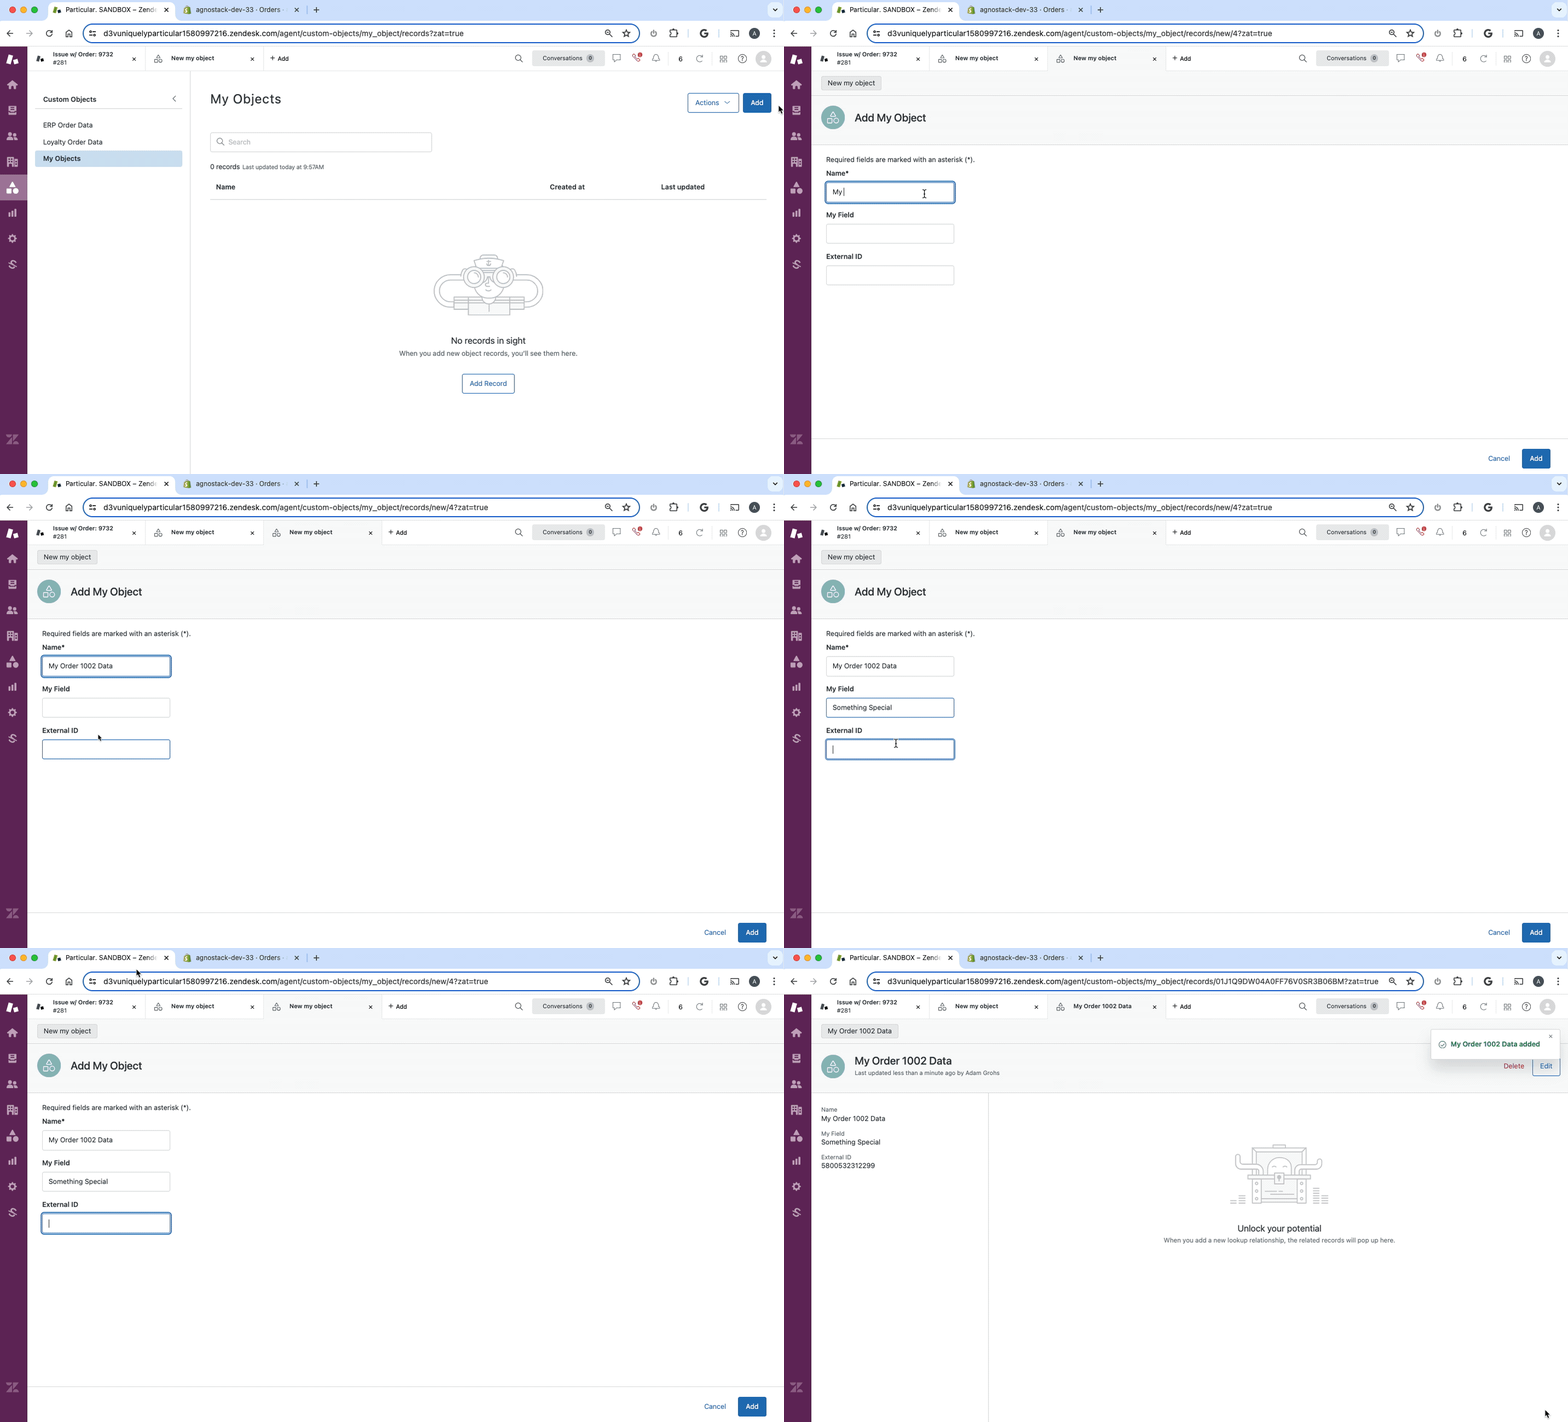
Back within your regular Zendesk Support interface (not the Admin Center), navigate with to the Custom Objects screen via the icon on the left nav and select you new Custom Object Type above from the left side of the screen. Click the Add button in the top right corner to create a new instance of your Object Type for a specific Order or Customer.

NOTE: the "External ID" field is used to link your Custom Object data via the Entity ID of the Customer or Order to display within agnoStack.
Setup Data Provider
The final step to get your Zendesk Custom Objects linked to our Order Insights and Customer Insights Advanced Data panels within agnoStack is to set up your Zendesk Custom Object Data Provider.
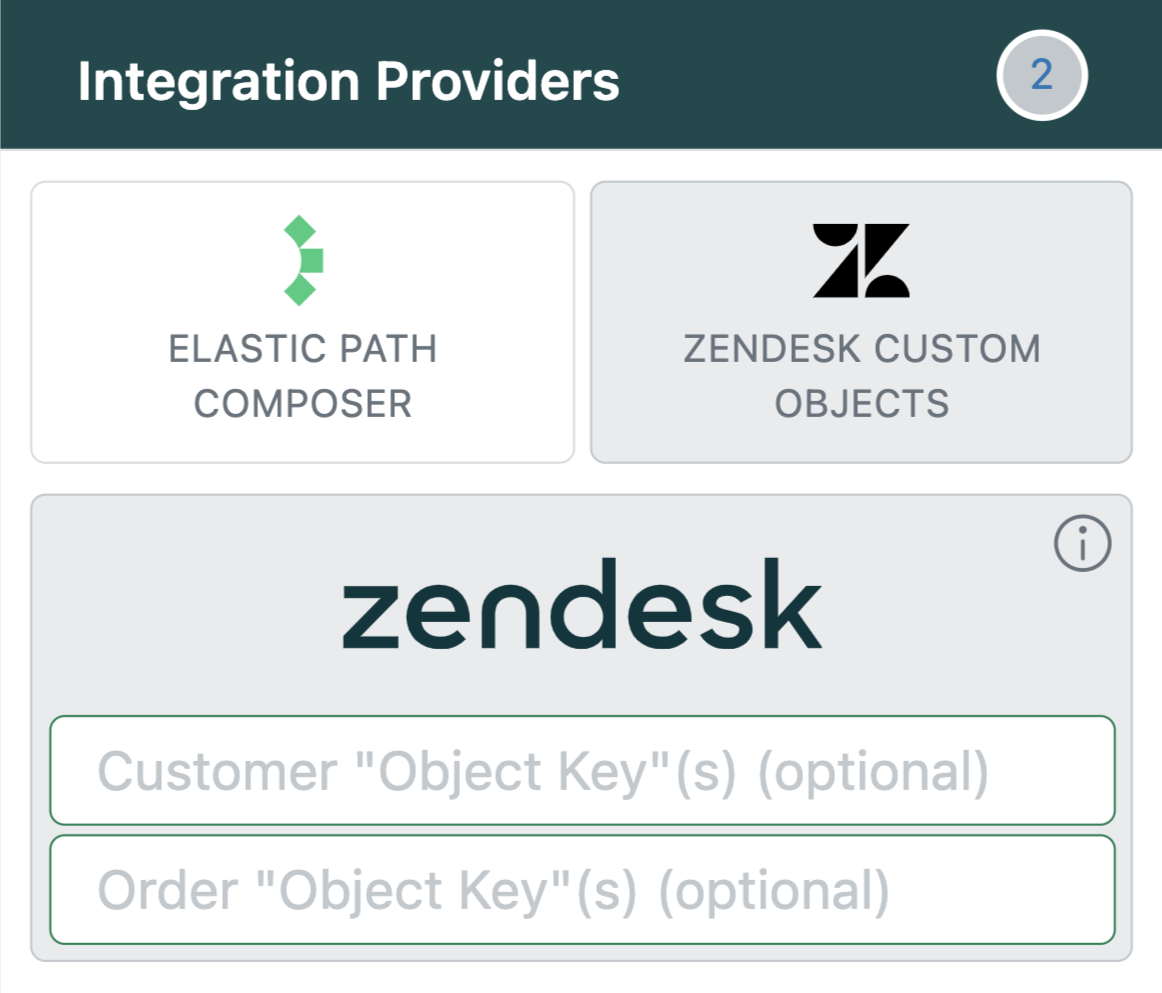
This process is handled within the Add-On Providers step of the agnoStack configuration process, by selecting "Data Providers" > "Zendesk Custom Objects". This step is extremely simple and only requires you to enter the "Object Key"(s) from the Configure Custom Object Types section above.
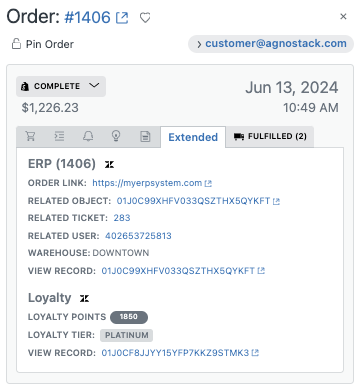
After clicking through to Activate and Save you configuration, the agnoStack plugin should be able to successfully connect to your Custom Objects directly into the hands of your Zendesk support agents! Depending on which Custom Object types you have set up, data will be displayed within the Customer and/or Order Insights Extended Data tabs.

Support & Troubleshooting
If you have questions or are having issues with the Data provider setup or developing with Zendesk Custom Objects, please contact us at support@agnostack.com any time!
We're always happy to help walk through and troubleshoot together with you! We try to make ourselves available across time zones, but if you don't see a timeslot available that works for you please contact us via email and we'll do our best to accommodate.