Frequentlyasked questions.
Recharge / Zendesk Configuration
Recharge can be connected to Zendesk as a free Add-On Provider using the agnoStack plugin.
Learn more around growing revenue through subscription via our guide to Optimize eCommerce Subscription Models and see how to Streamline Subscription Management through our agnoStack Recharge integration.
Recharge is one of the leading Subscription Payment solutions, providing an easy way to launch and scale a subscription business. This guide provides a high-level overview of Recharge, its core features, and migration resources.
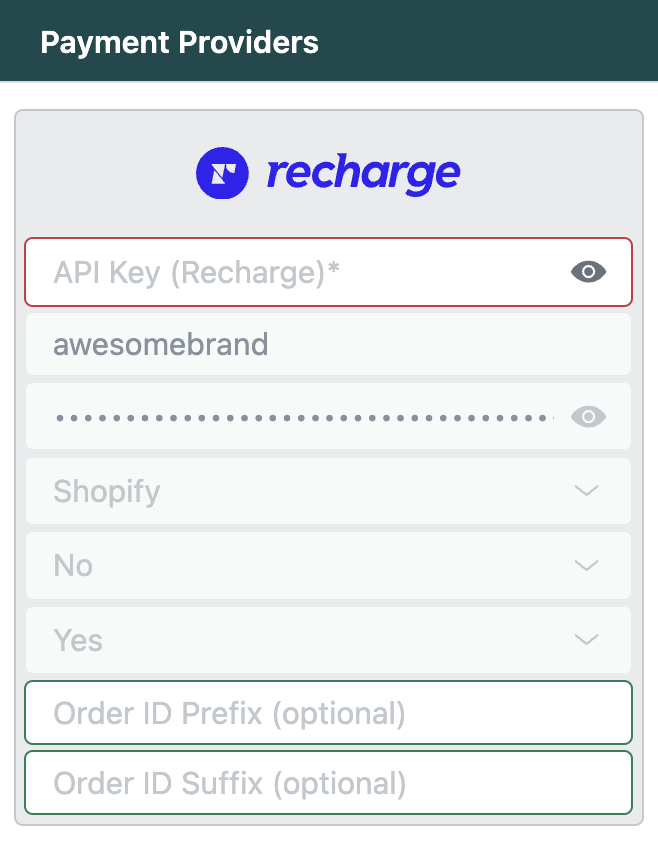
In order configure the Recharge add-on inside of agnoStack, please complete the following steps:
Login into Recharge and navigate to your API Tokens
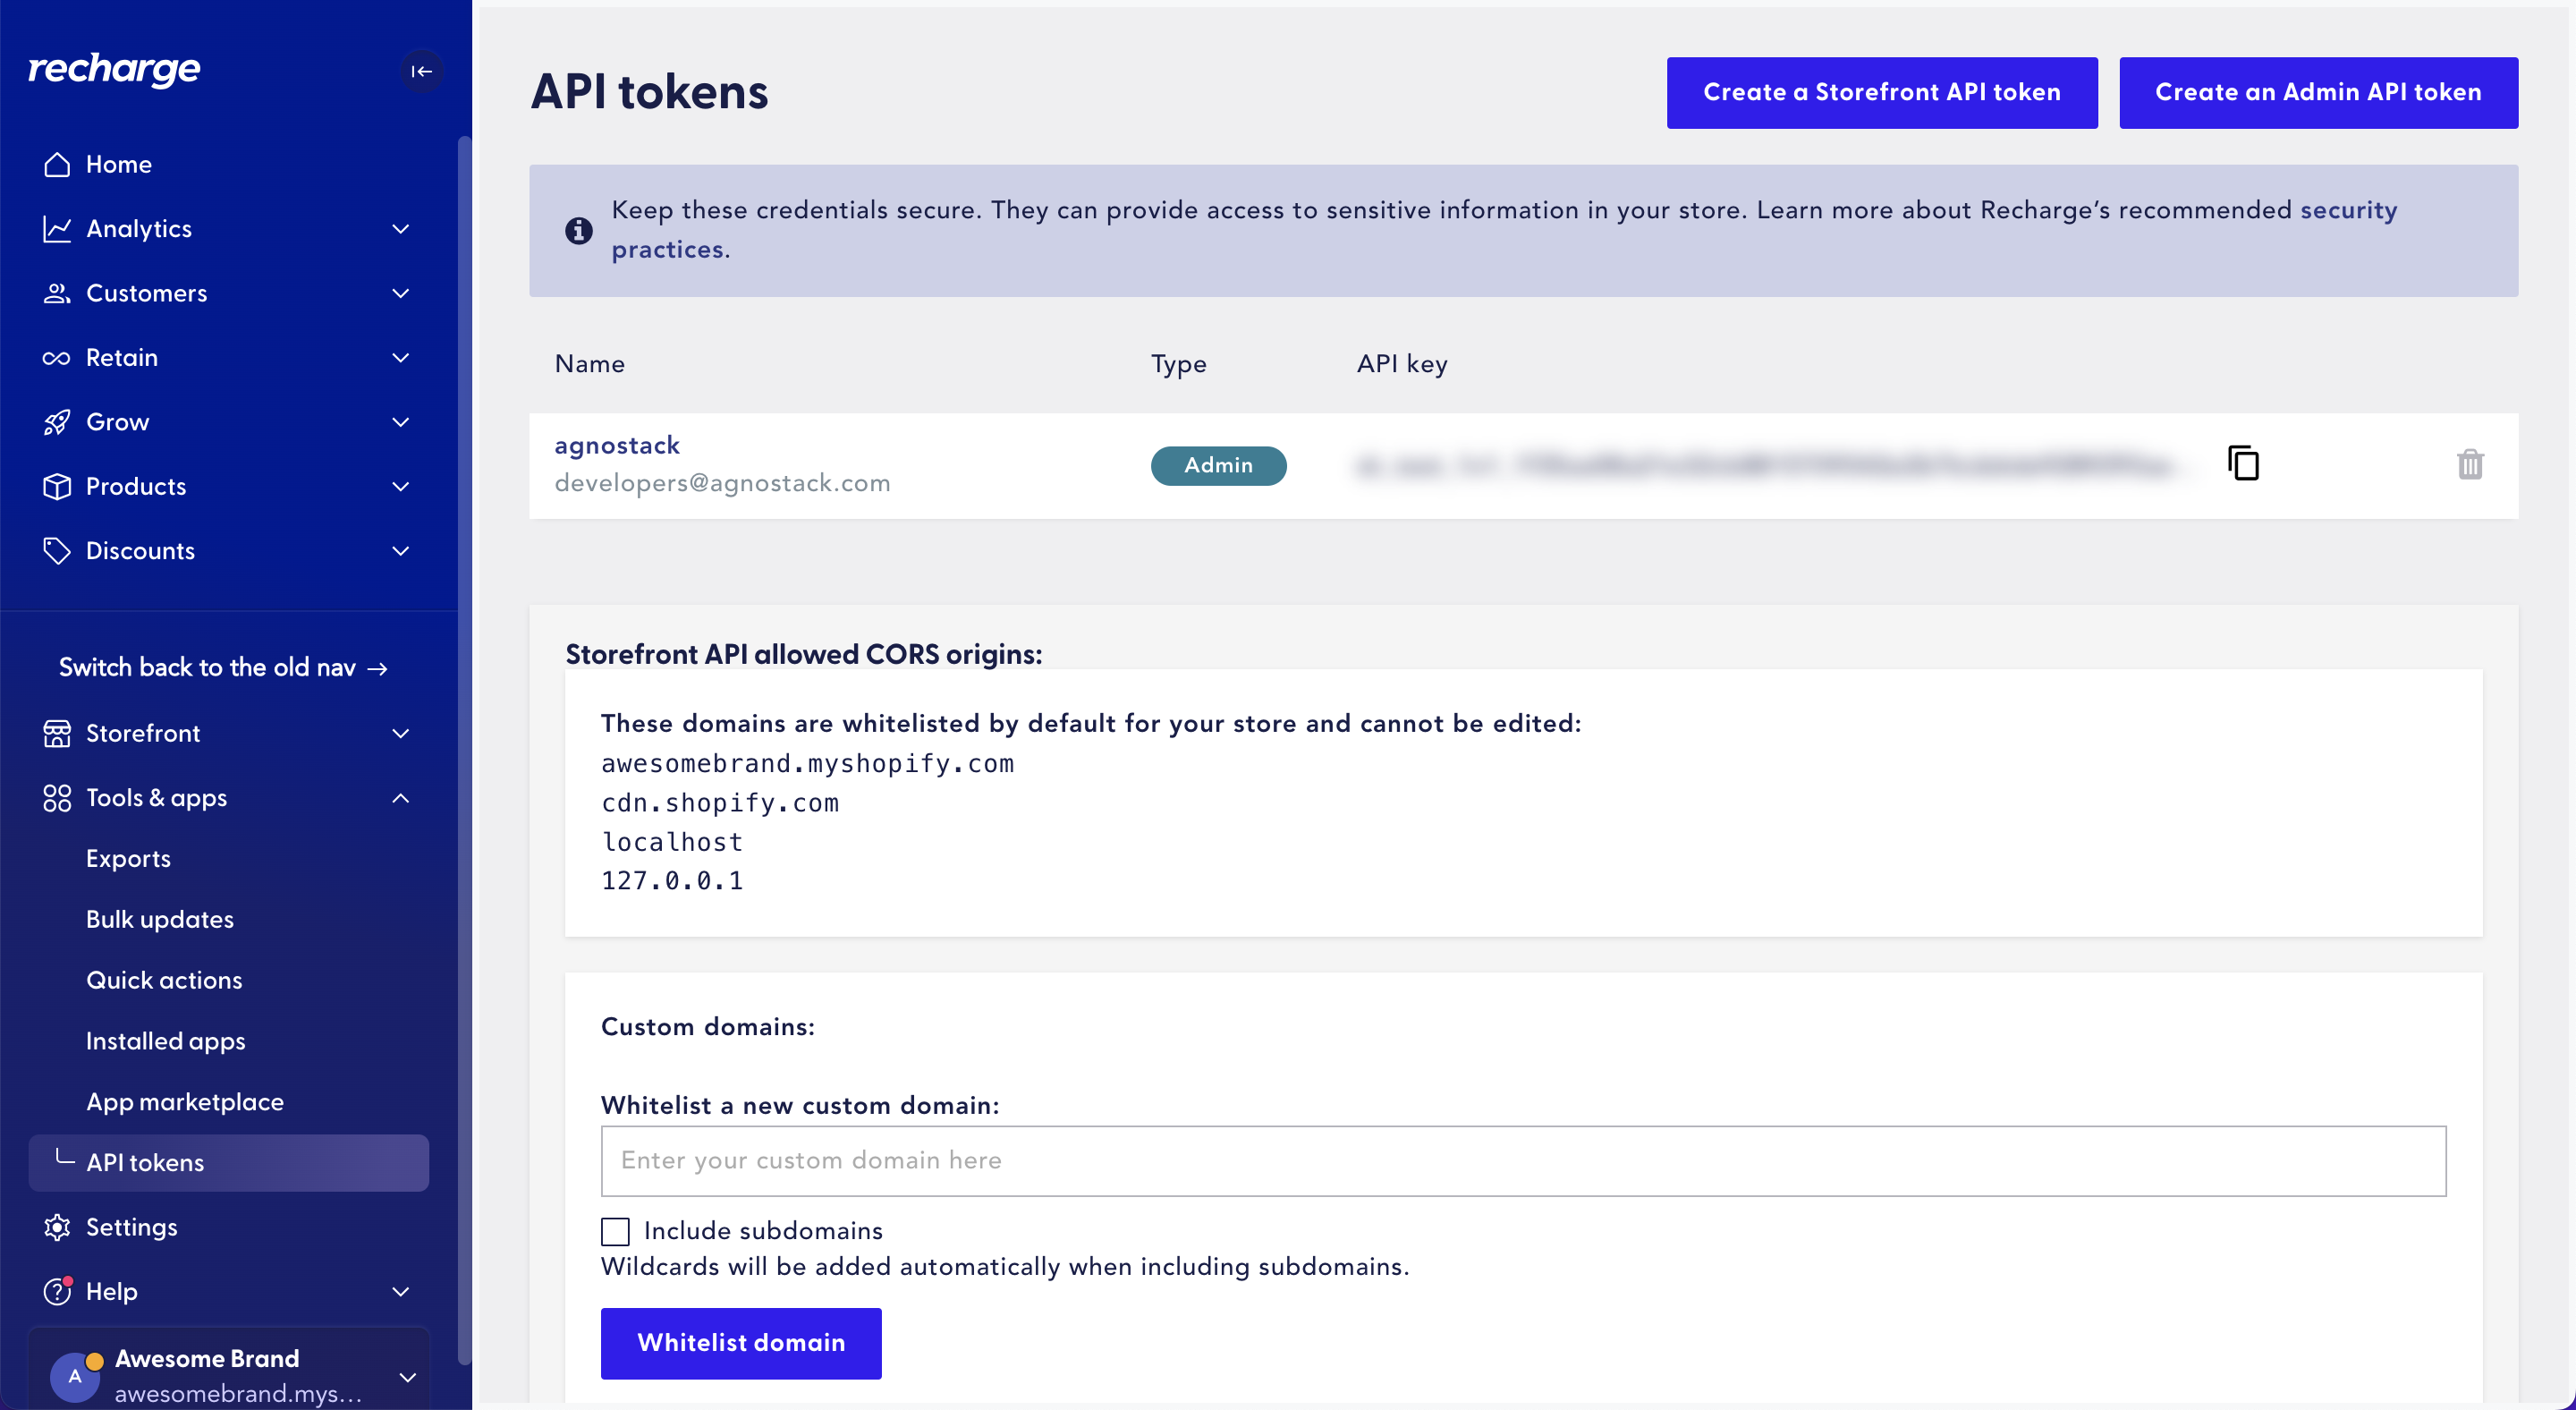
Visit your Recharge admin portal and login/select your storefront. Once logged in, click on "Apps > API Tokens" from the left-hand navigation menu.
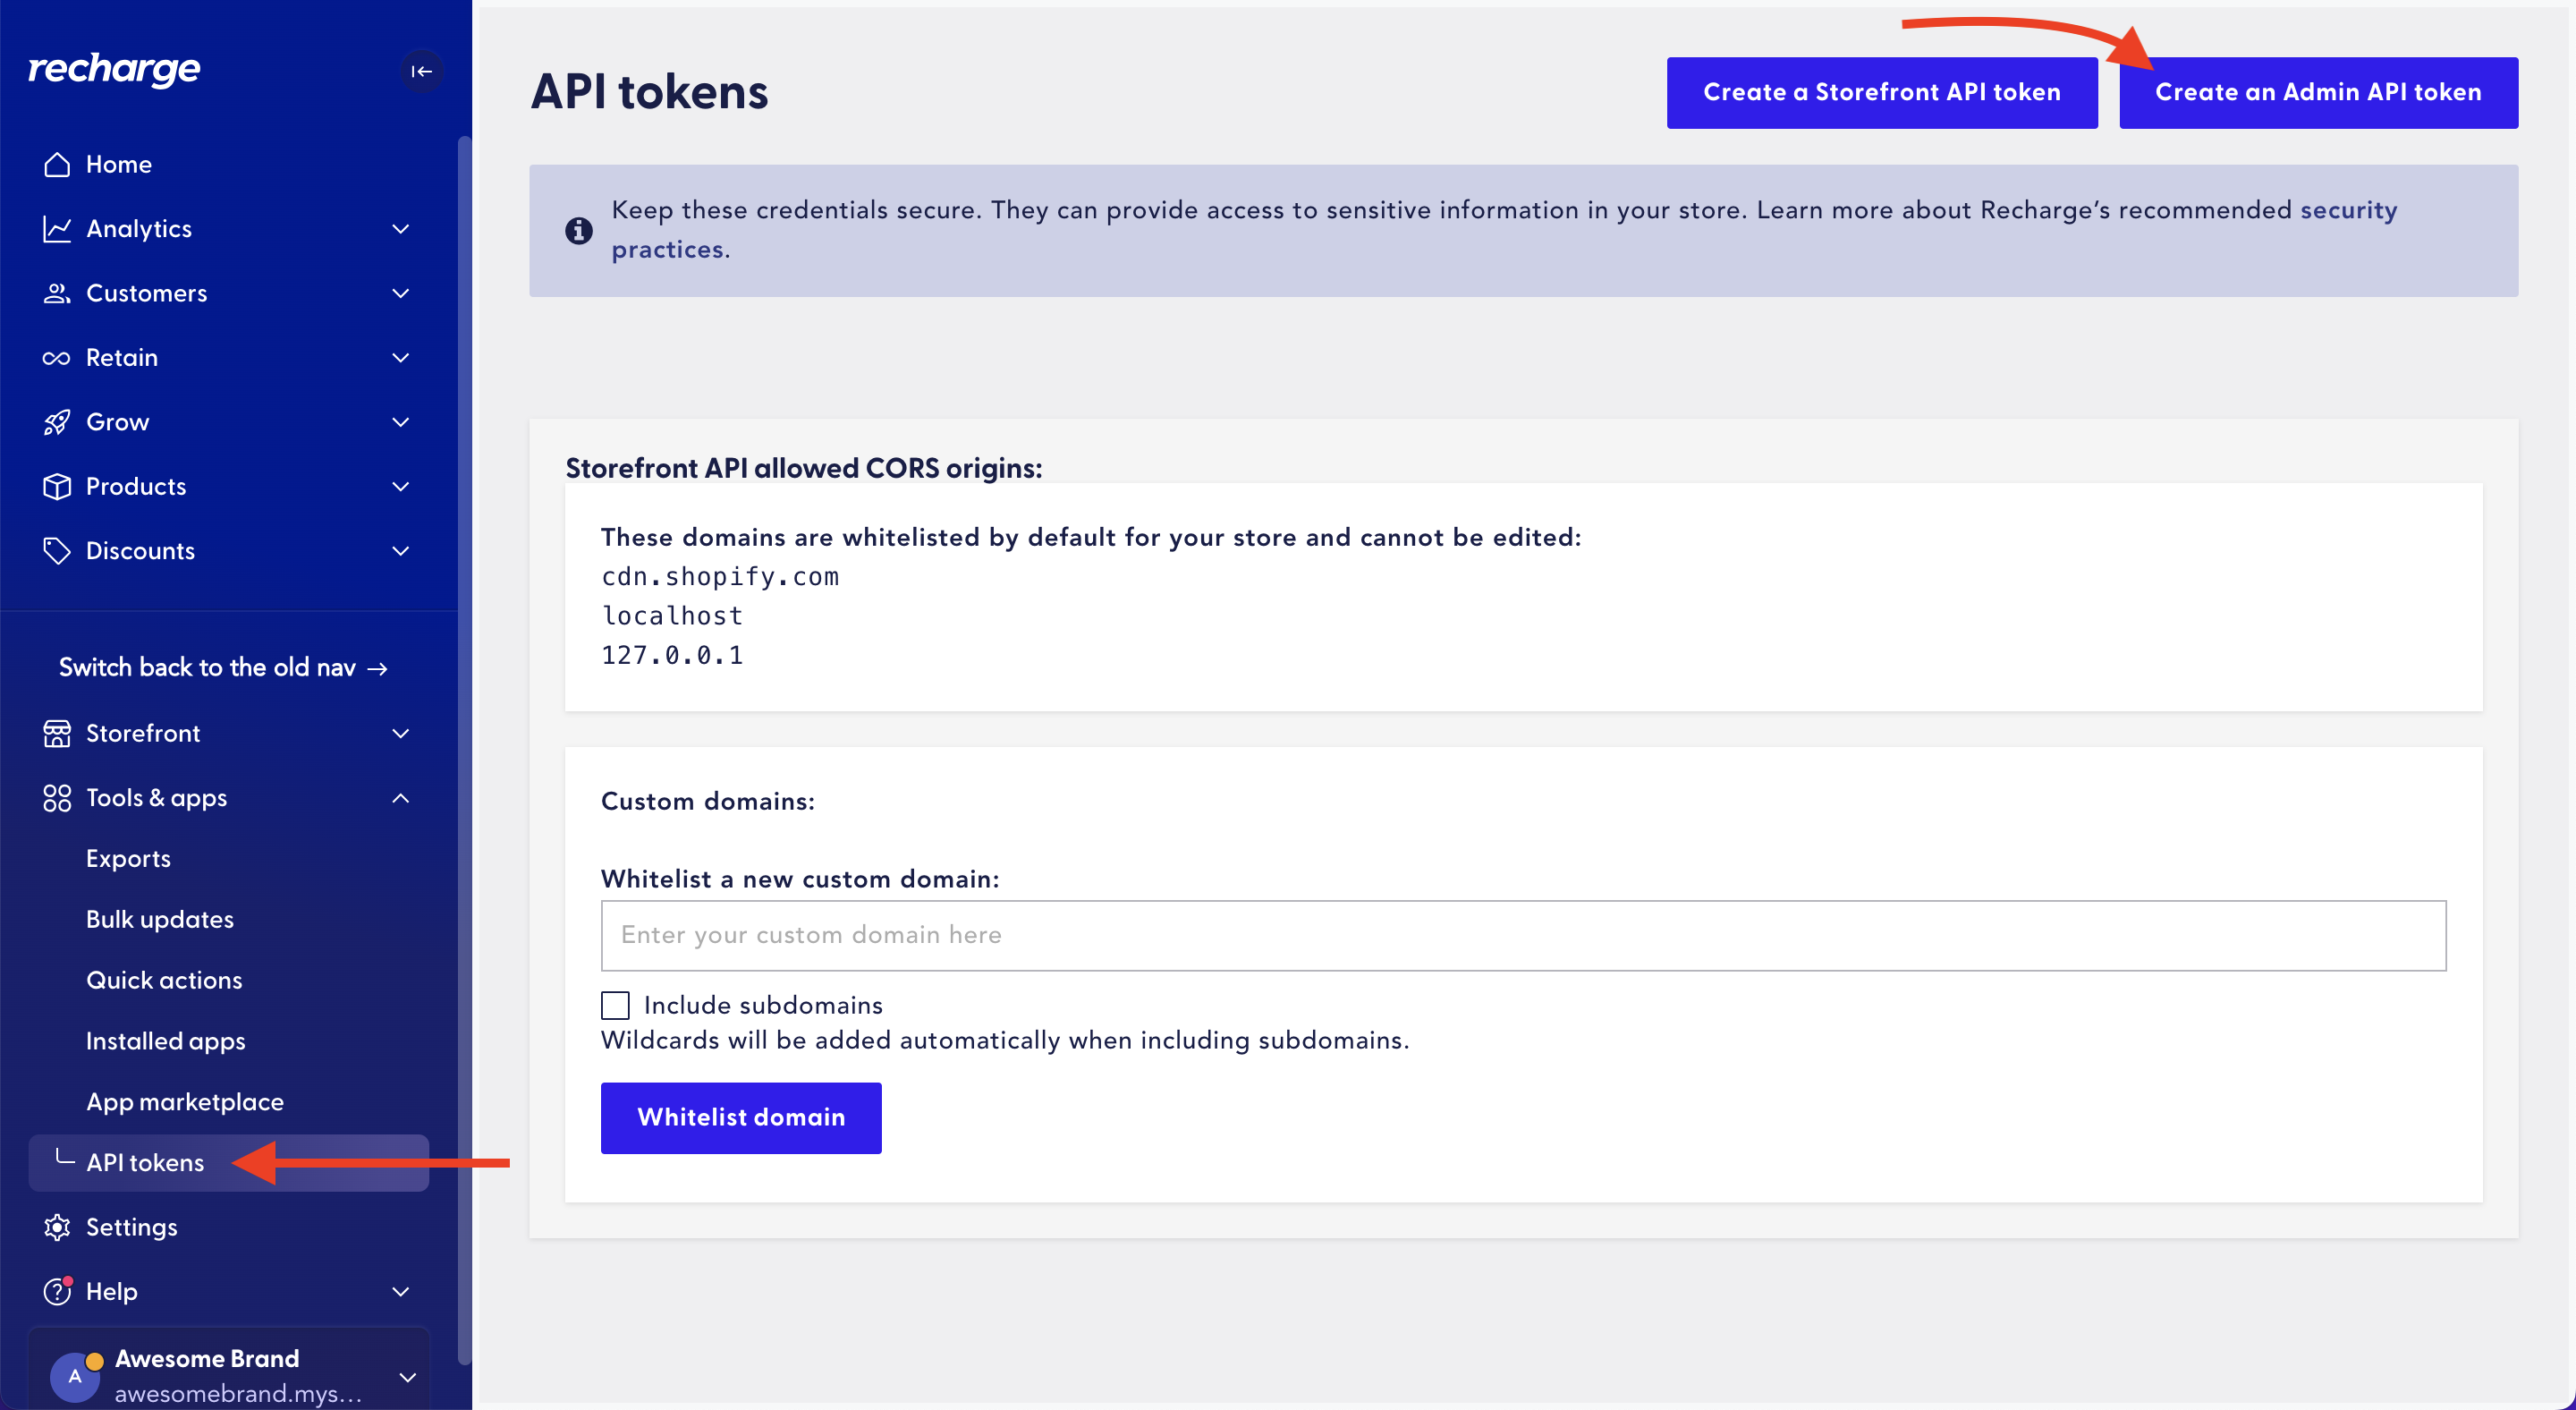
Create an API Token and obtain your API key
Once on the "Create an API token" page, give your "Token nickname" a meaningful name (this name can be anything you wish). Also enter an email address associated with your Recharge account.
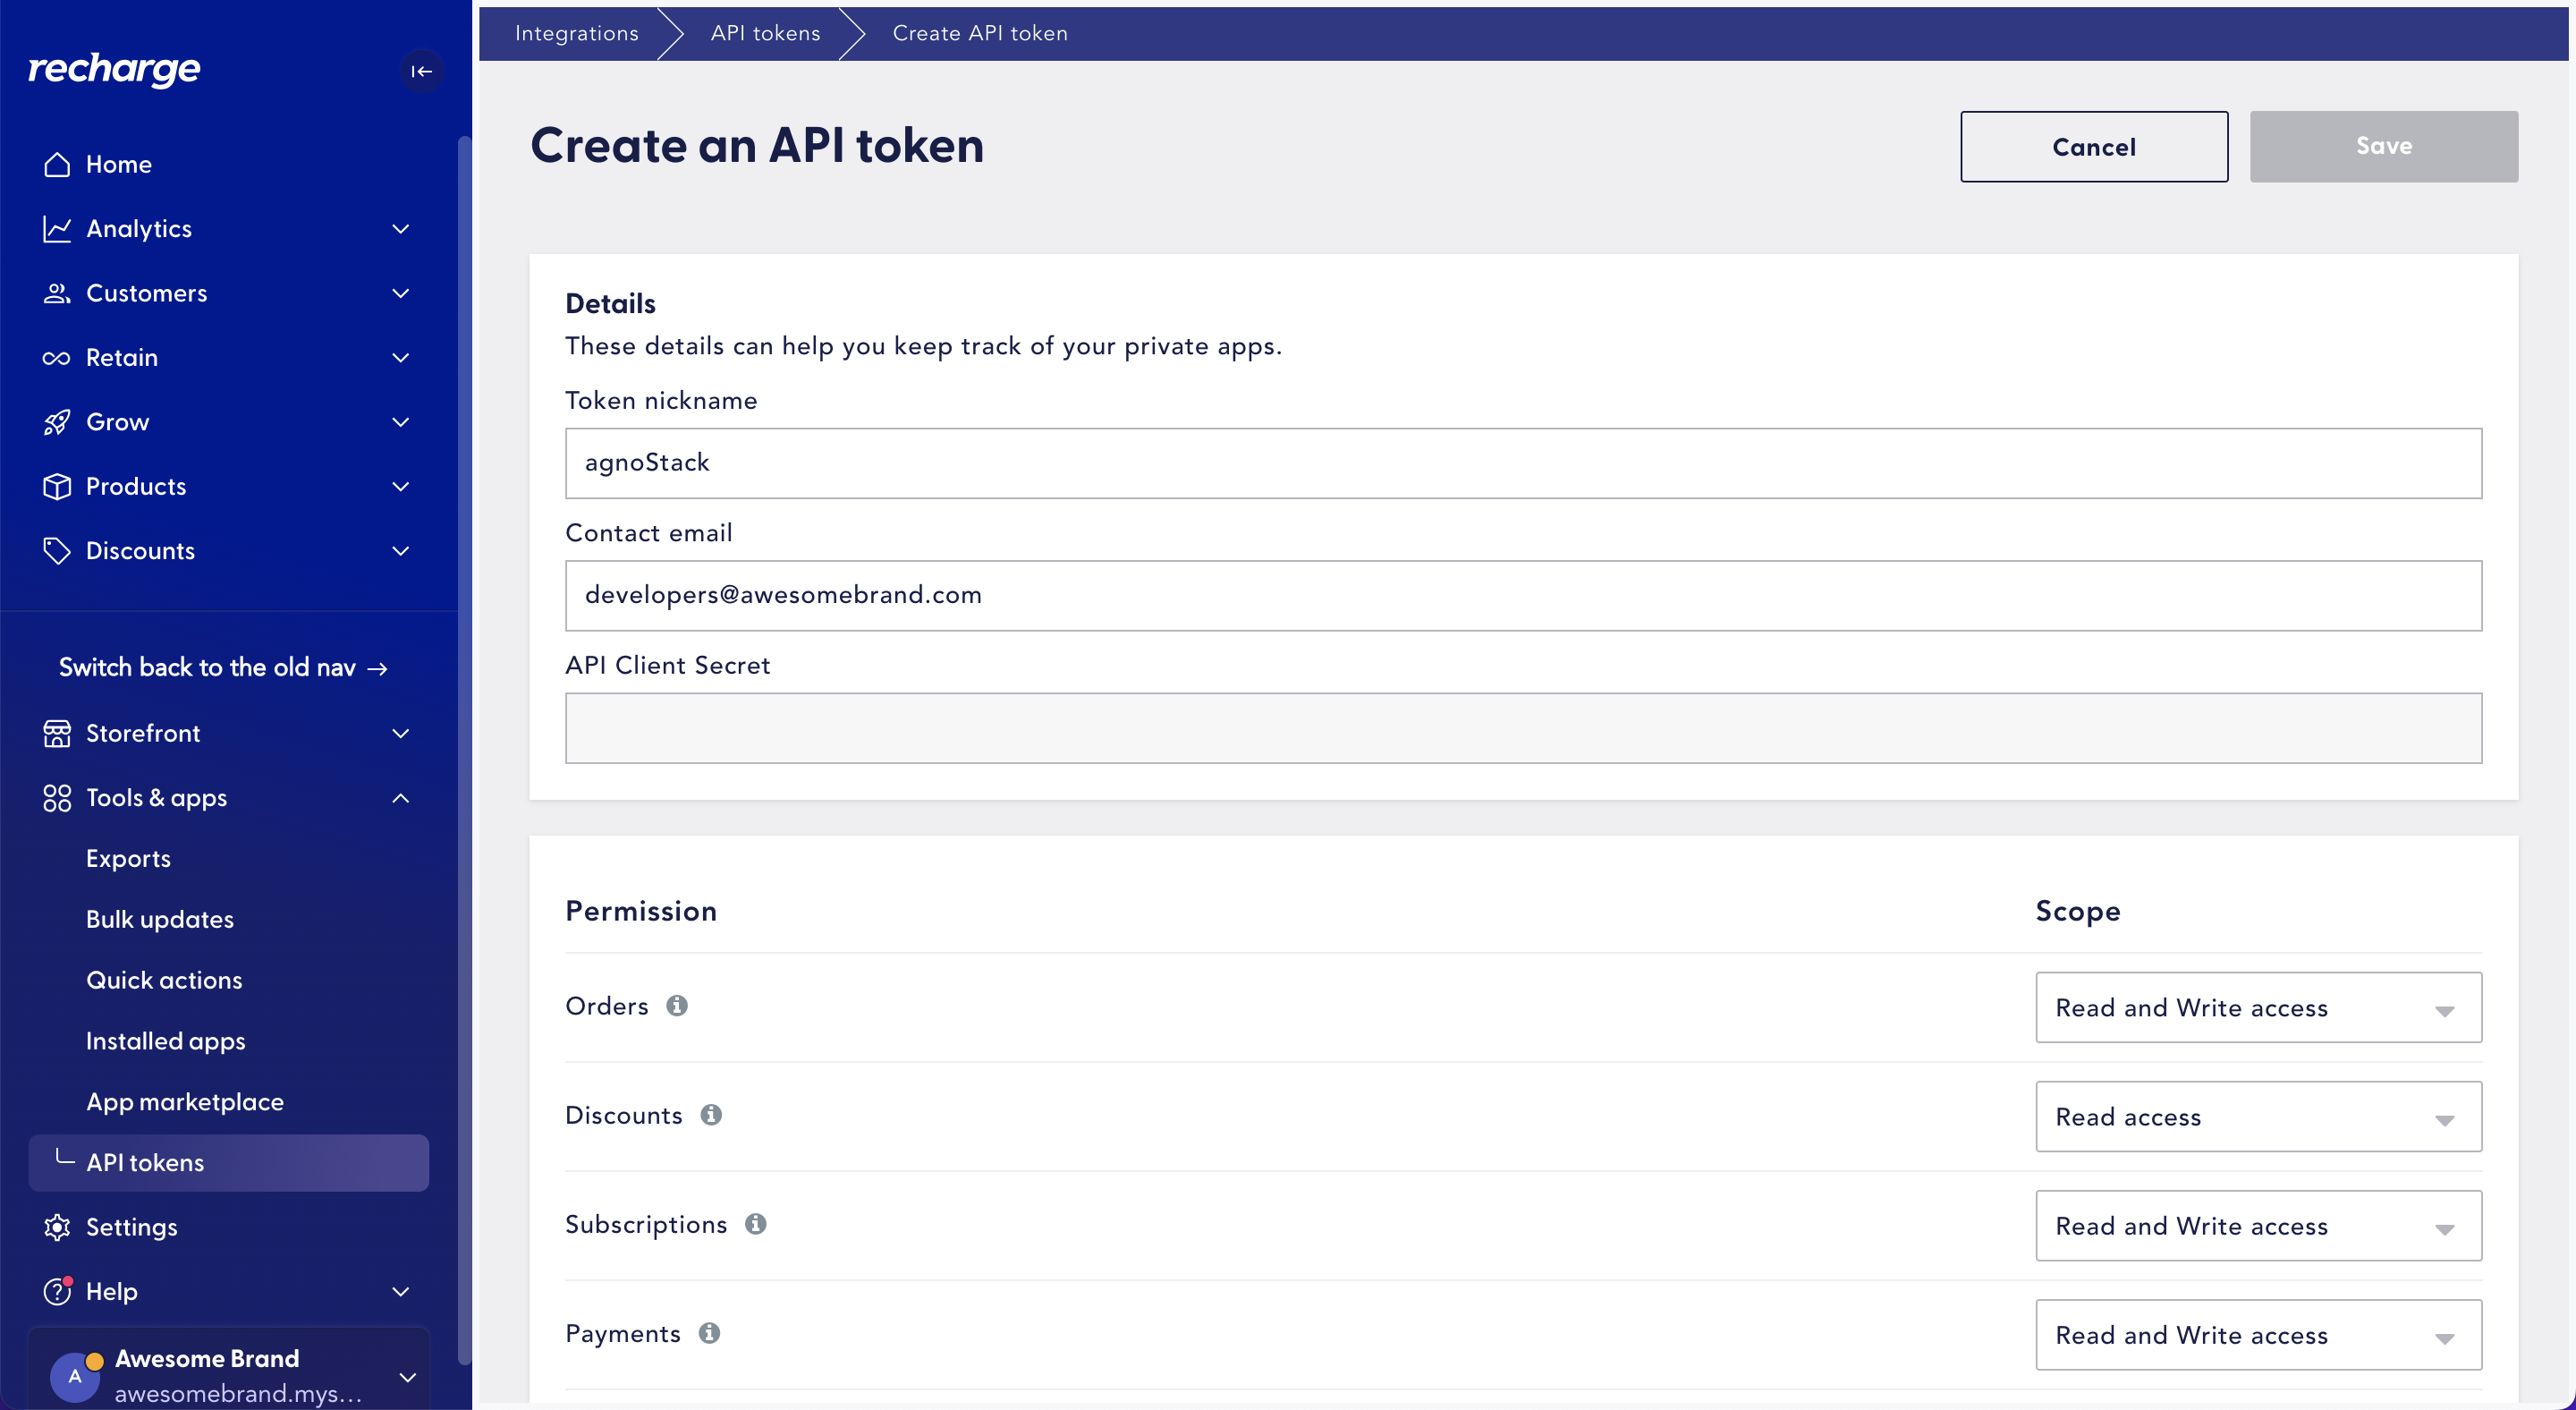
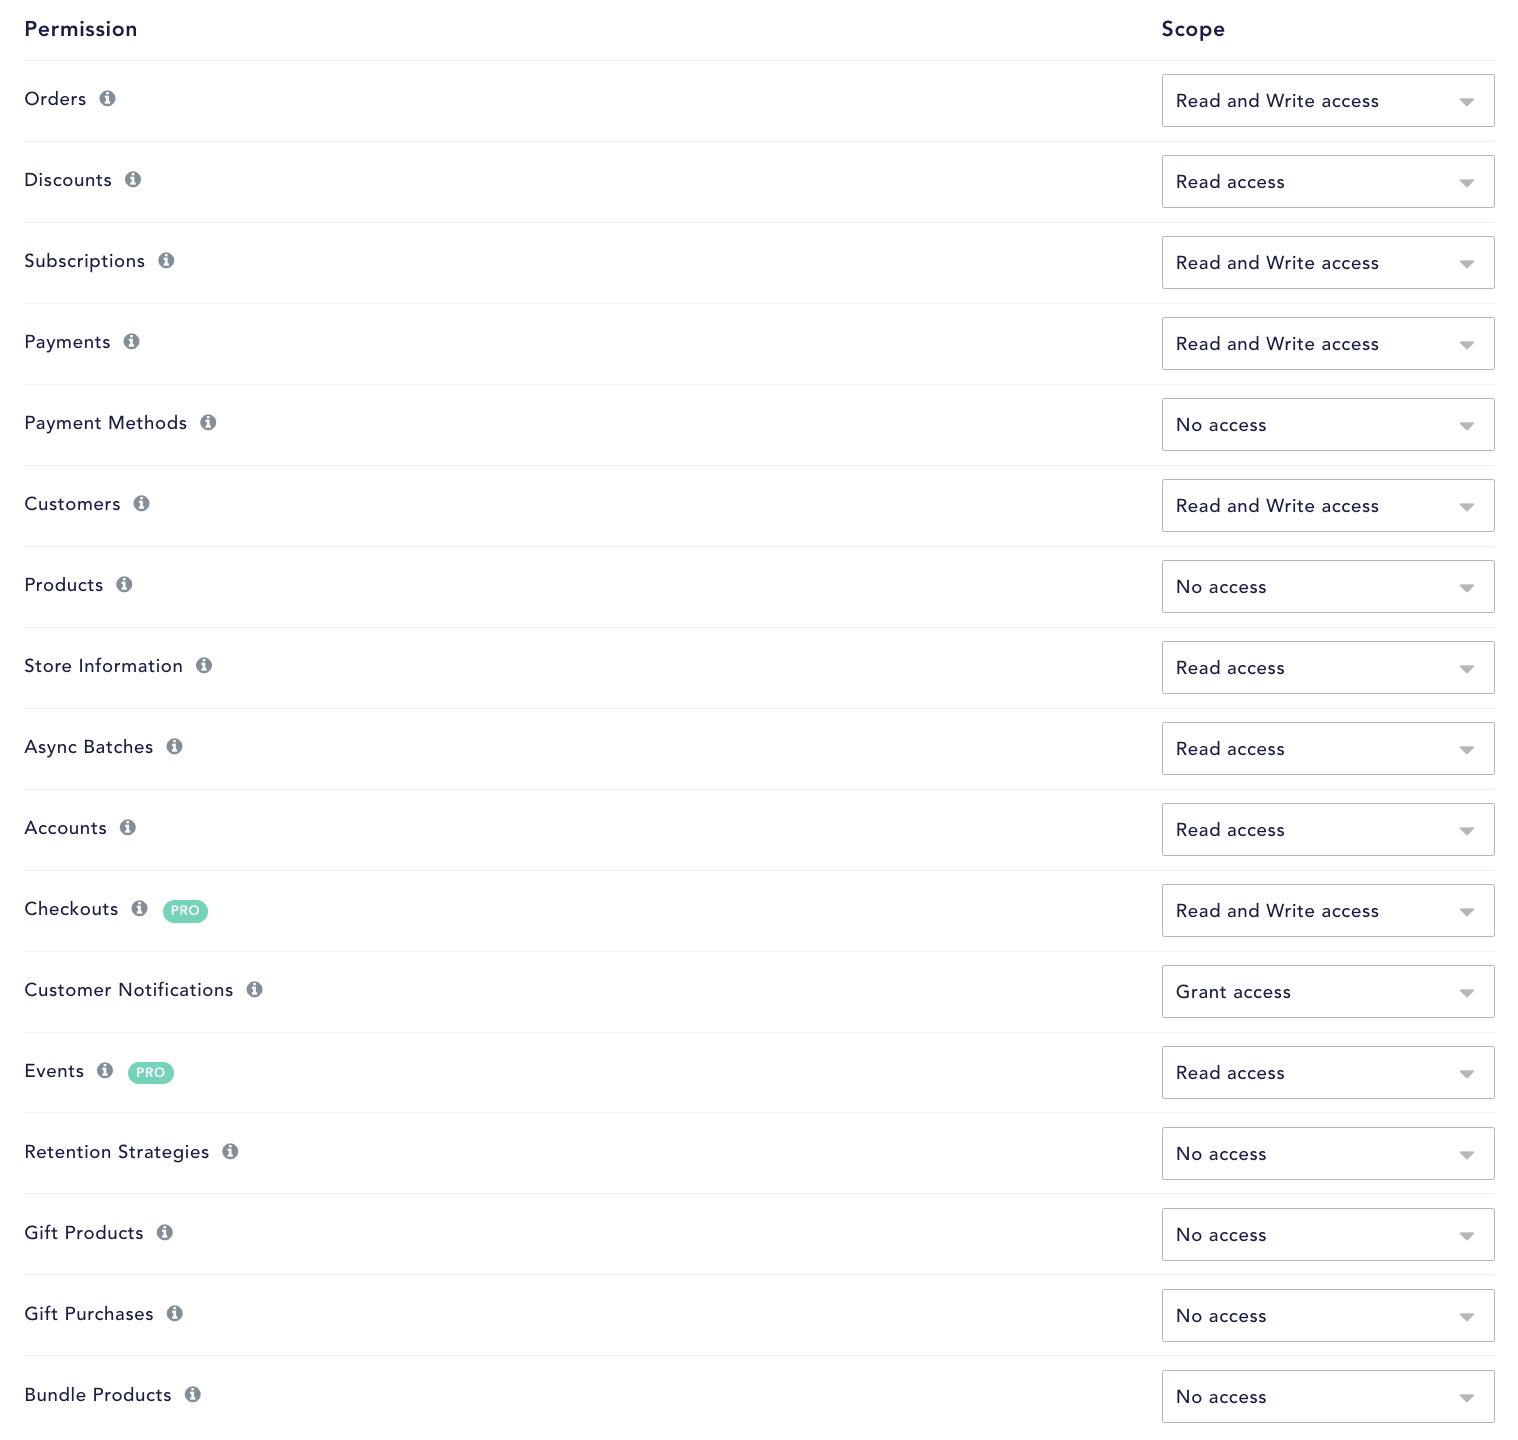
Select the appropriate permission scopes according to the following:
- Orders: Read and Write access
- Discounts: Read and Write access
- Subscriptions: Read and Write access
- Payments: Read and Write access
- Payment Methods: Read access
- Customers: Read and Write access
- Products: Read access
- Store Information: Read access
- Async Batches: Read access
- Accounts: Read access
- Customer Notifications: Grant access
Once your API token is created, copy the "API key" which is listed on the API Tokens page, as you will need this to configure Recharge within agnoStack.
agnoStack Activation
You can navigate inside of Zendesk back into the agnoStack configuration screen (via the "Manage Your Account" link or using the icon in the left sidebar) and enter the API key obtained above.
Be sure to continue through the remainder of the configuration screens and click "Activate" to save your new Add-On configuration data.
If you run into any trouble or need additional assistance, please contact us any time at support@agnostack.com.
