Frequentlyasked questions.
Dynamics Business Central / Zendesk Configuration
Microsoft Dynamics Business Central can be integrated with Zendesk as a free Add-On Provider through the agnoStack plugin.
Microsoft Dynamics 365 Business Central is an ERP/CRM solution for businesses that provides cloud-based business management software to integrate business data into one system, giving every department a unified view of the overall business. By automating processes and operations, Dynamics 365 Business Central gives a solid foundation that can meet evolving business needs, both today and in the future.
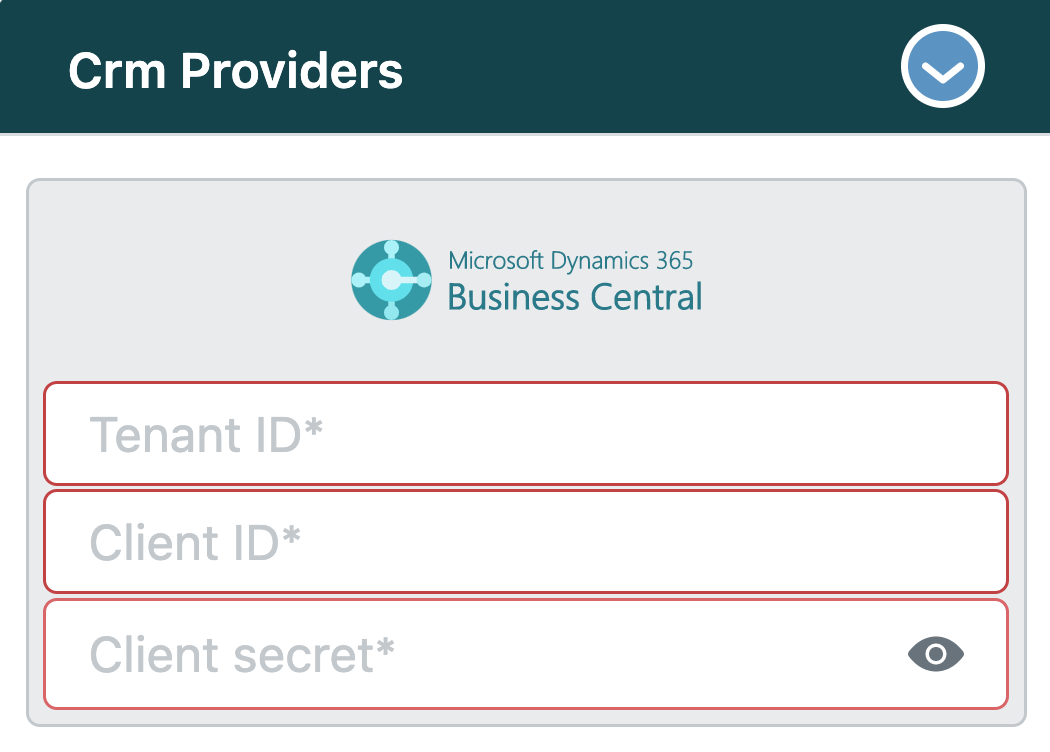
In order configure the Dynamics Businss Central add-on inside of agnoStack, please complete the following steps:
Create/Register Azure Active Directory Application
Sign into your Azure portal (https://portal.azure.com) using the same Admin credentials that are used to access Dynamics Businss Central.
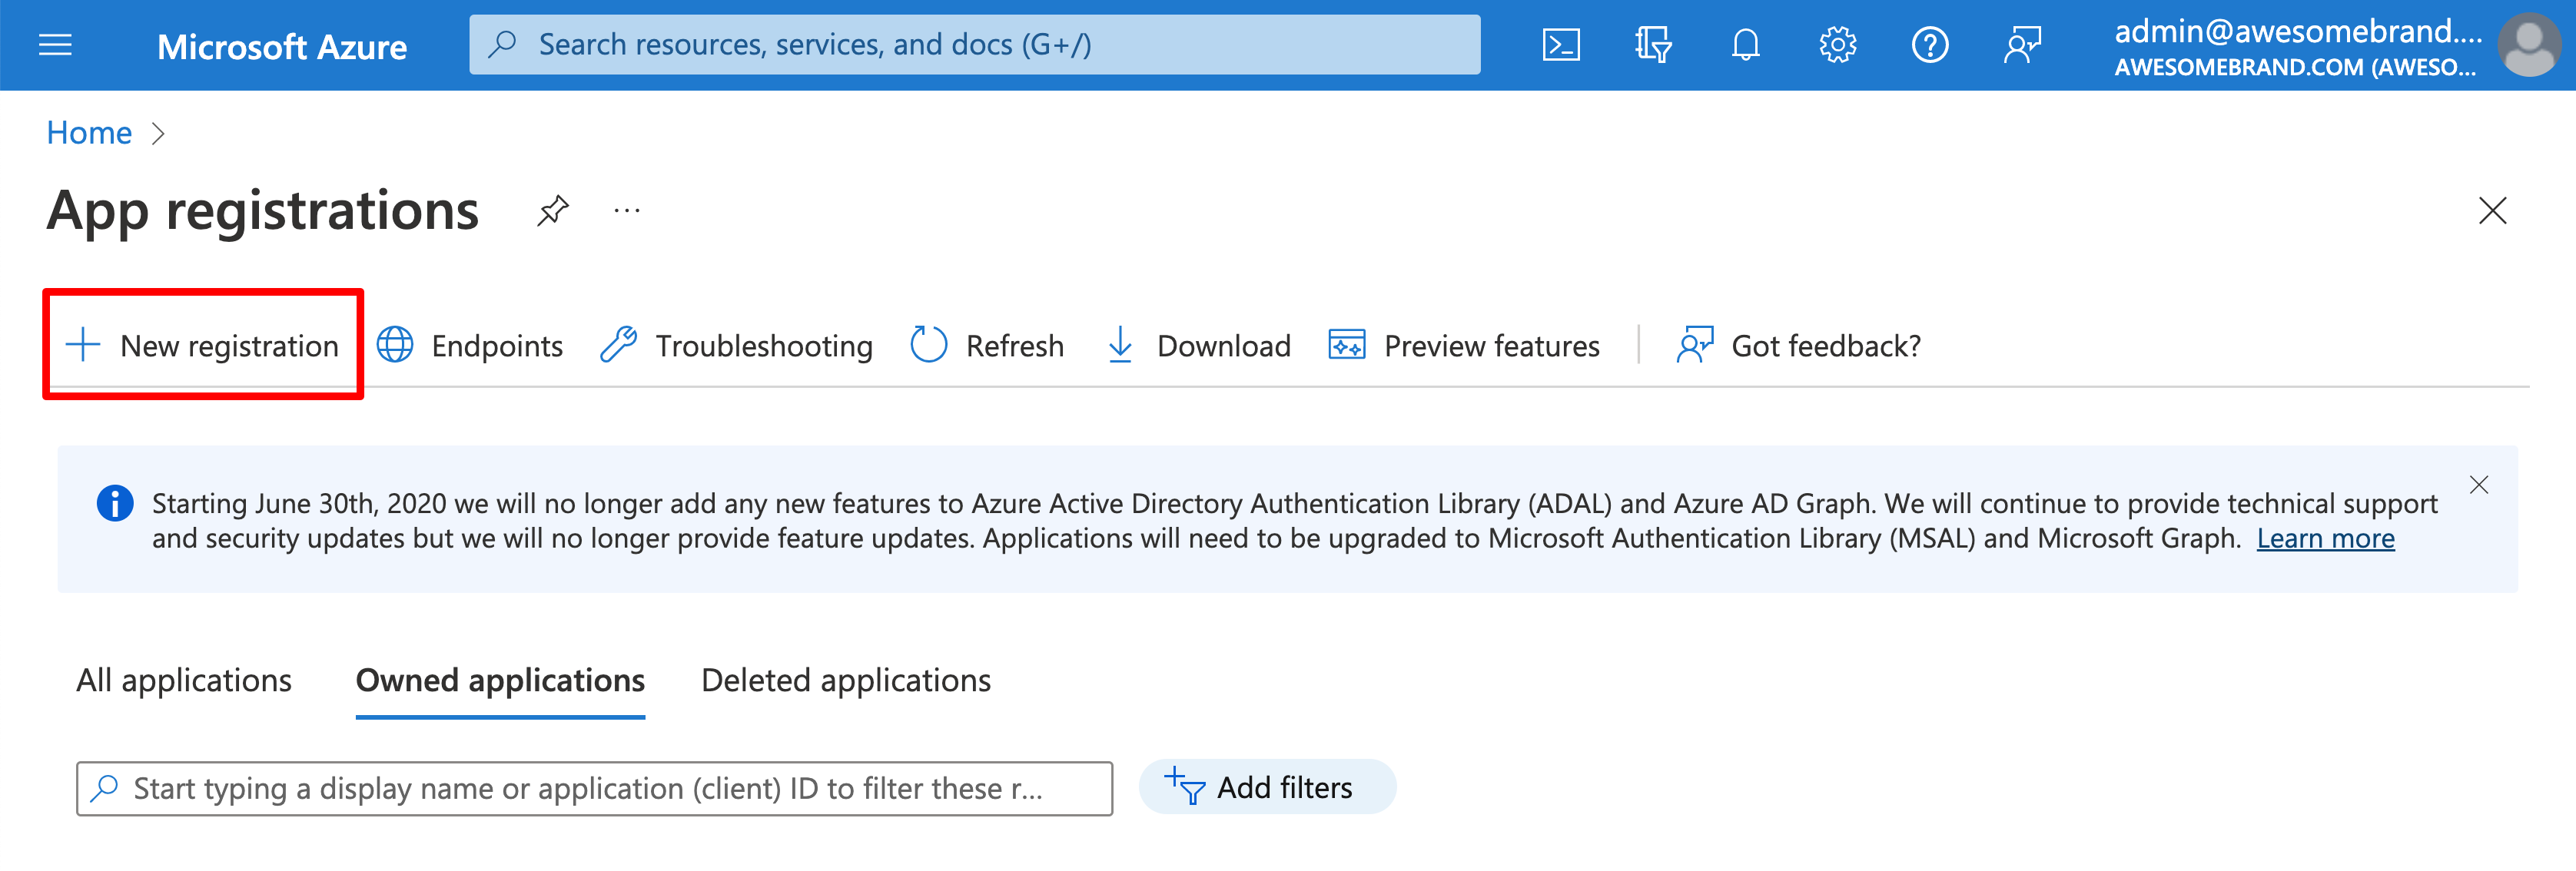
Click on "New registration" to register your new application.
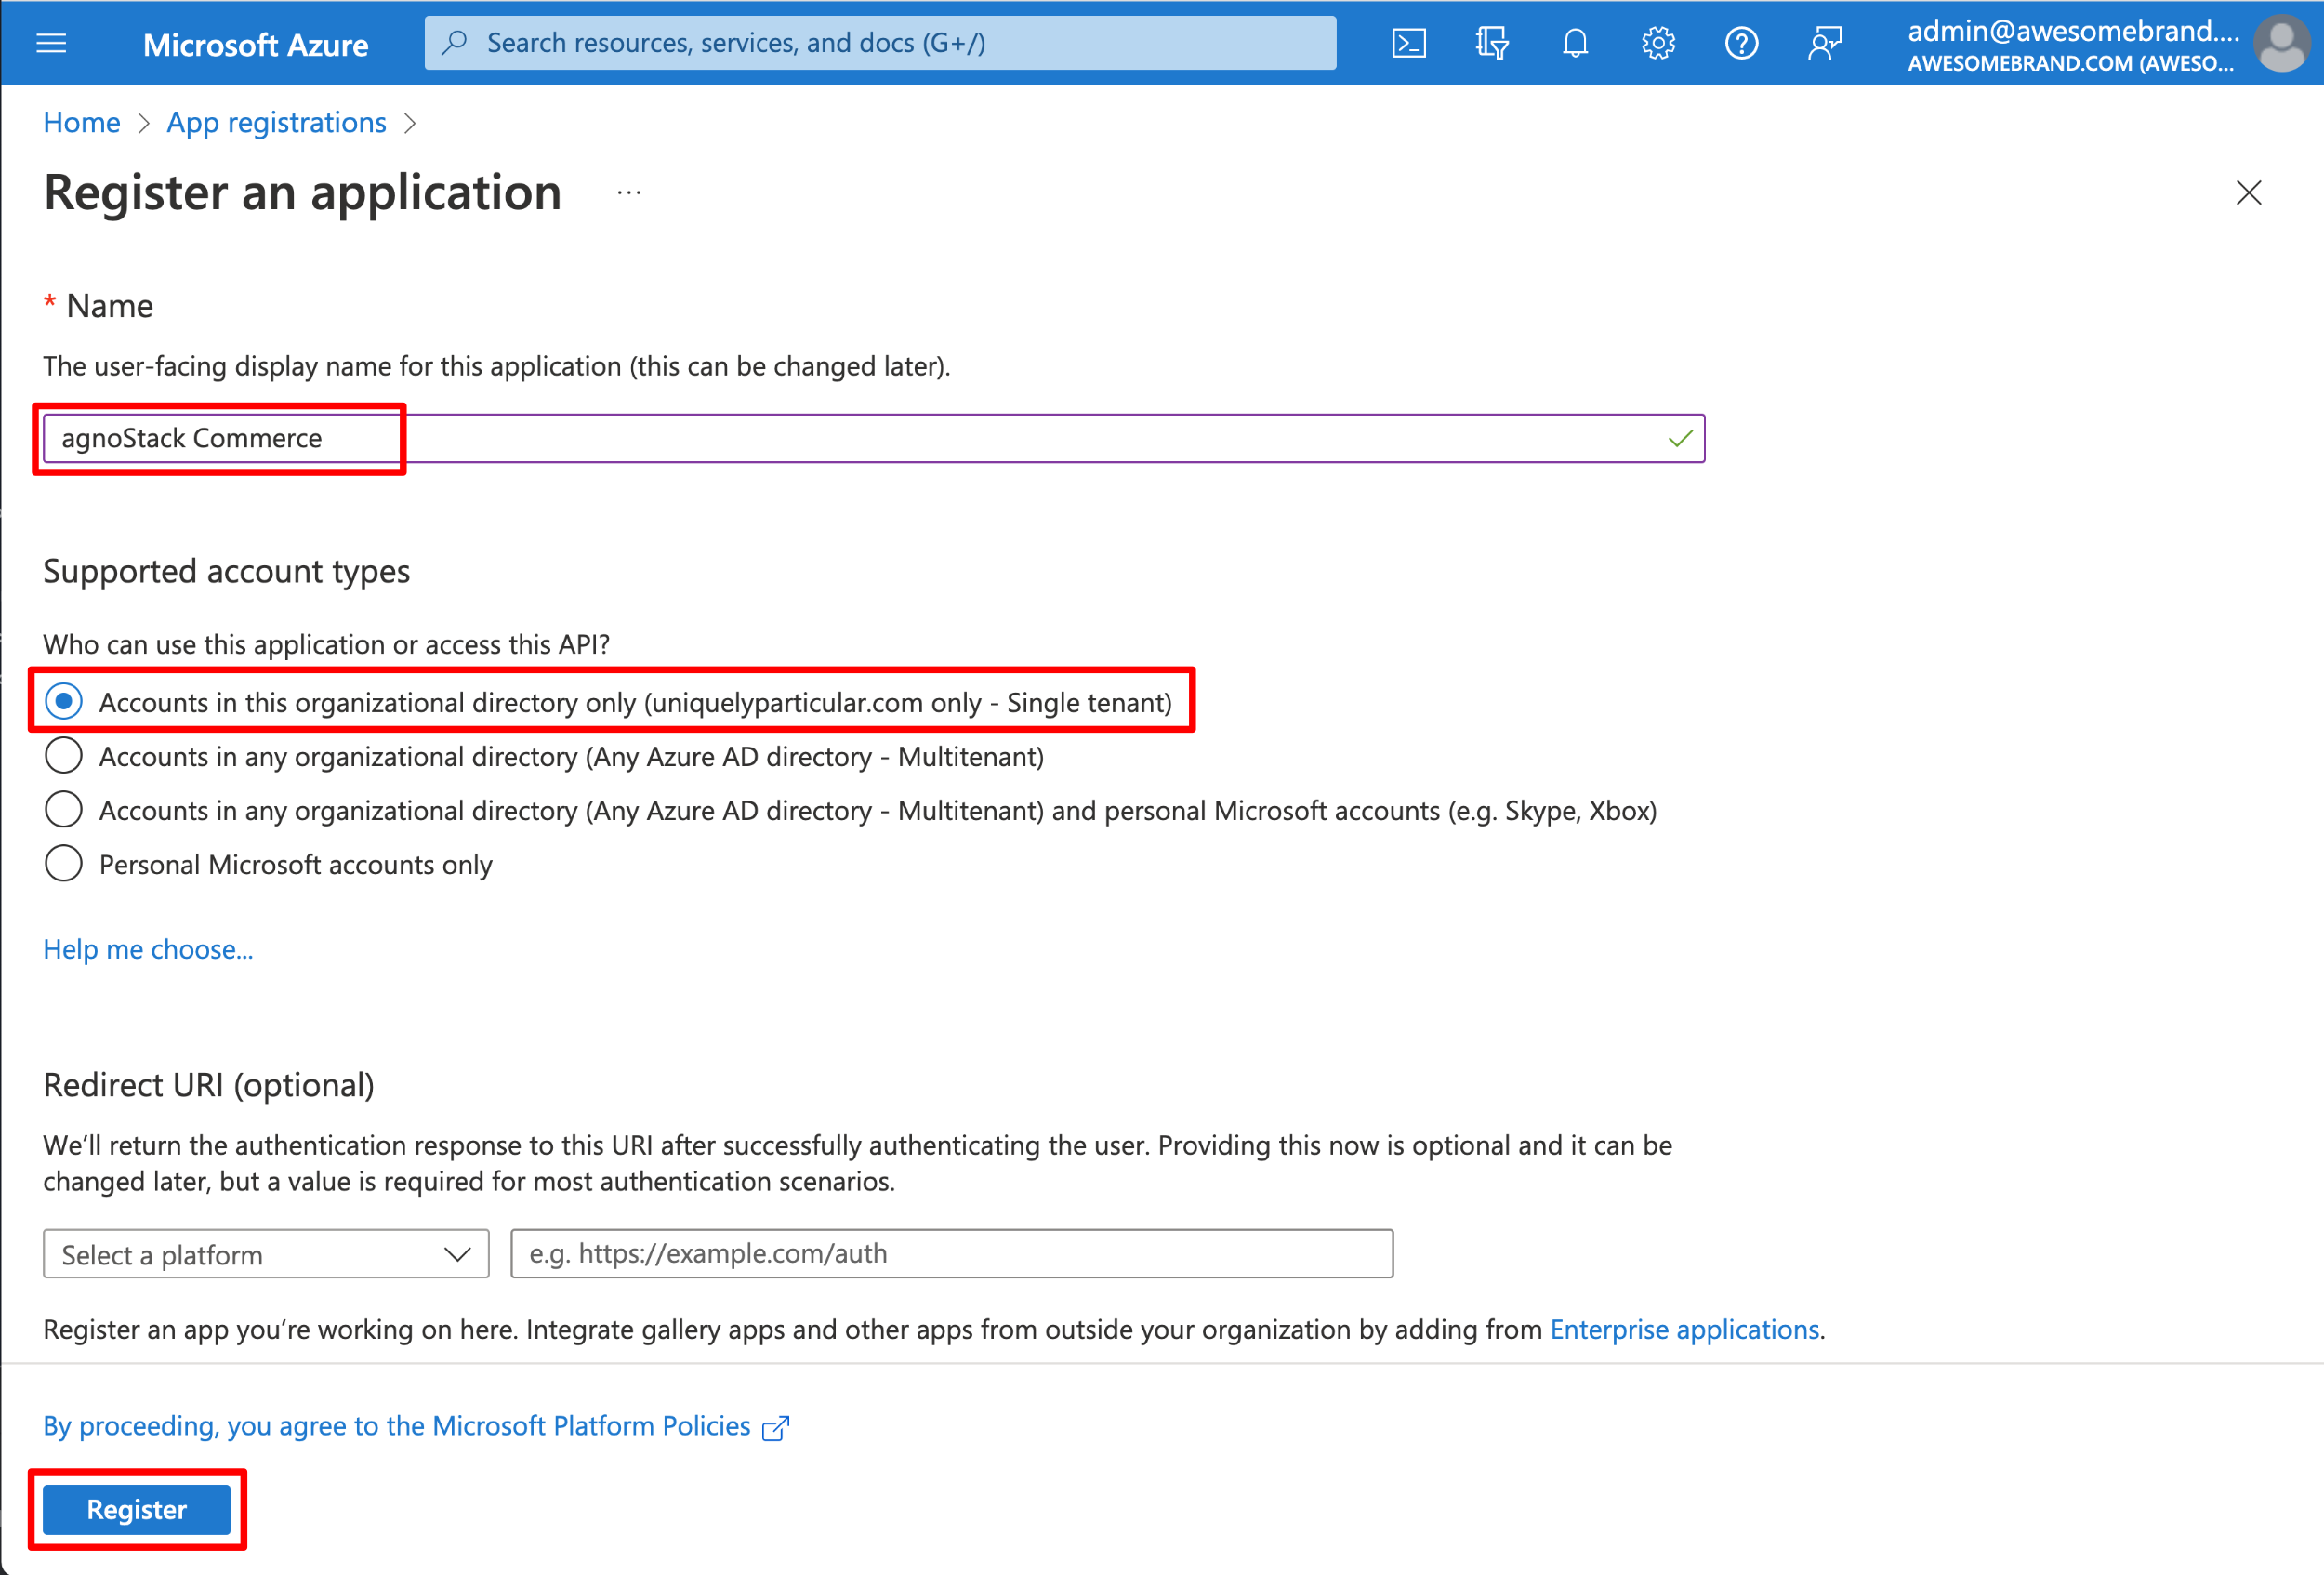
Give your application a meaningful name (this name can be anything you wish). Make sure to select the "Single tenant option". Finally, click on "Register".
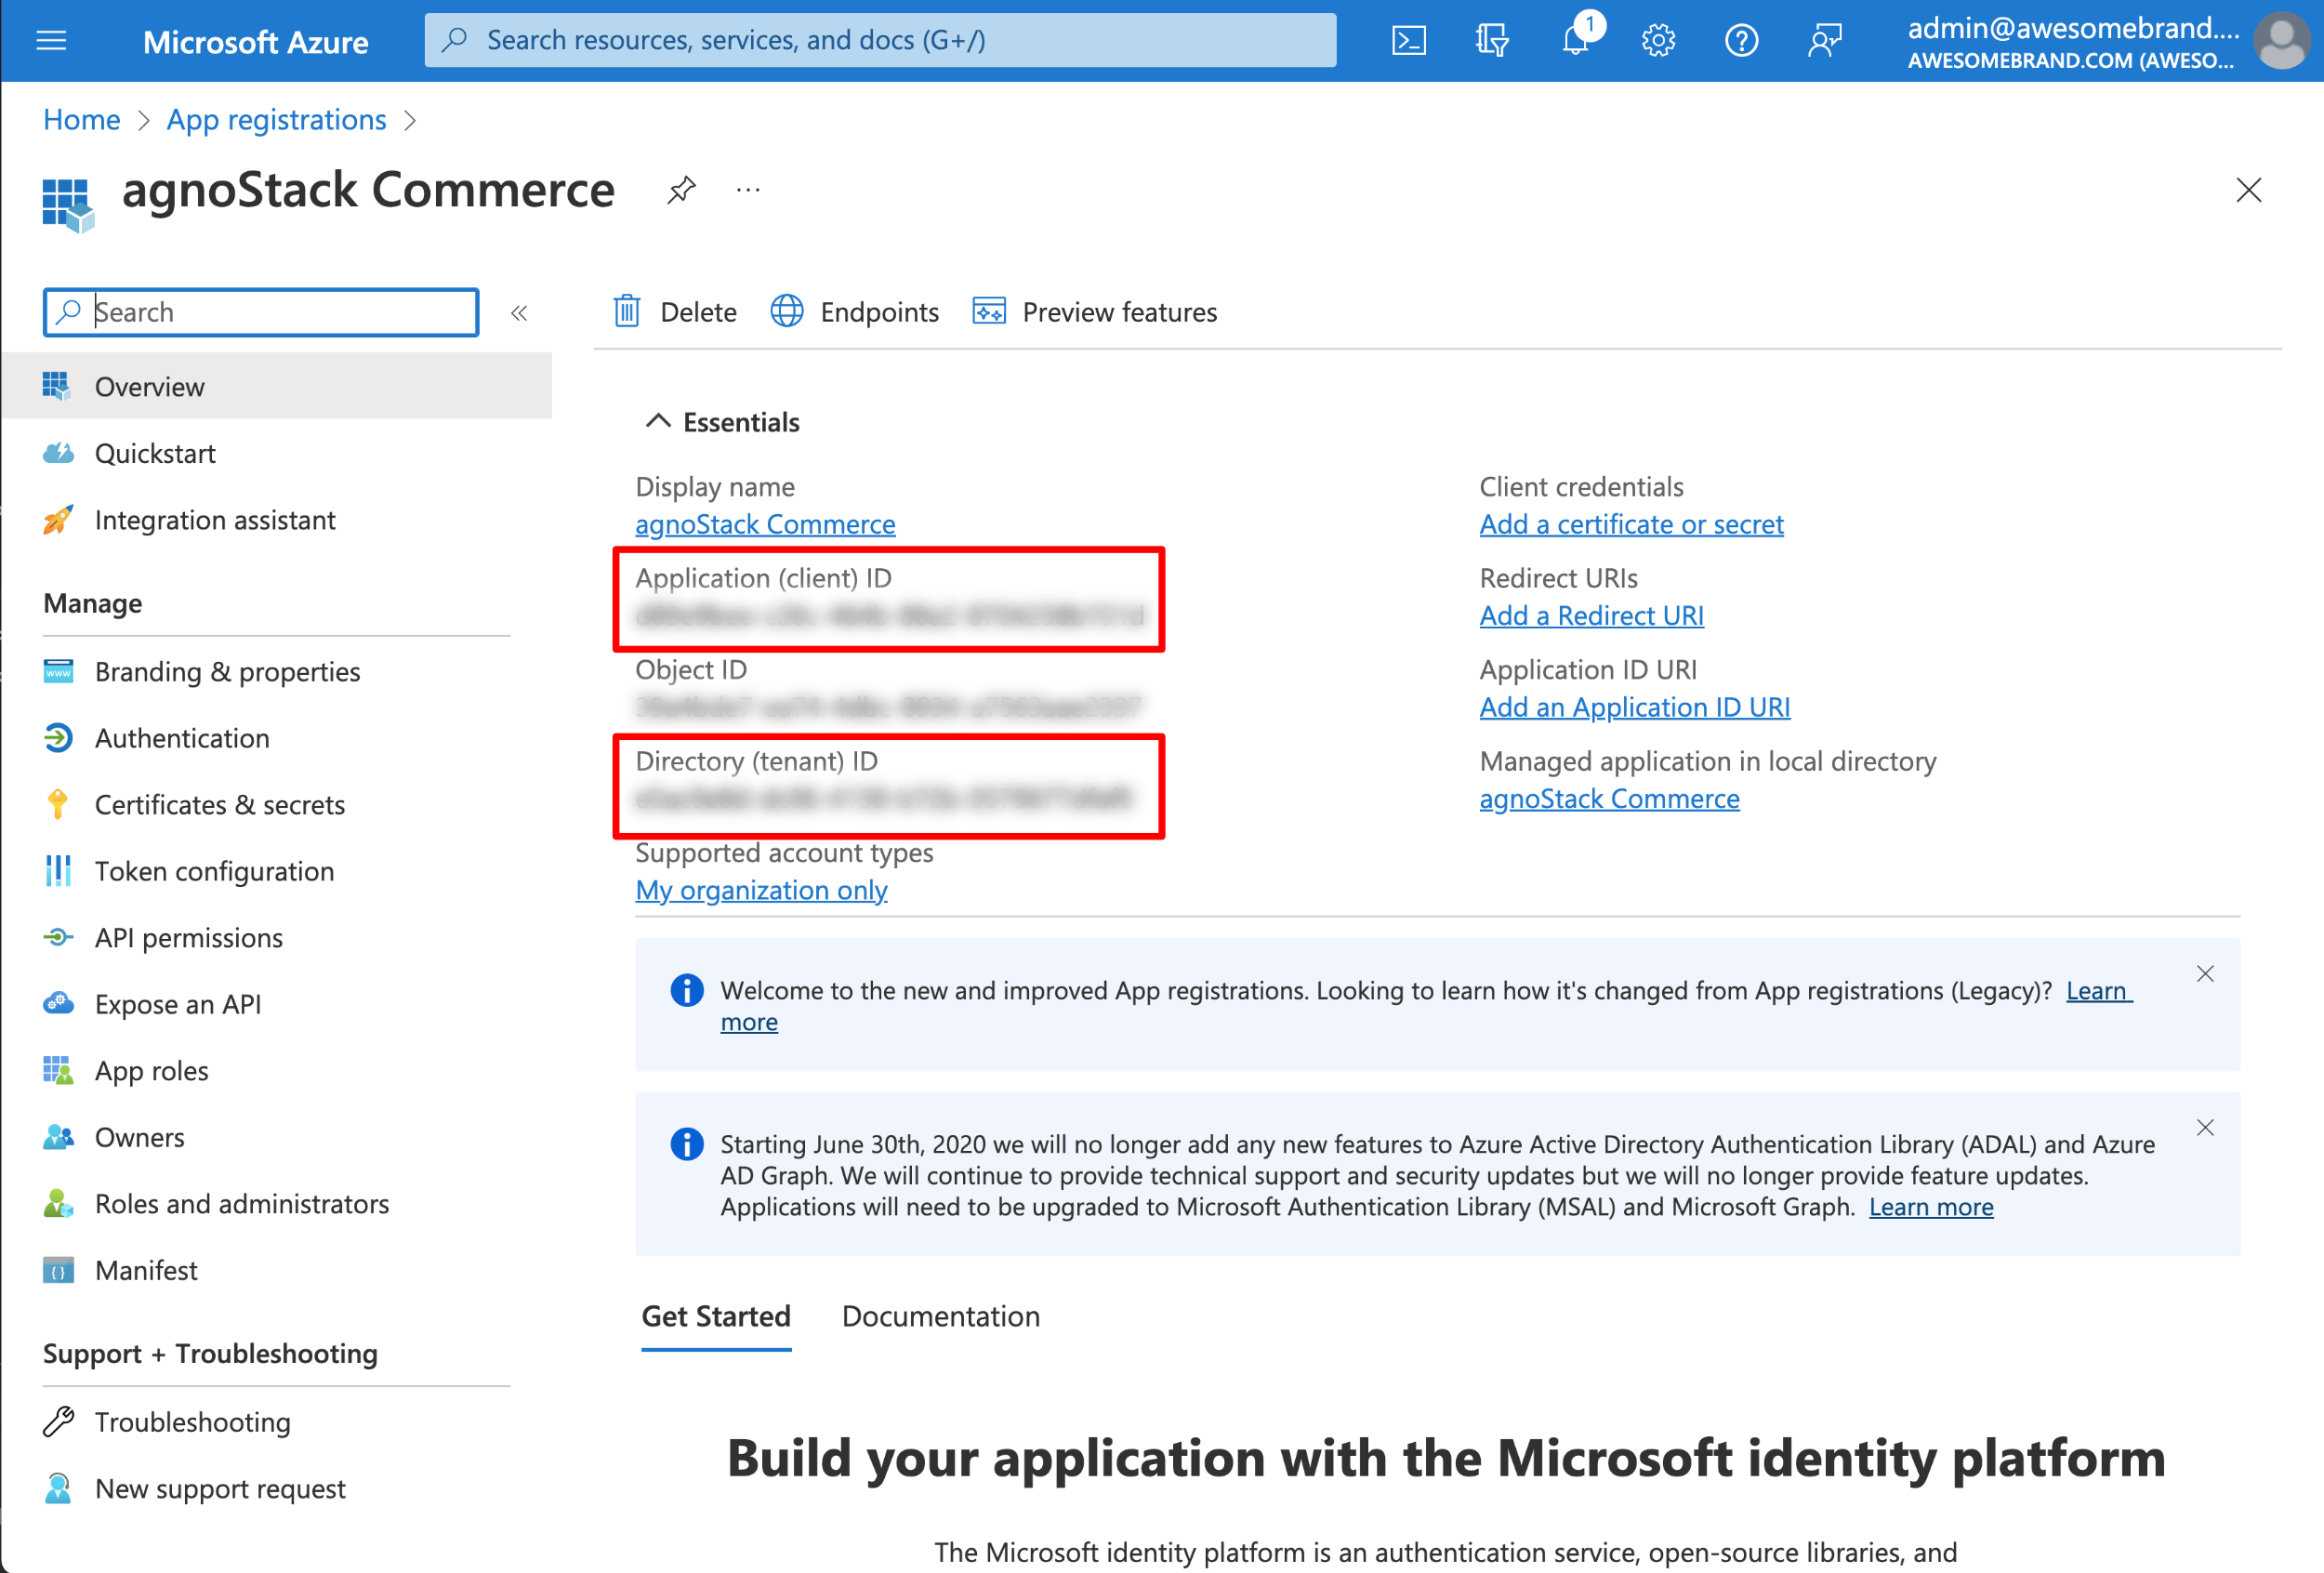
Once your application is registered, make note of the "Application (client) ID" (i.e. the Client ID) as well as the "Directory (tenant) ID" (i.e. the Tenant ID), as you will need these later to configure within agnoStack.
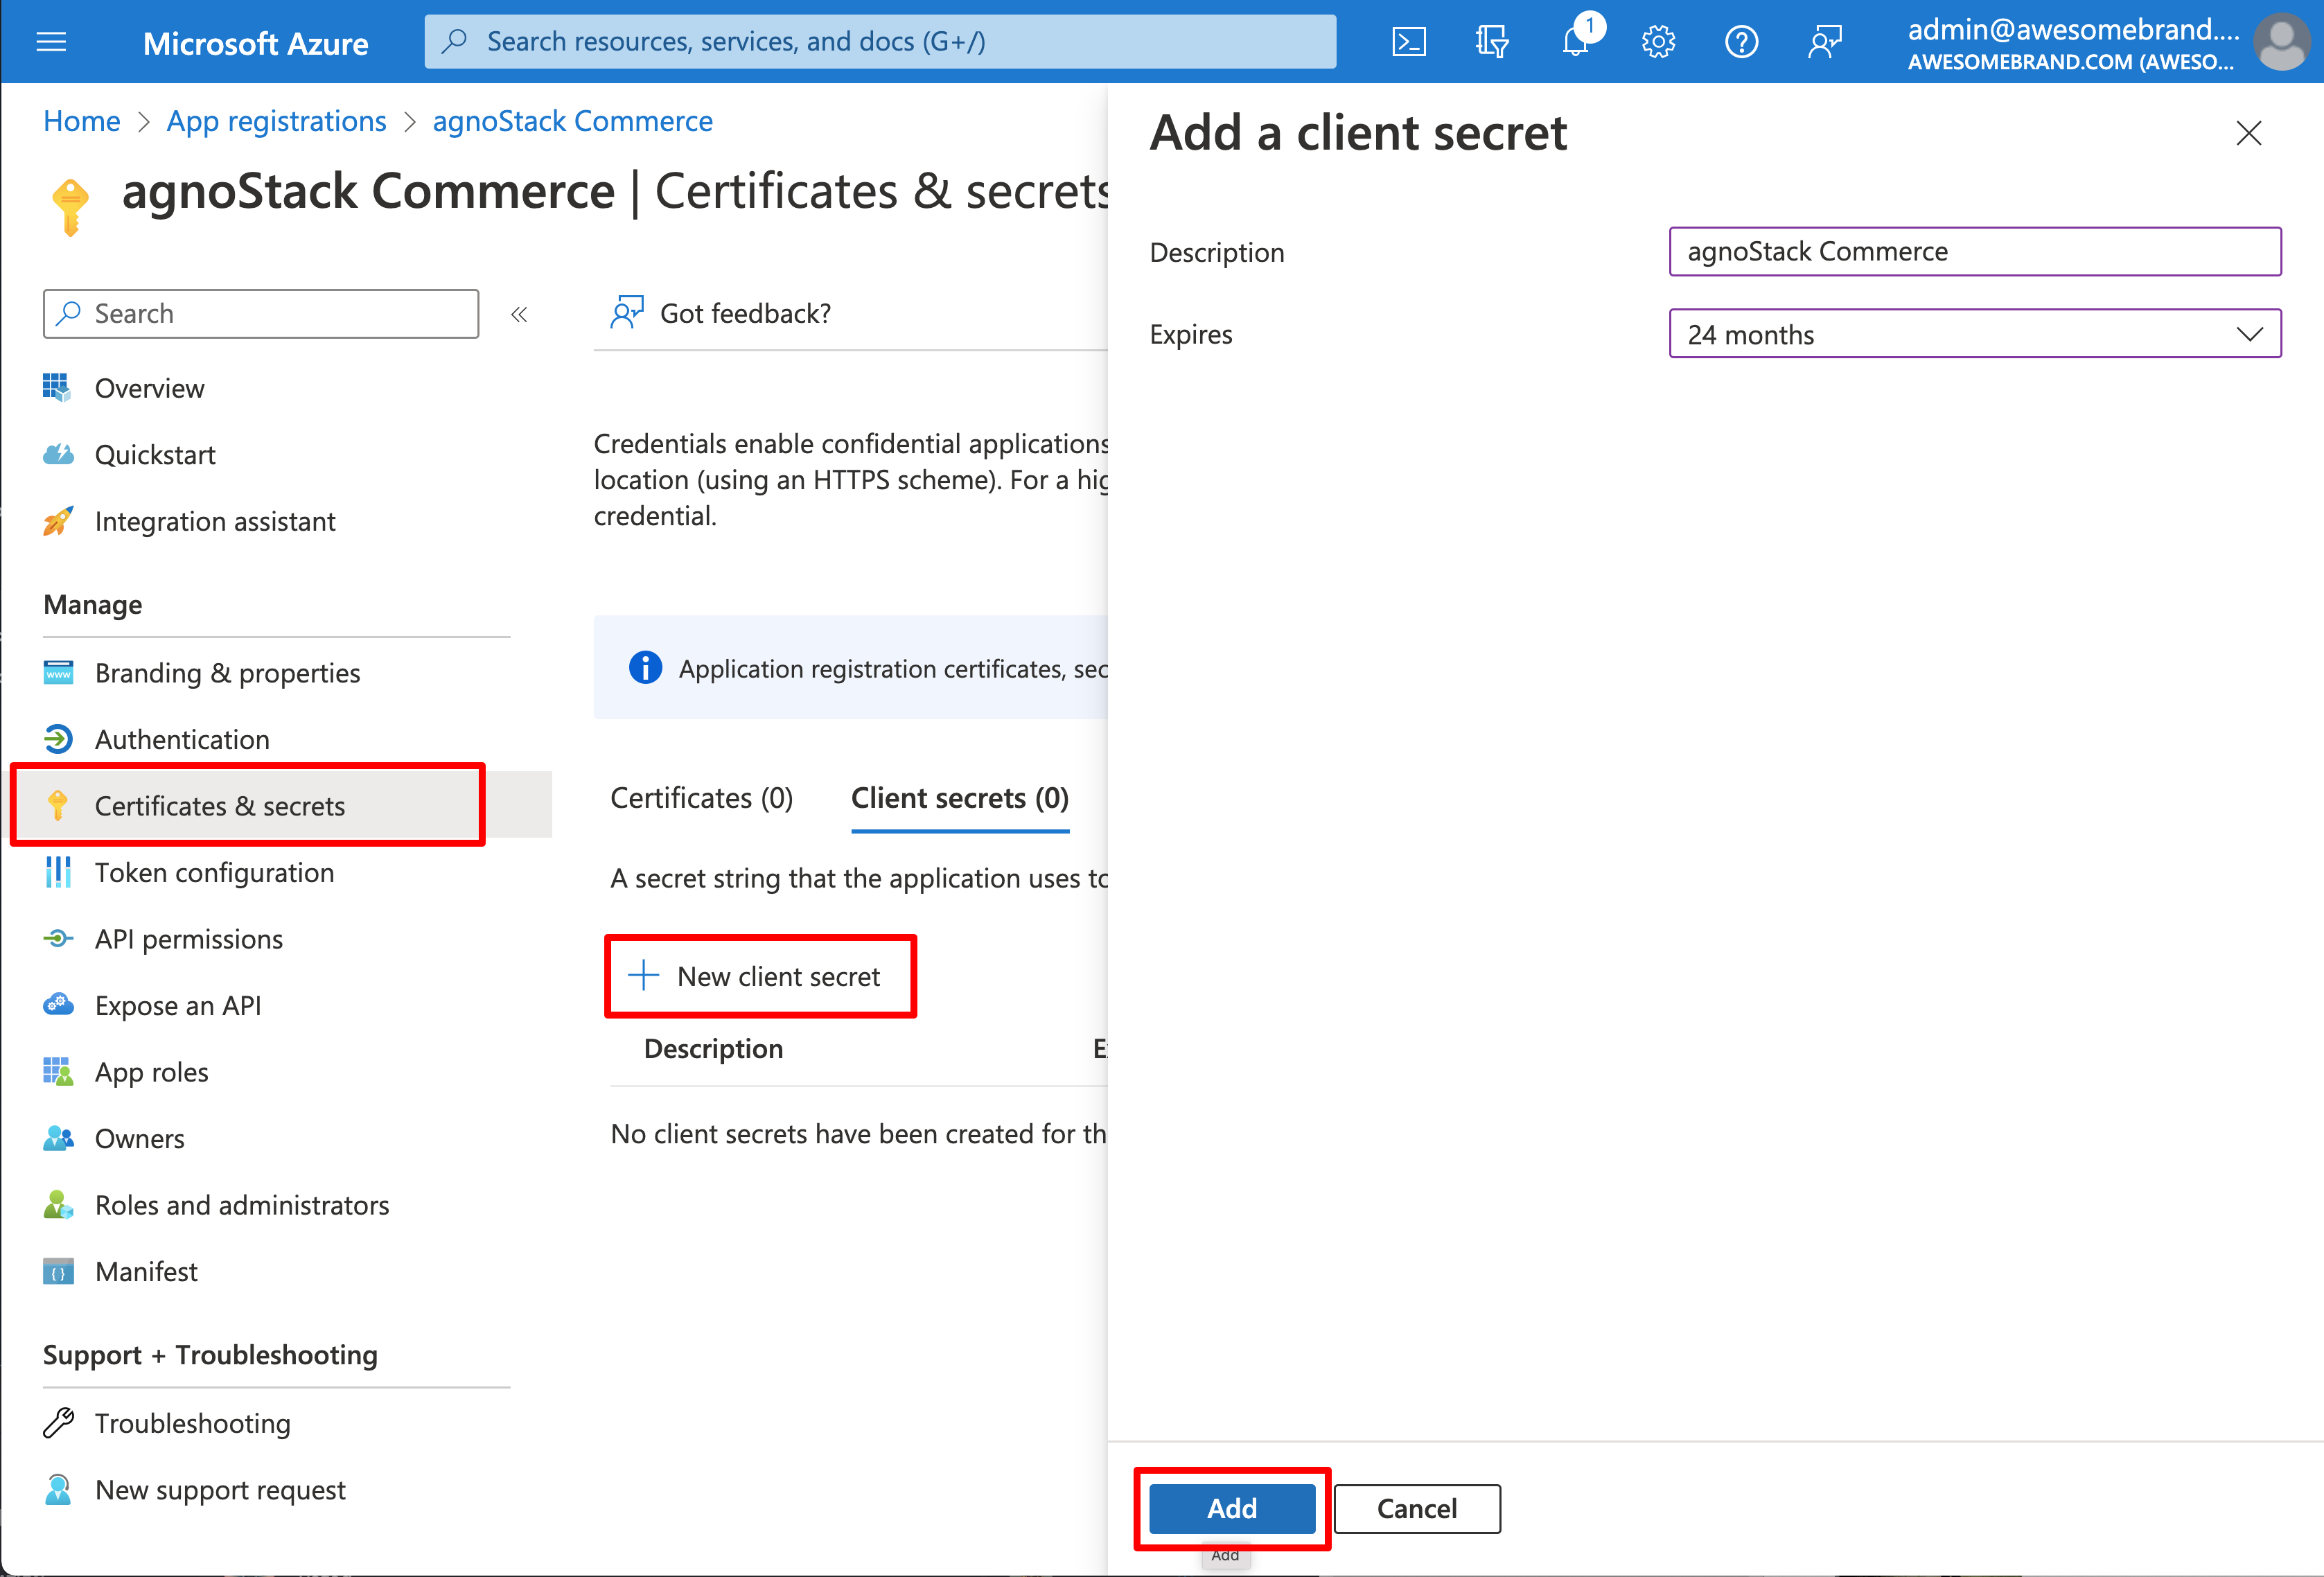
Next, click on "Certificates and secrets" in your app registration's left-hand menu. Choose "New client secret", give it a description and select an expiration duration (we recommend 24 months).
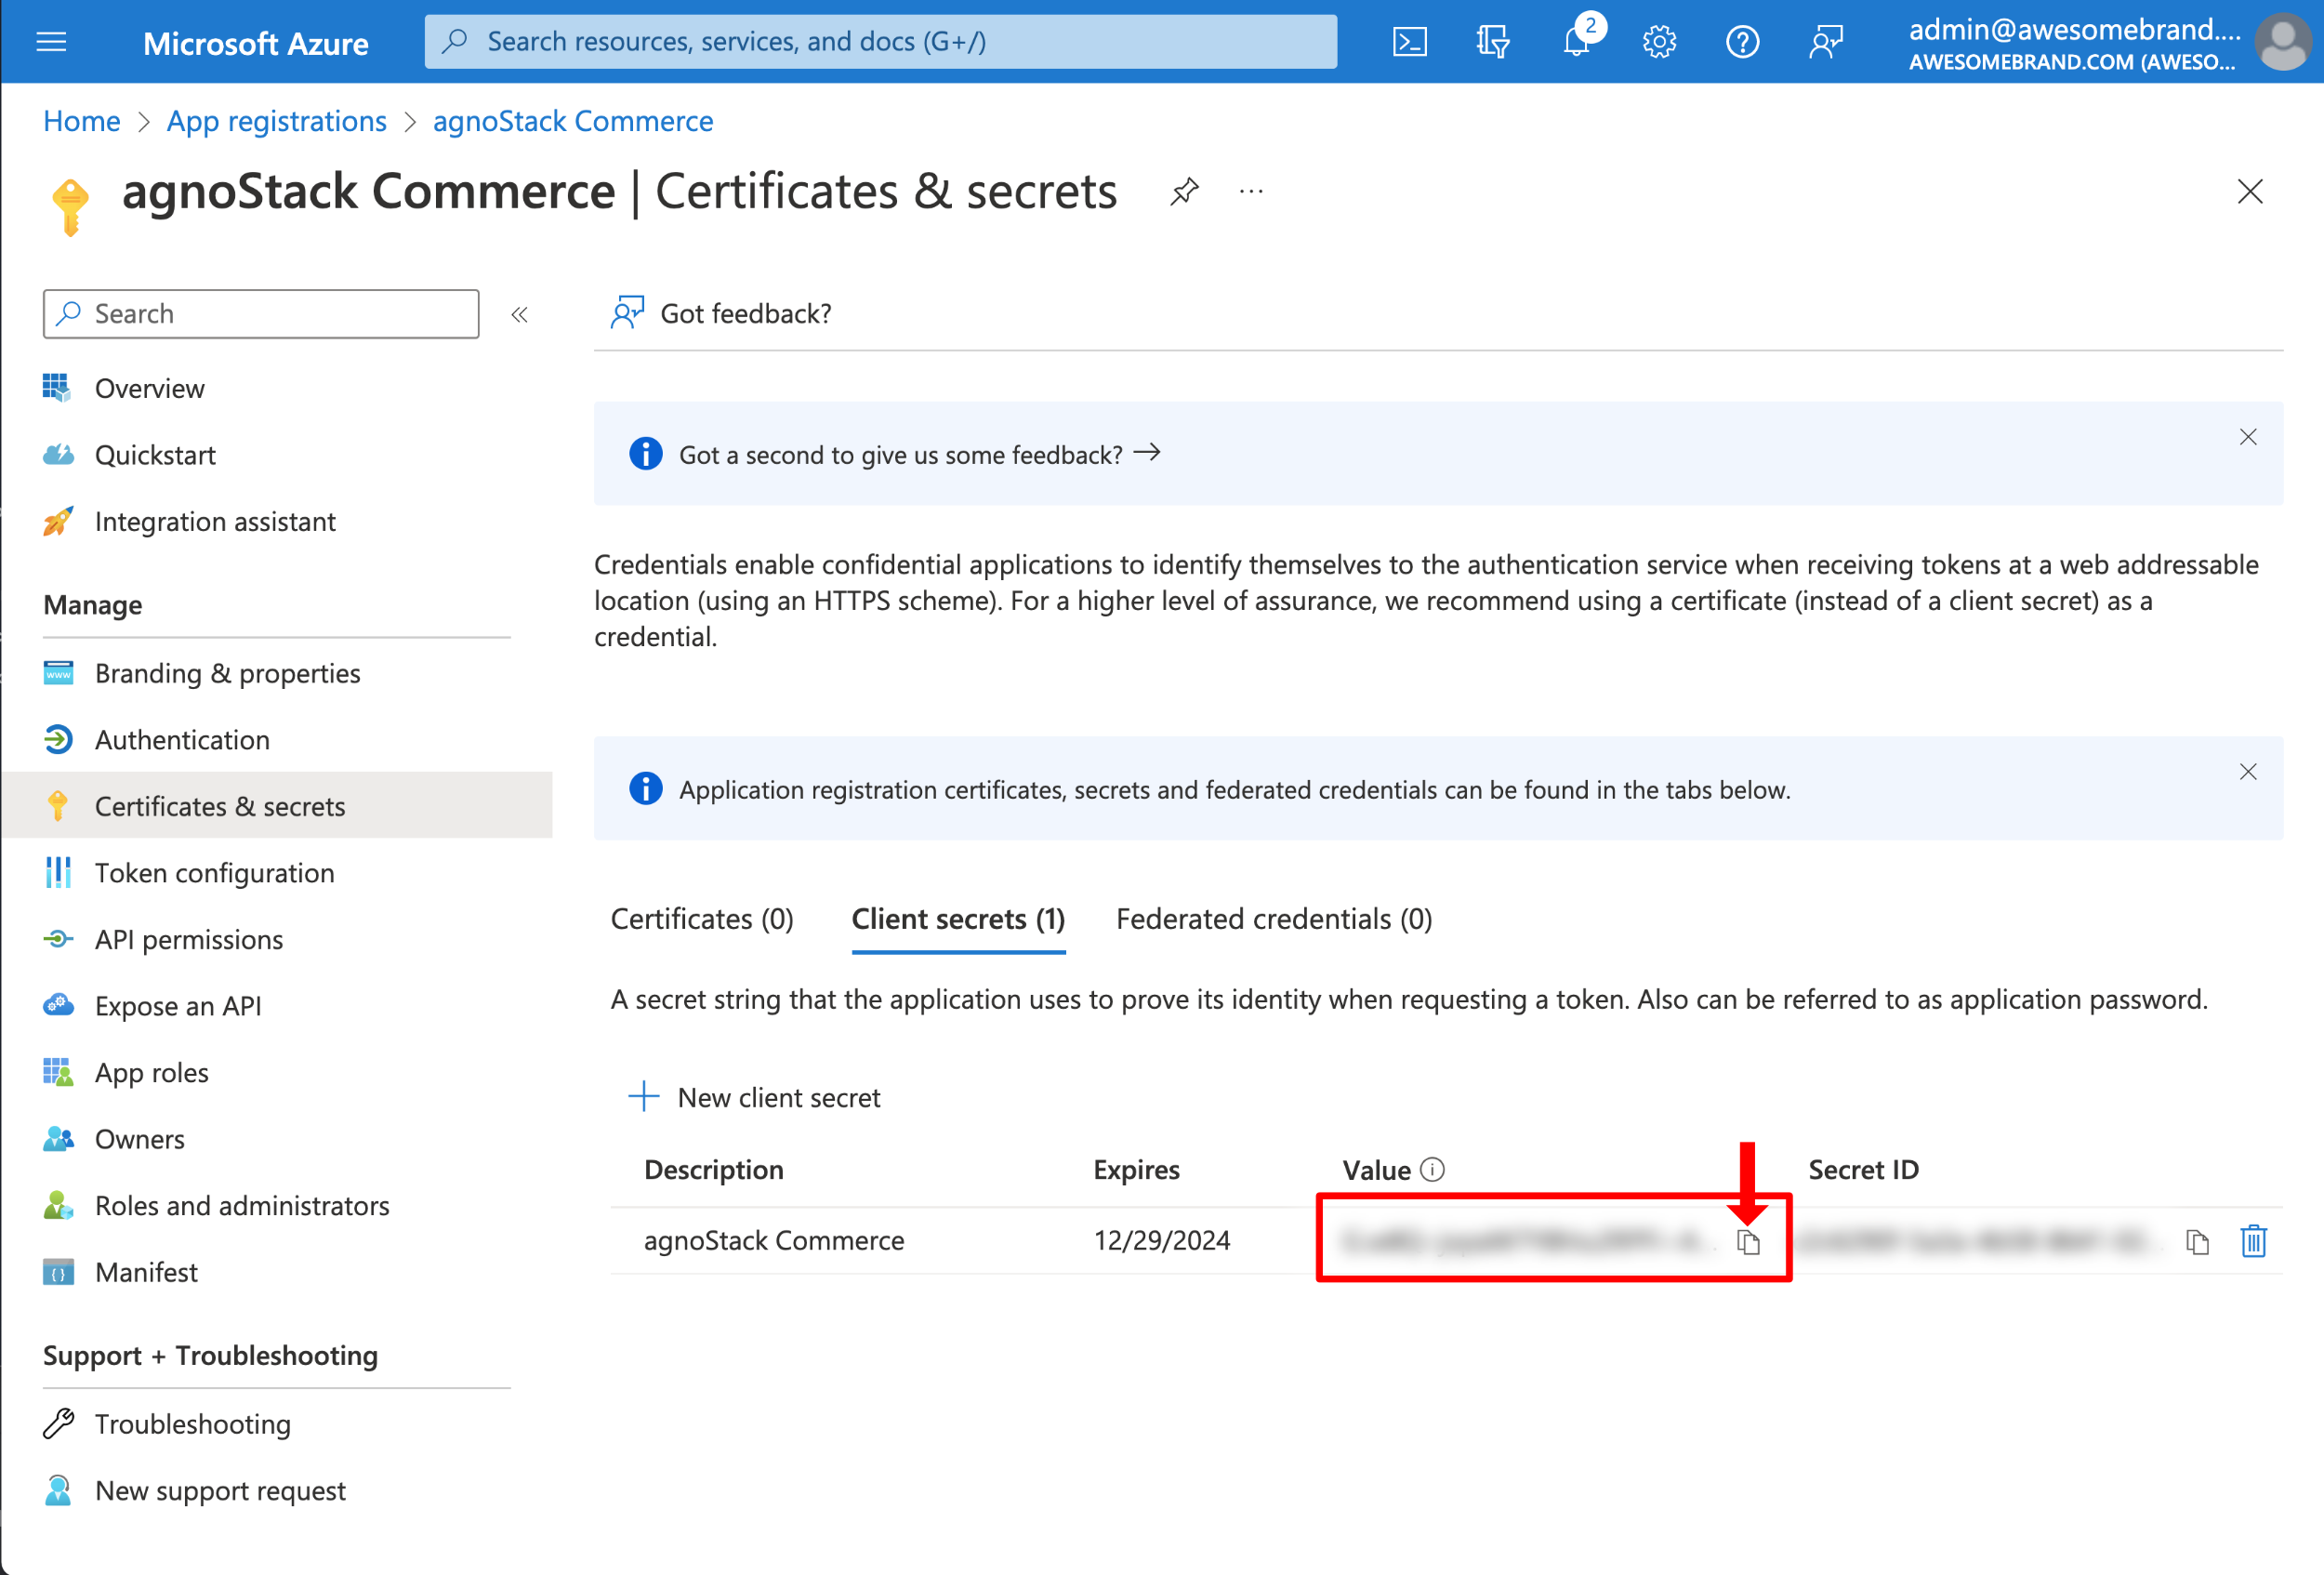
NOTE: Once your Client secret is created, make sure to copy it immediately, as this is only available once. You will need this value later to configure within agnoStack.
Setup Azure AD application in Business Central
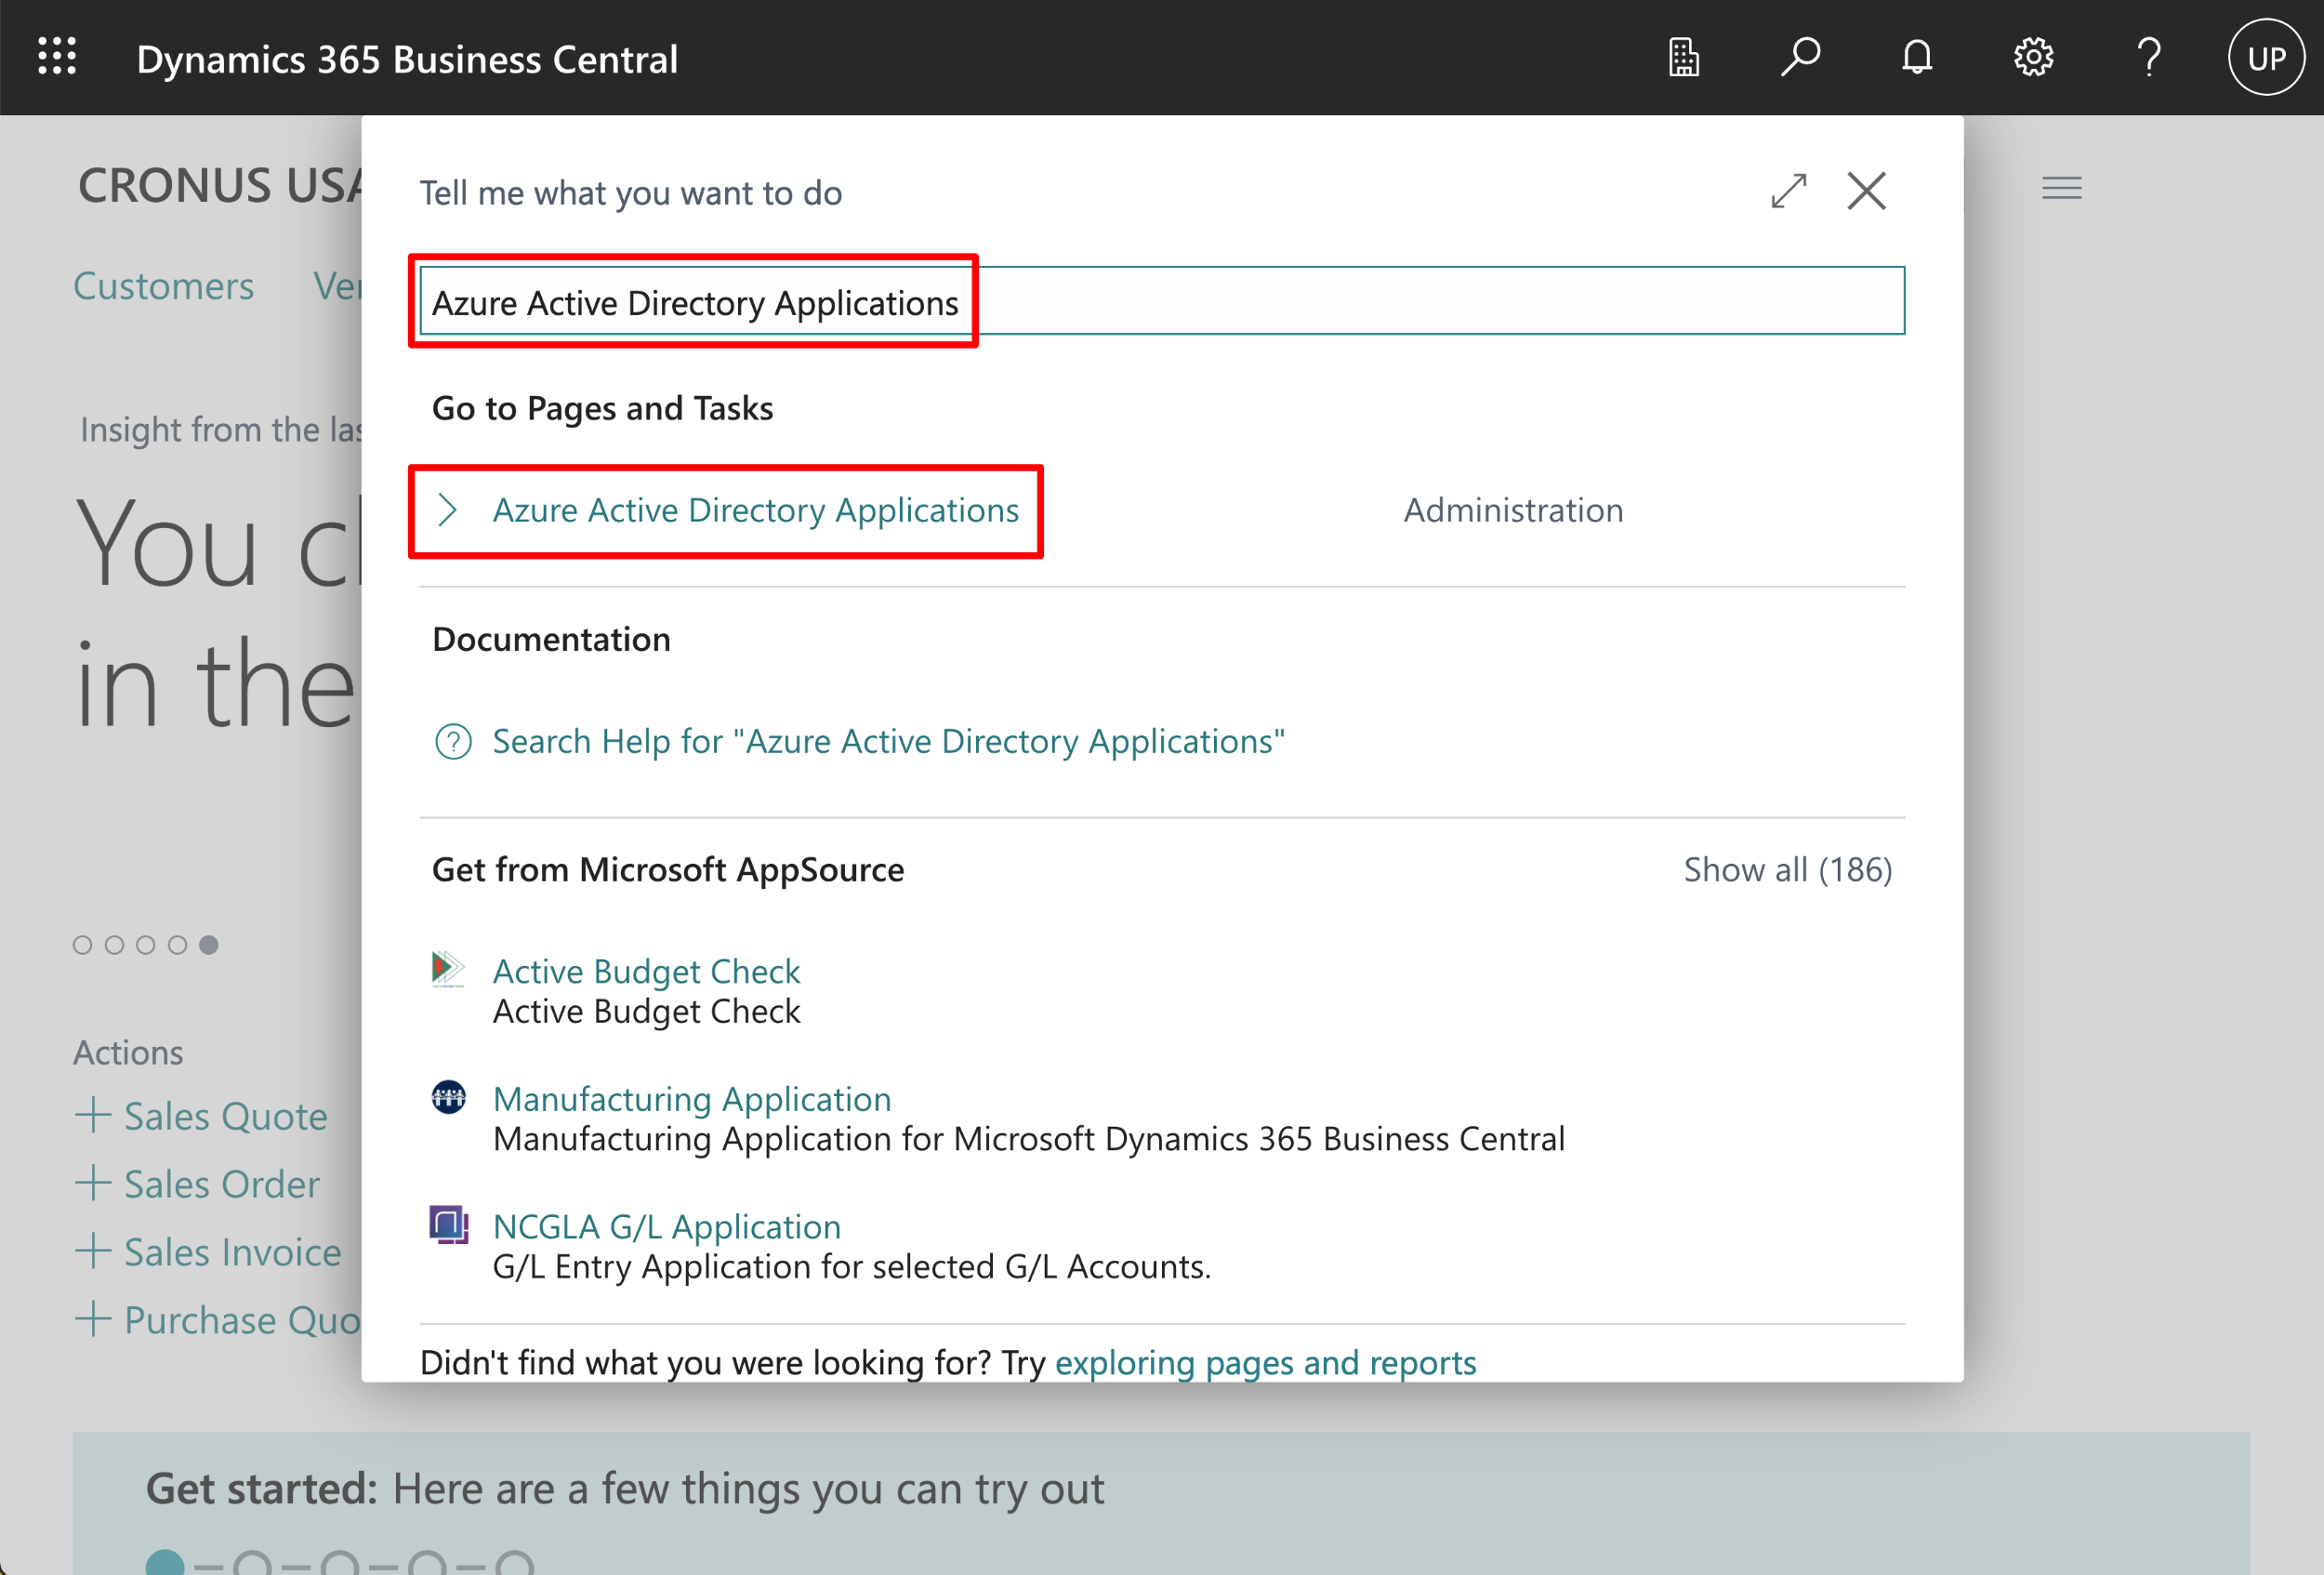
Login into your Business Central account using your Admin credentials. In the main search field, type "Azure Active Directory Applications" and select this option in the search results.
Select the "New" button to add your new application to Business Central.

Enter your applications Client ID that you obtained earlier, give it a description and set the "State" to "Enabled". Scroll down to the "User Groups" section to add the appropriate permission options.
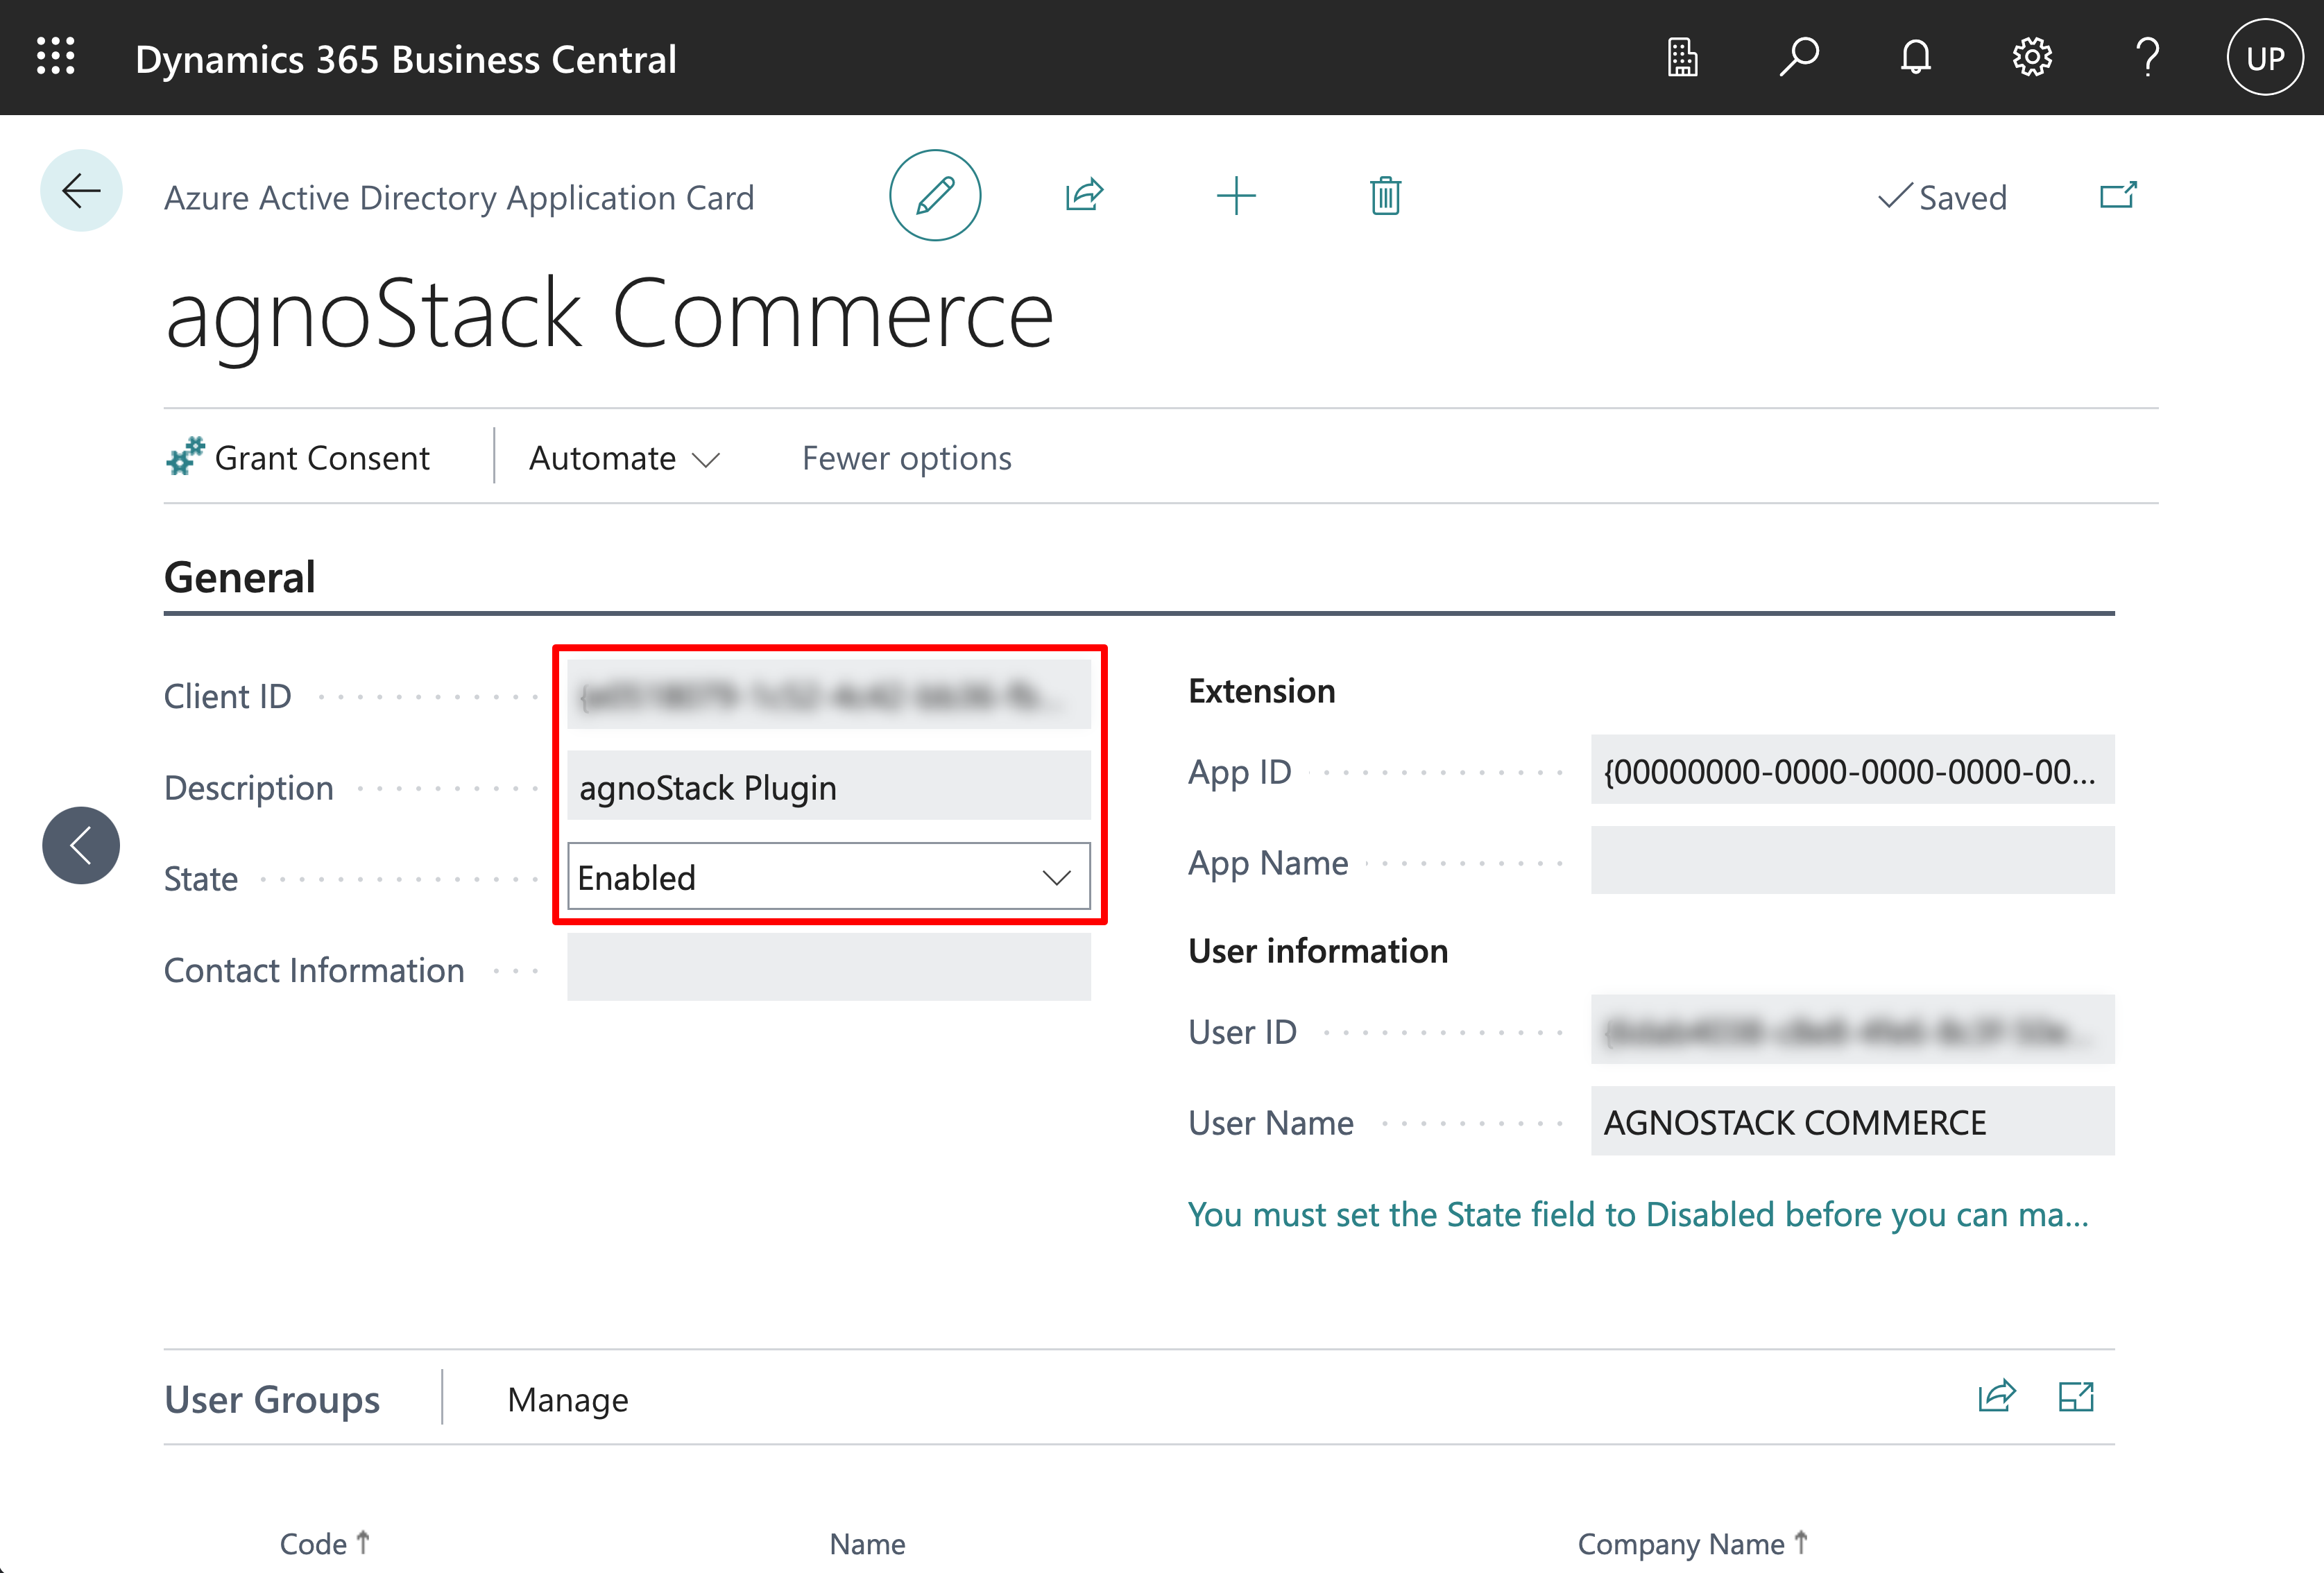
Click inside the "Code" field to access the permission list and choose the appropriate permissions. The minimum permission option needed for agnoStack is "D365 BASIC ISV".
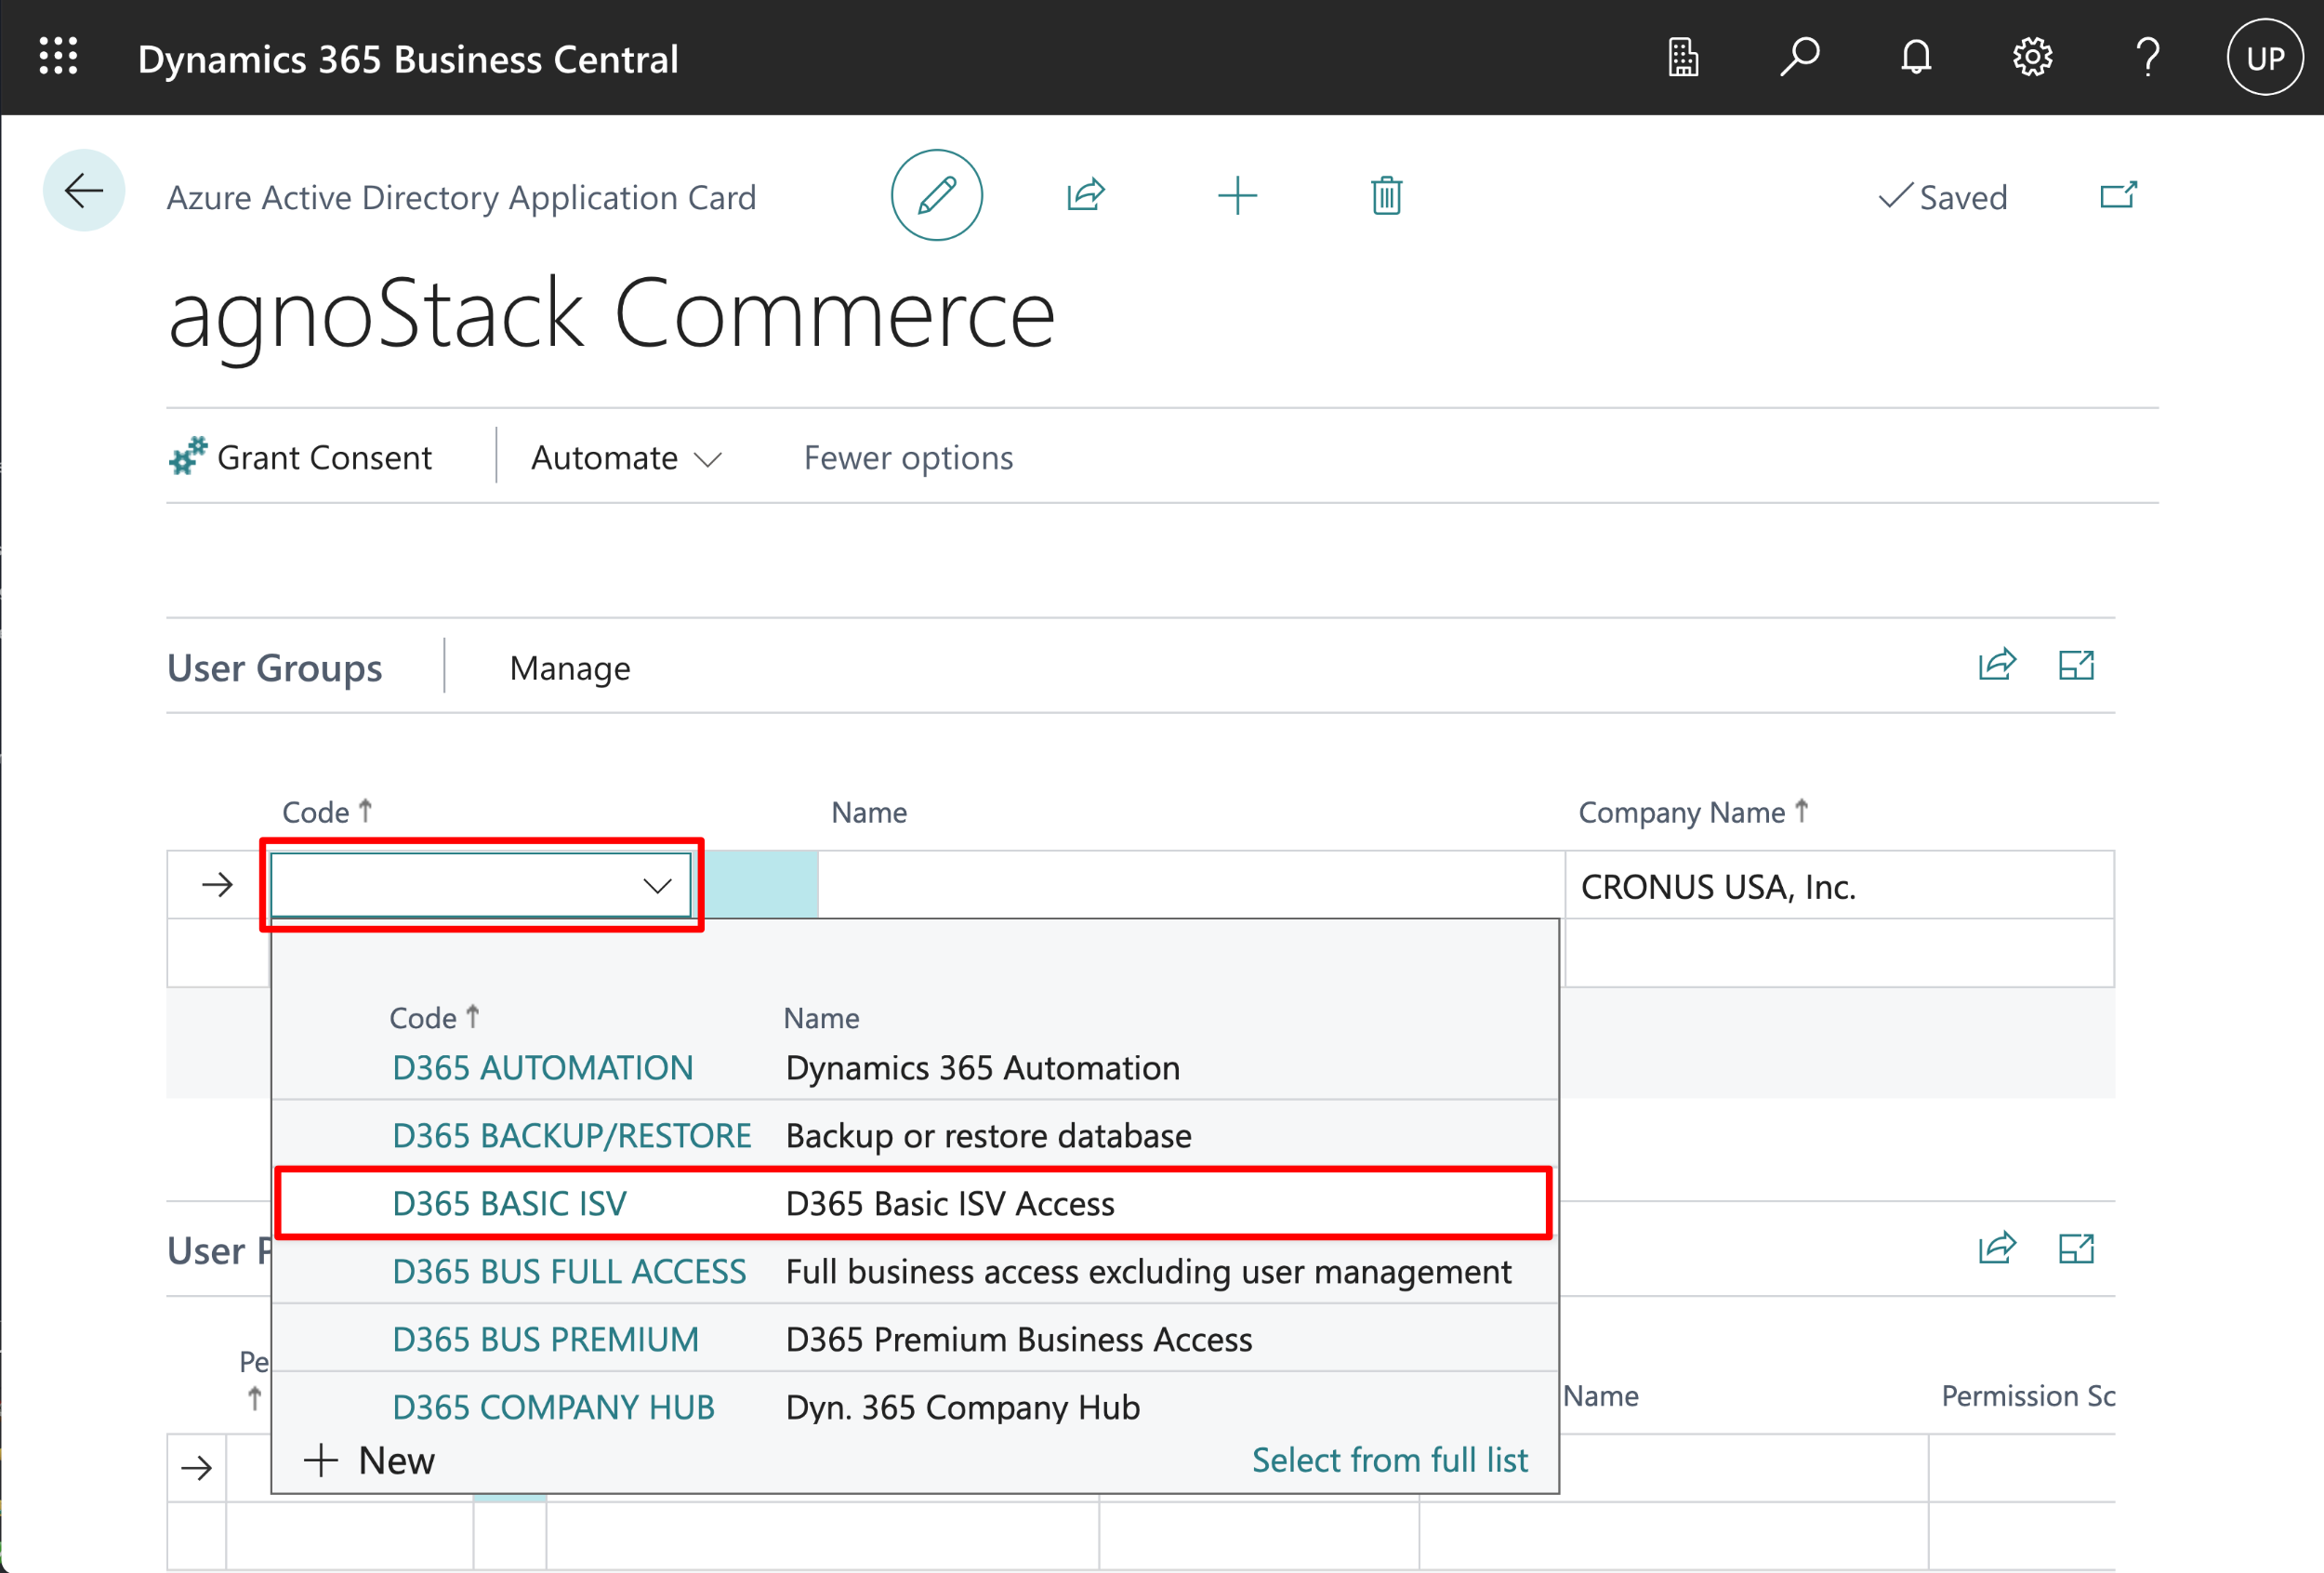
Once selected, click into the "Name" field to ensure this value is properly populated. Once configured, your configuration should like the below screenshot.
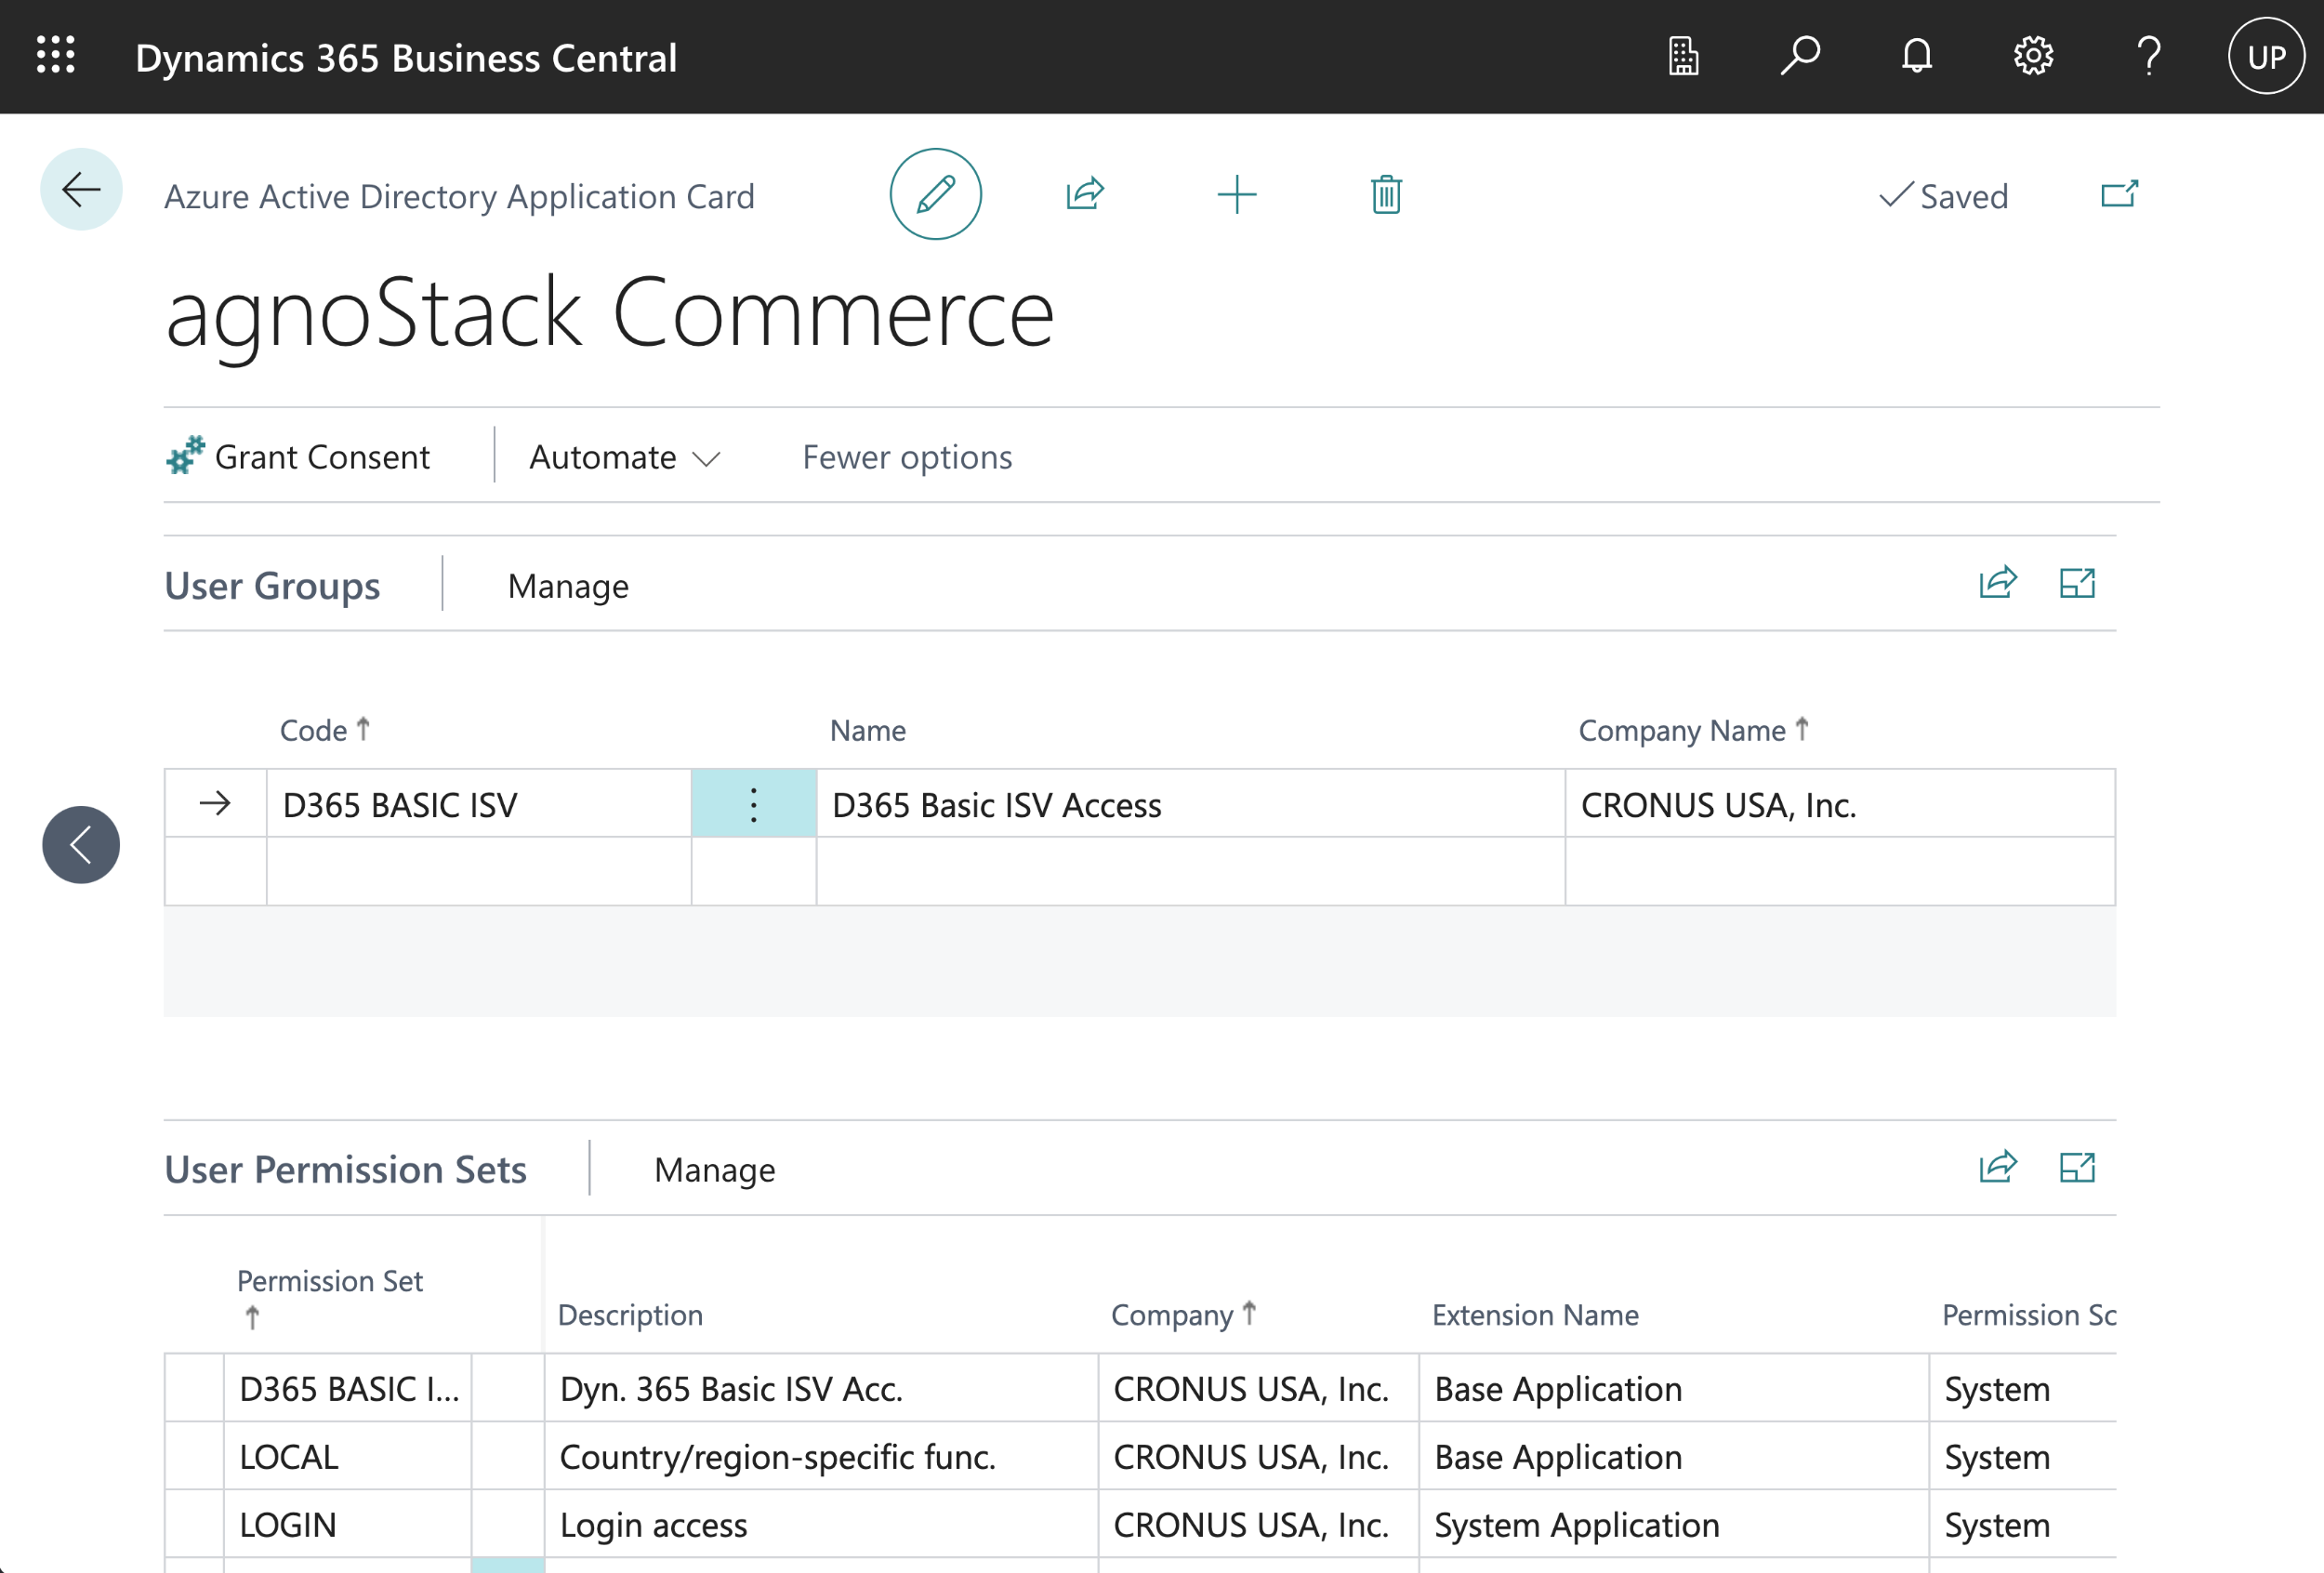
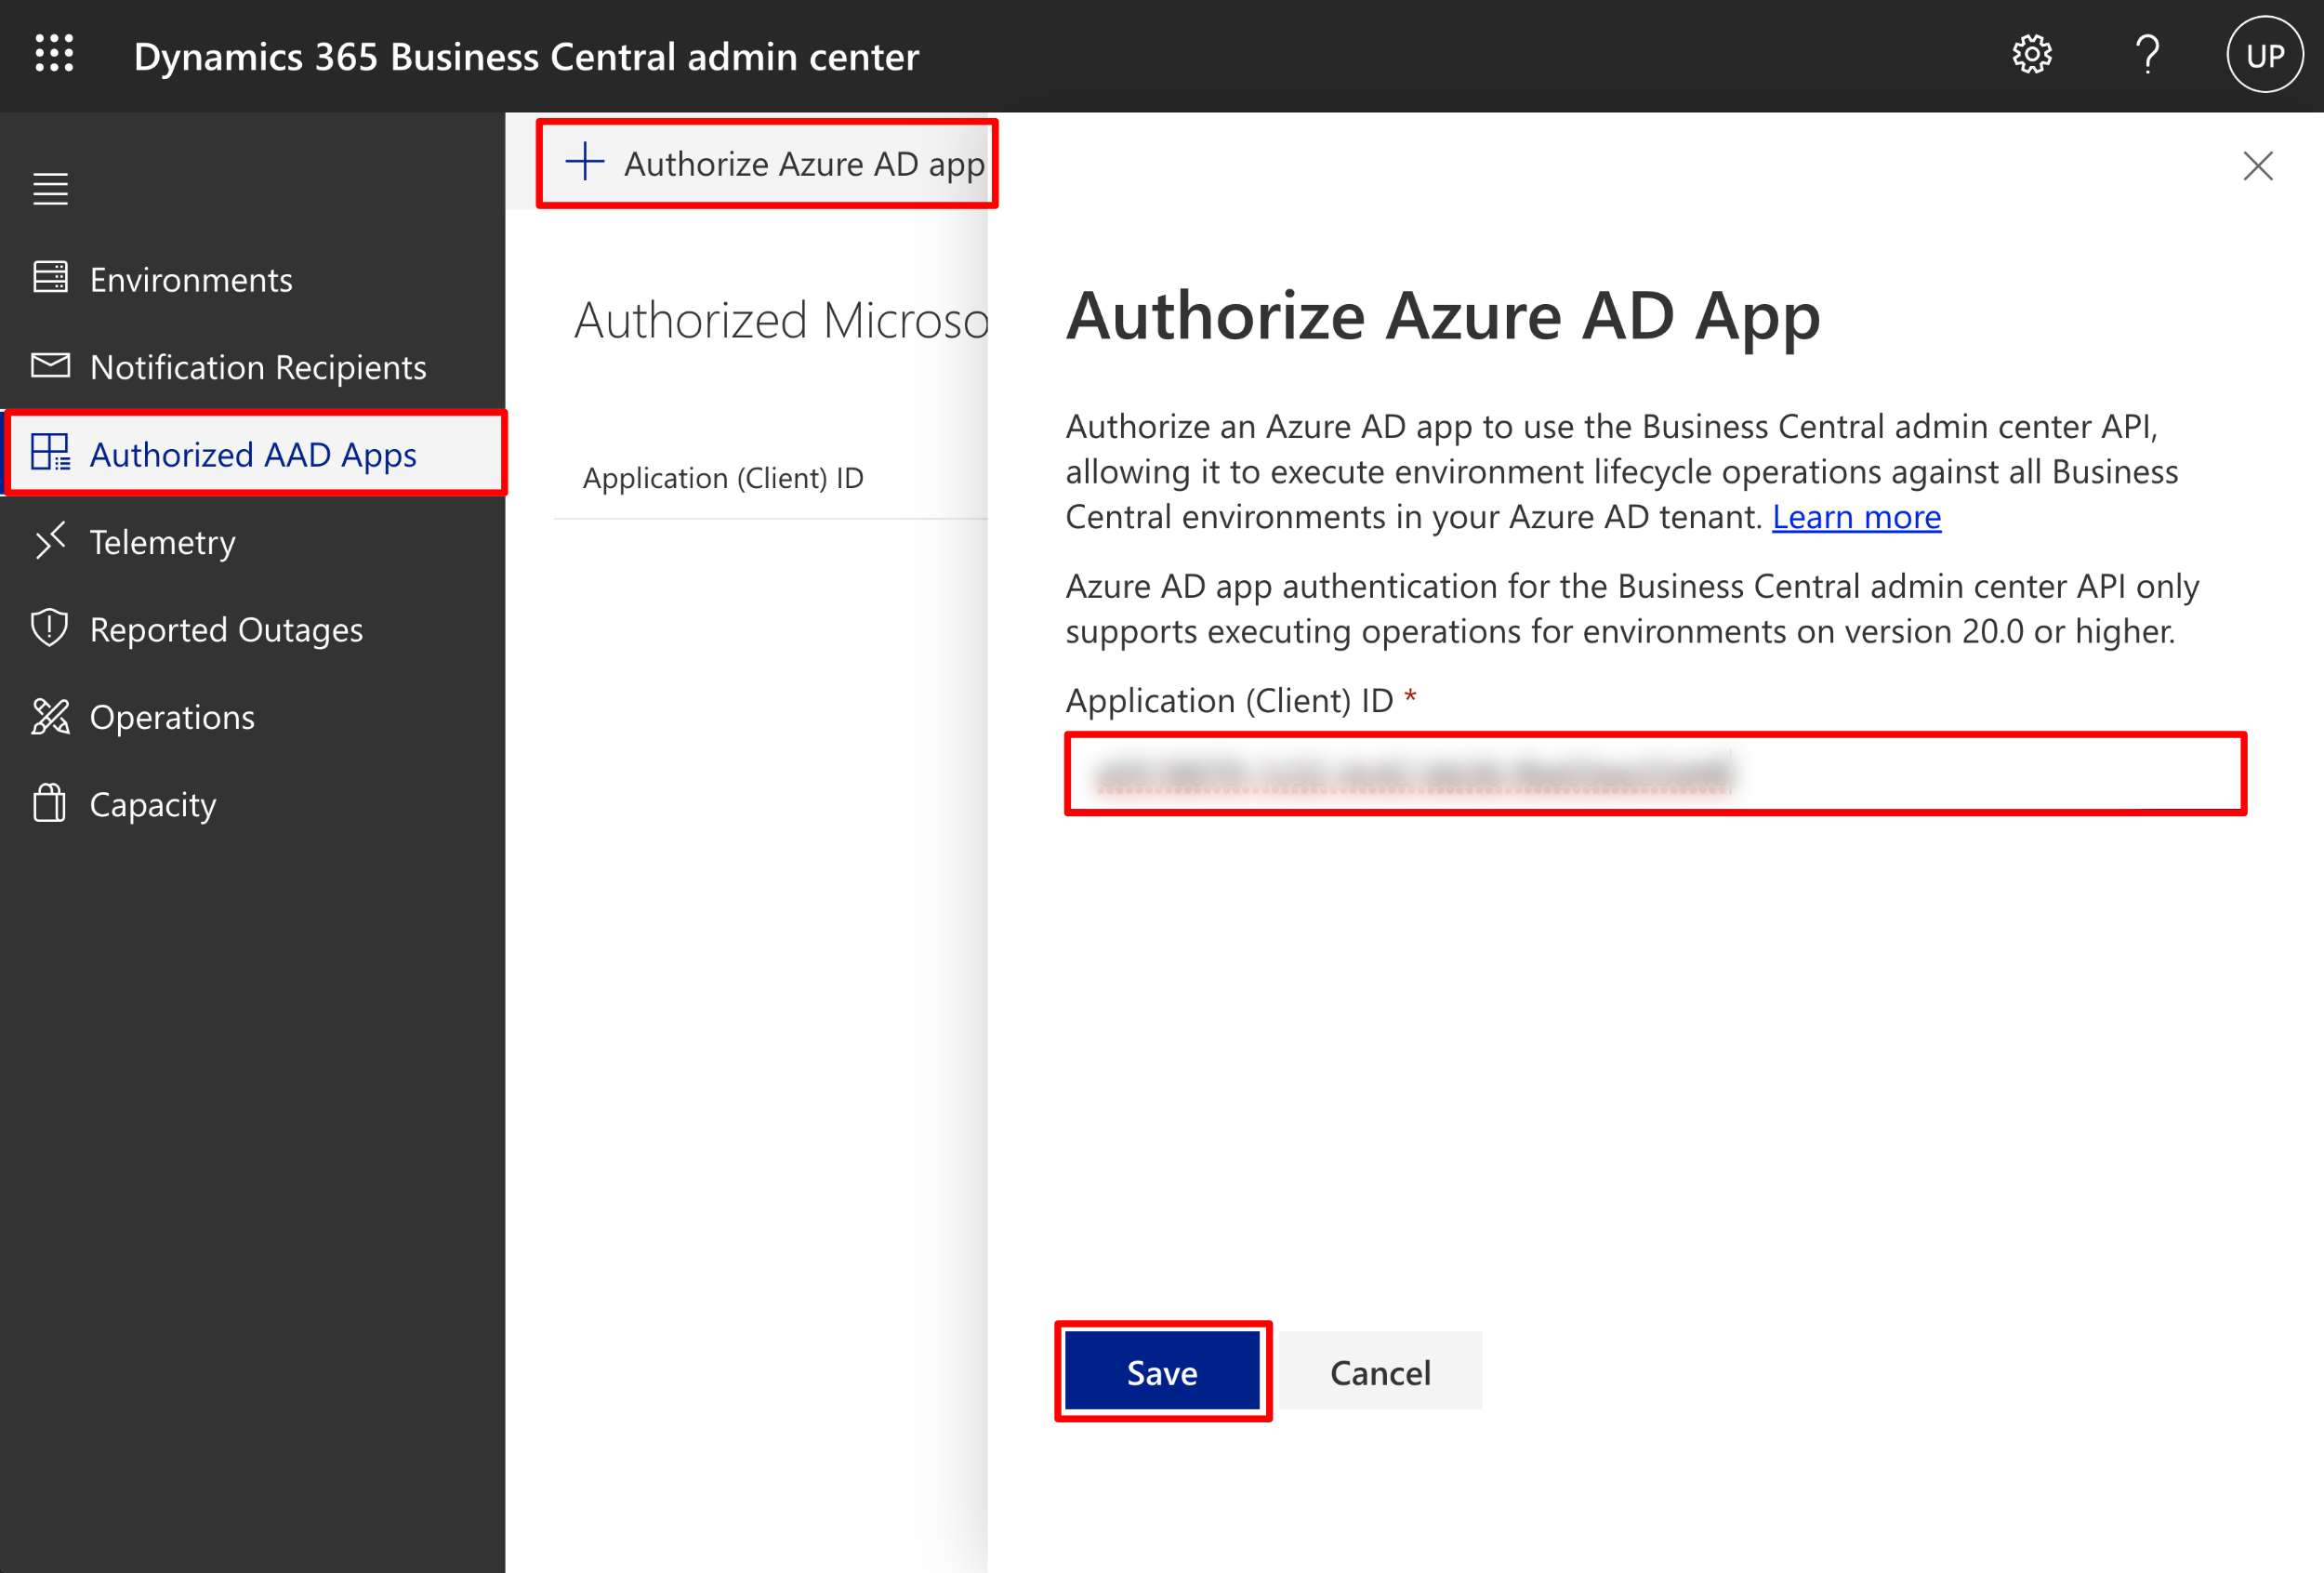
Next, go back into your Business Central dashboard and select the "Gear" icon, and then choose "Admin Center" in order to authorize your new application.
Choose "Authorized AAD Apps", and then click on "Authorize Azure AD app" at the top of this screen. In the "Application (Client) ID" field, enter your Client ID that you obtained earlier, and click "Save". (NOTE: you do not need to click on the Grant list that will appear in the list once saved, we will do this inside of the Azure Portal in the next step)
Configure Azure AD application permissions
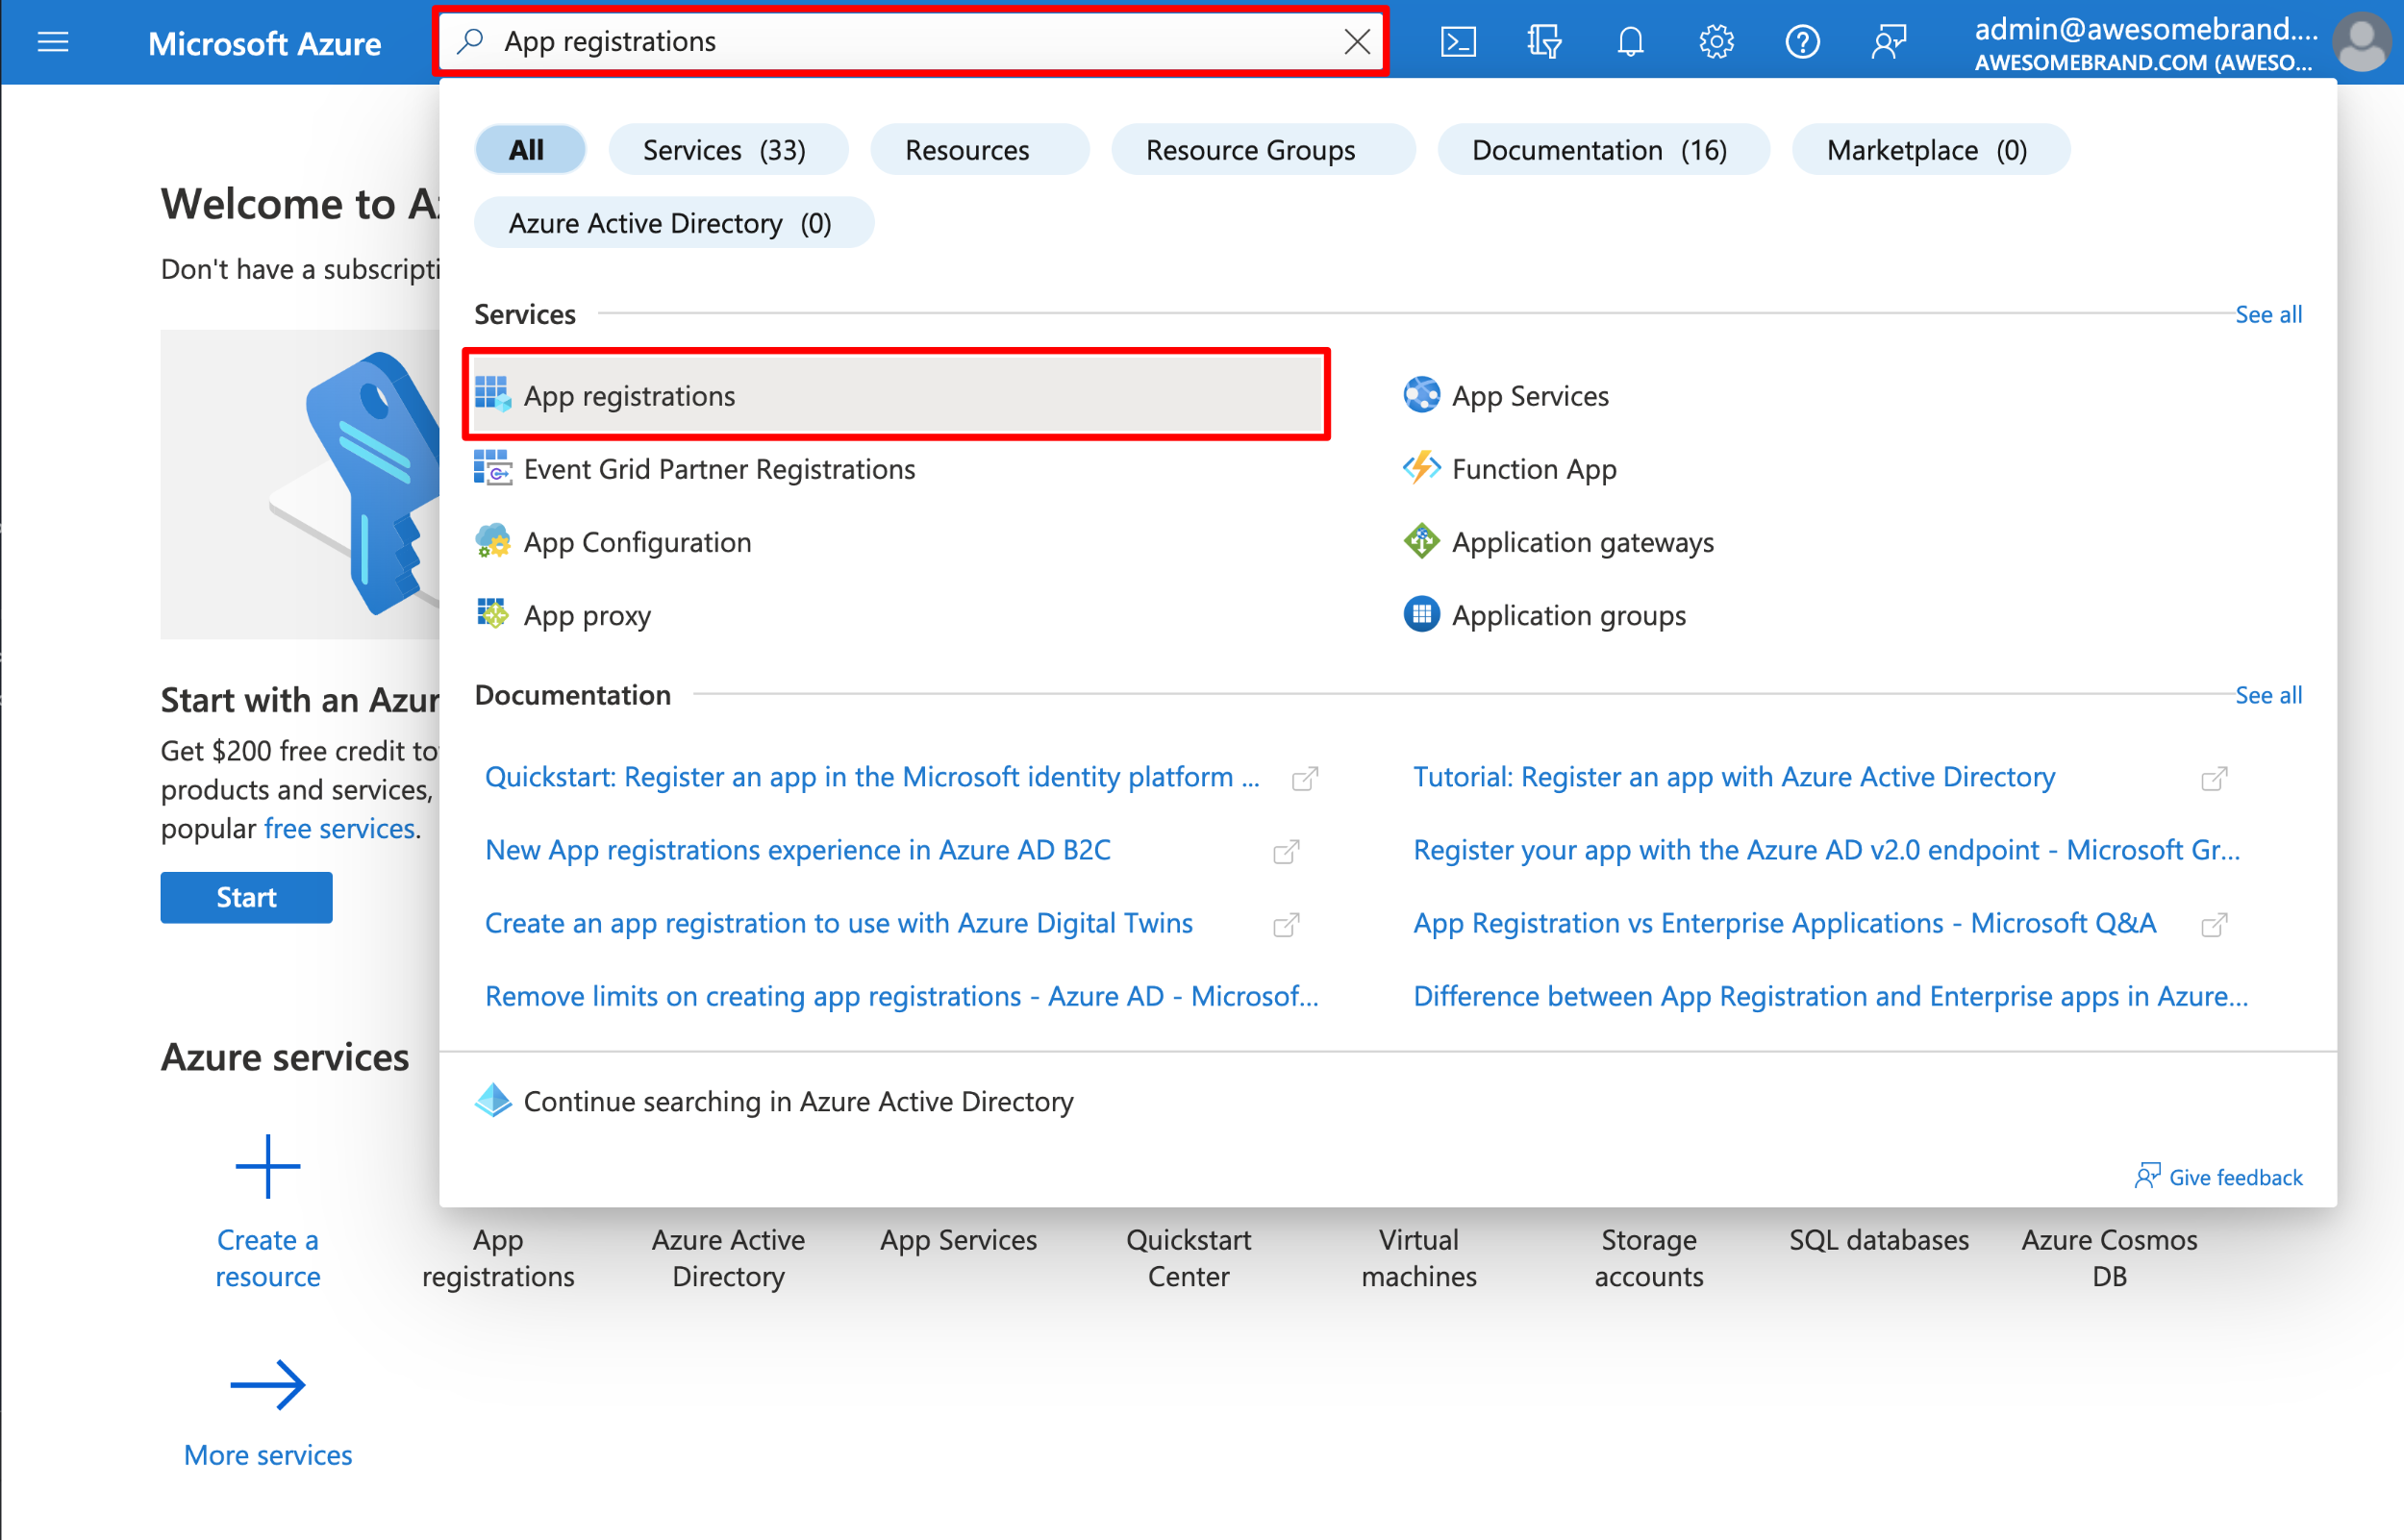
Navigation back into the Azure portal (https://portal.azure.com) and navigate to your newly created App registration. You can find this by searching for "App registrations" and selecting your new application from the list.
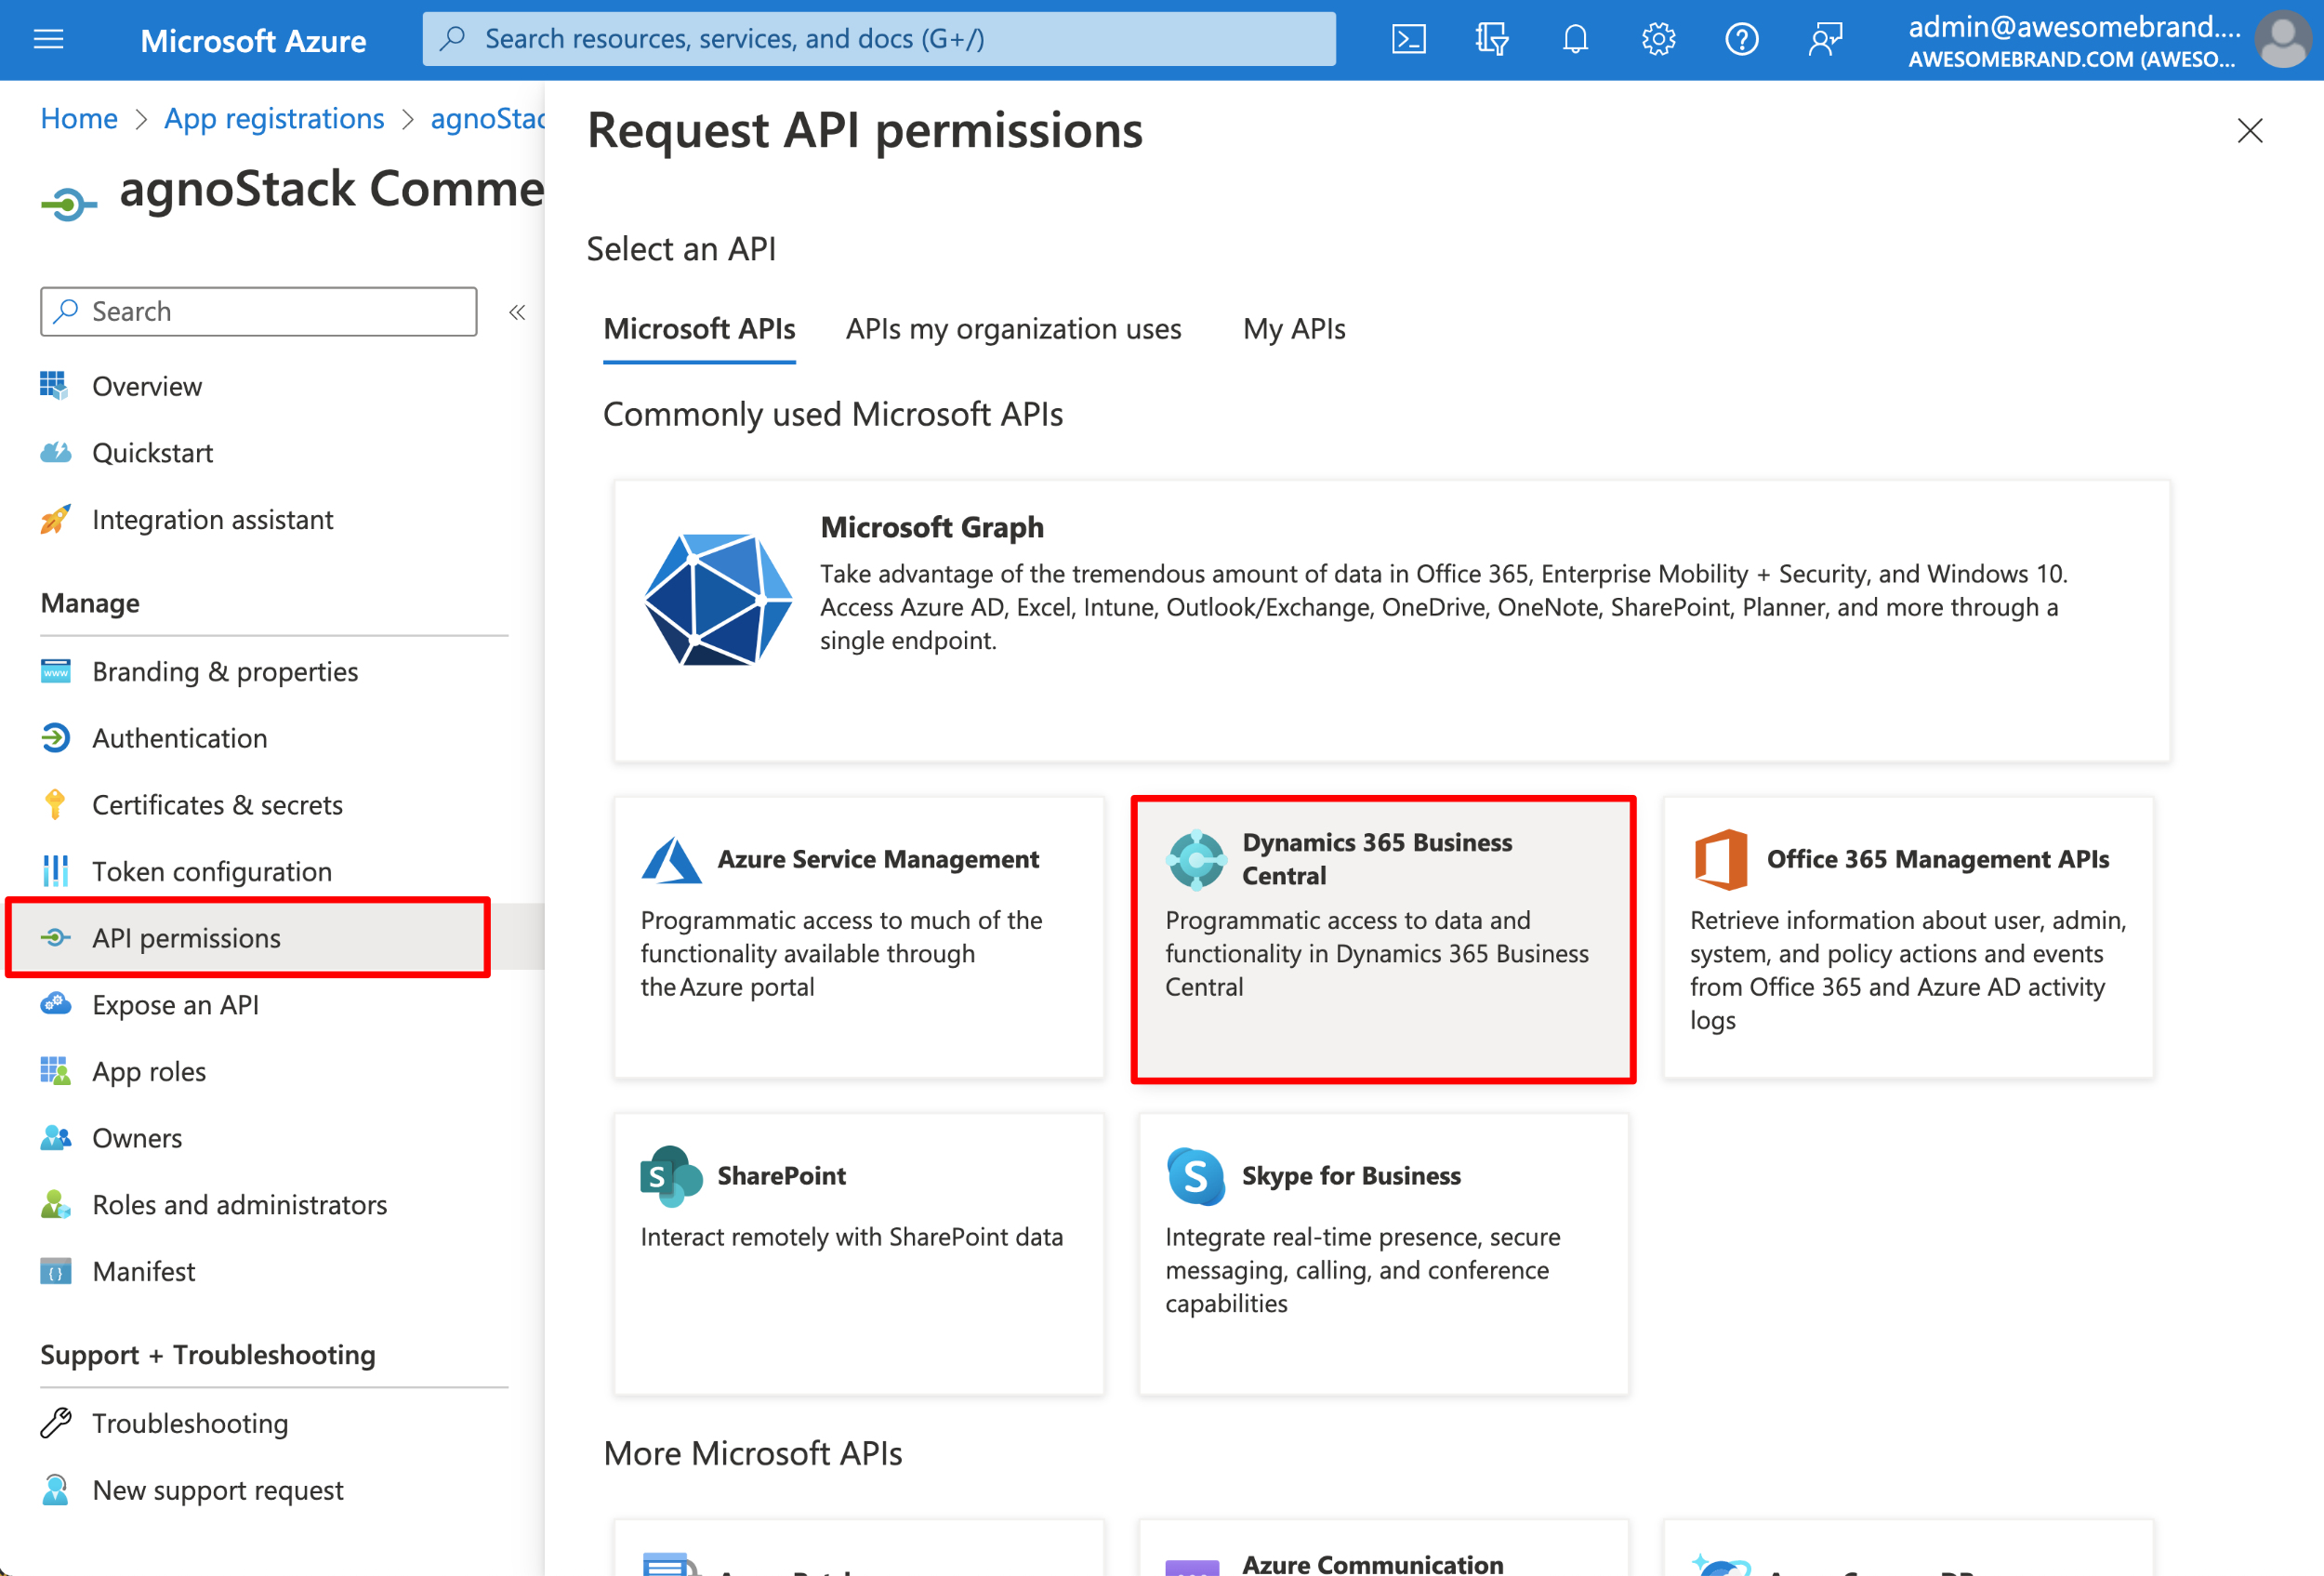
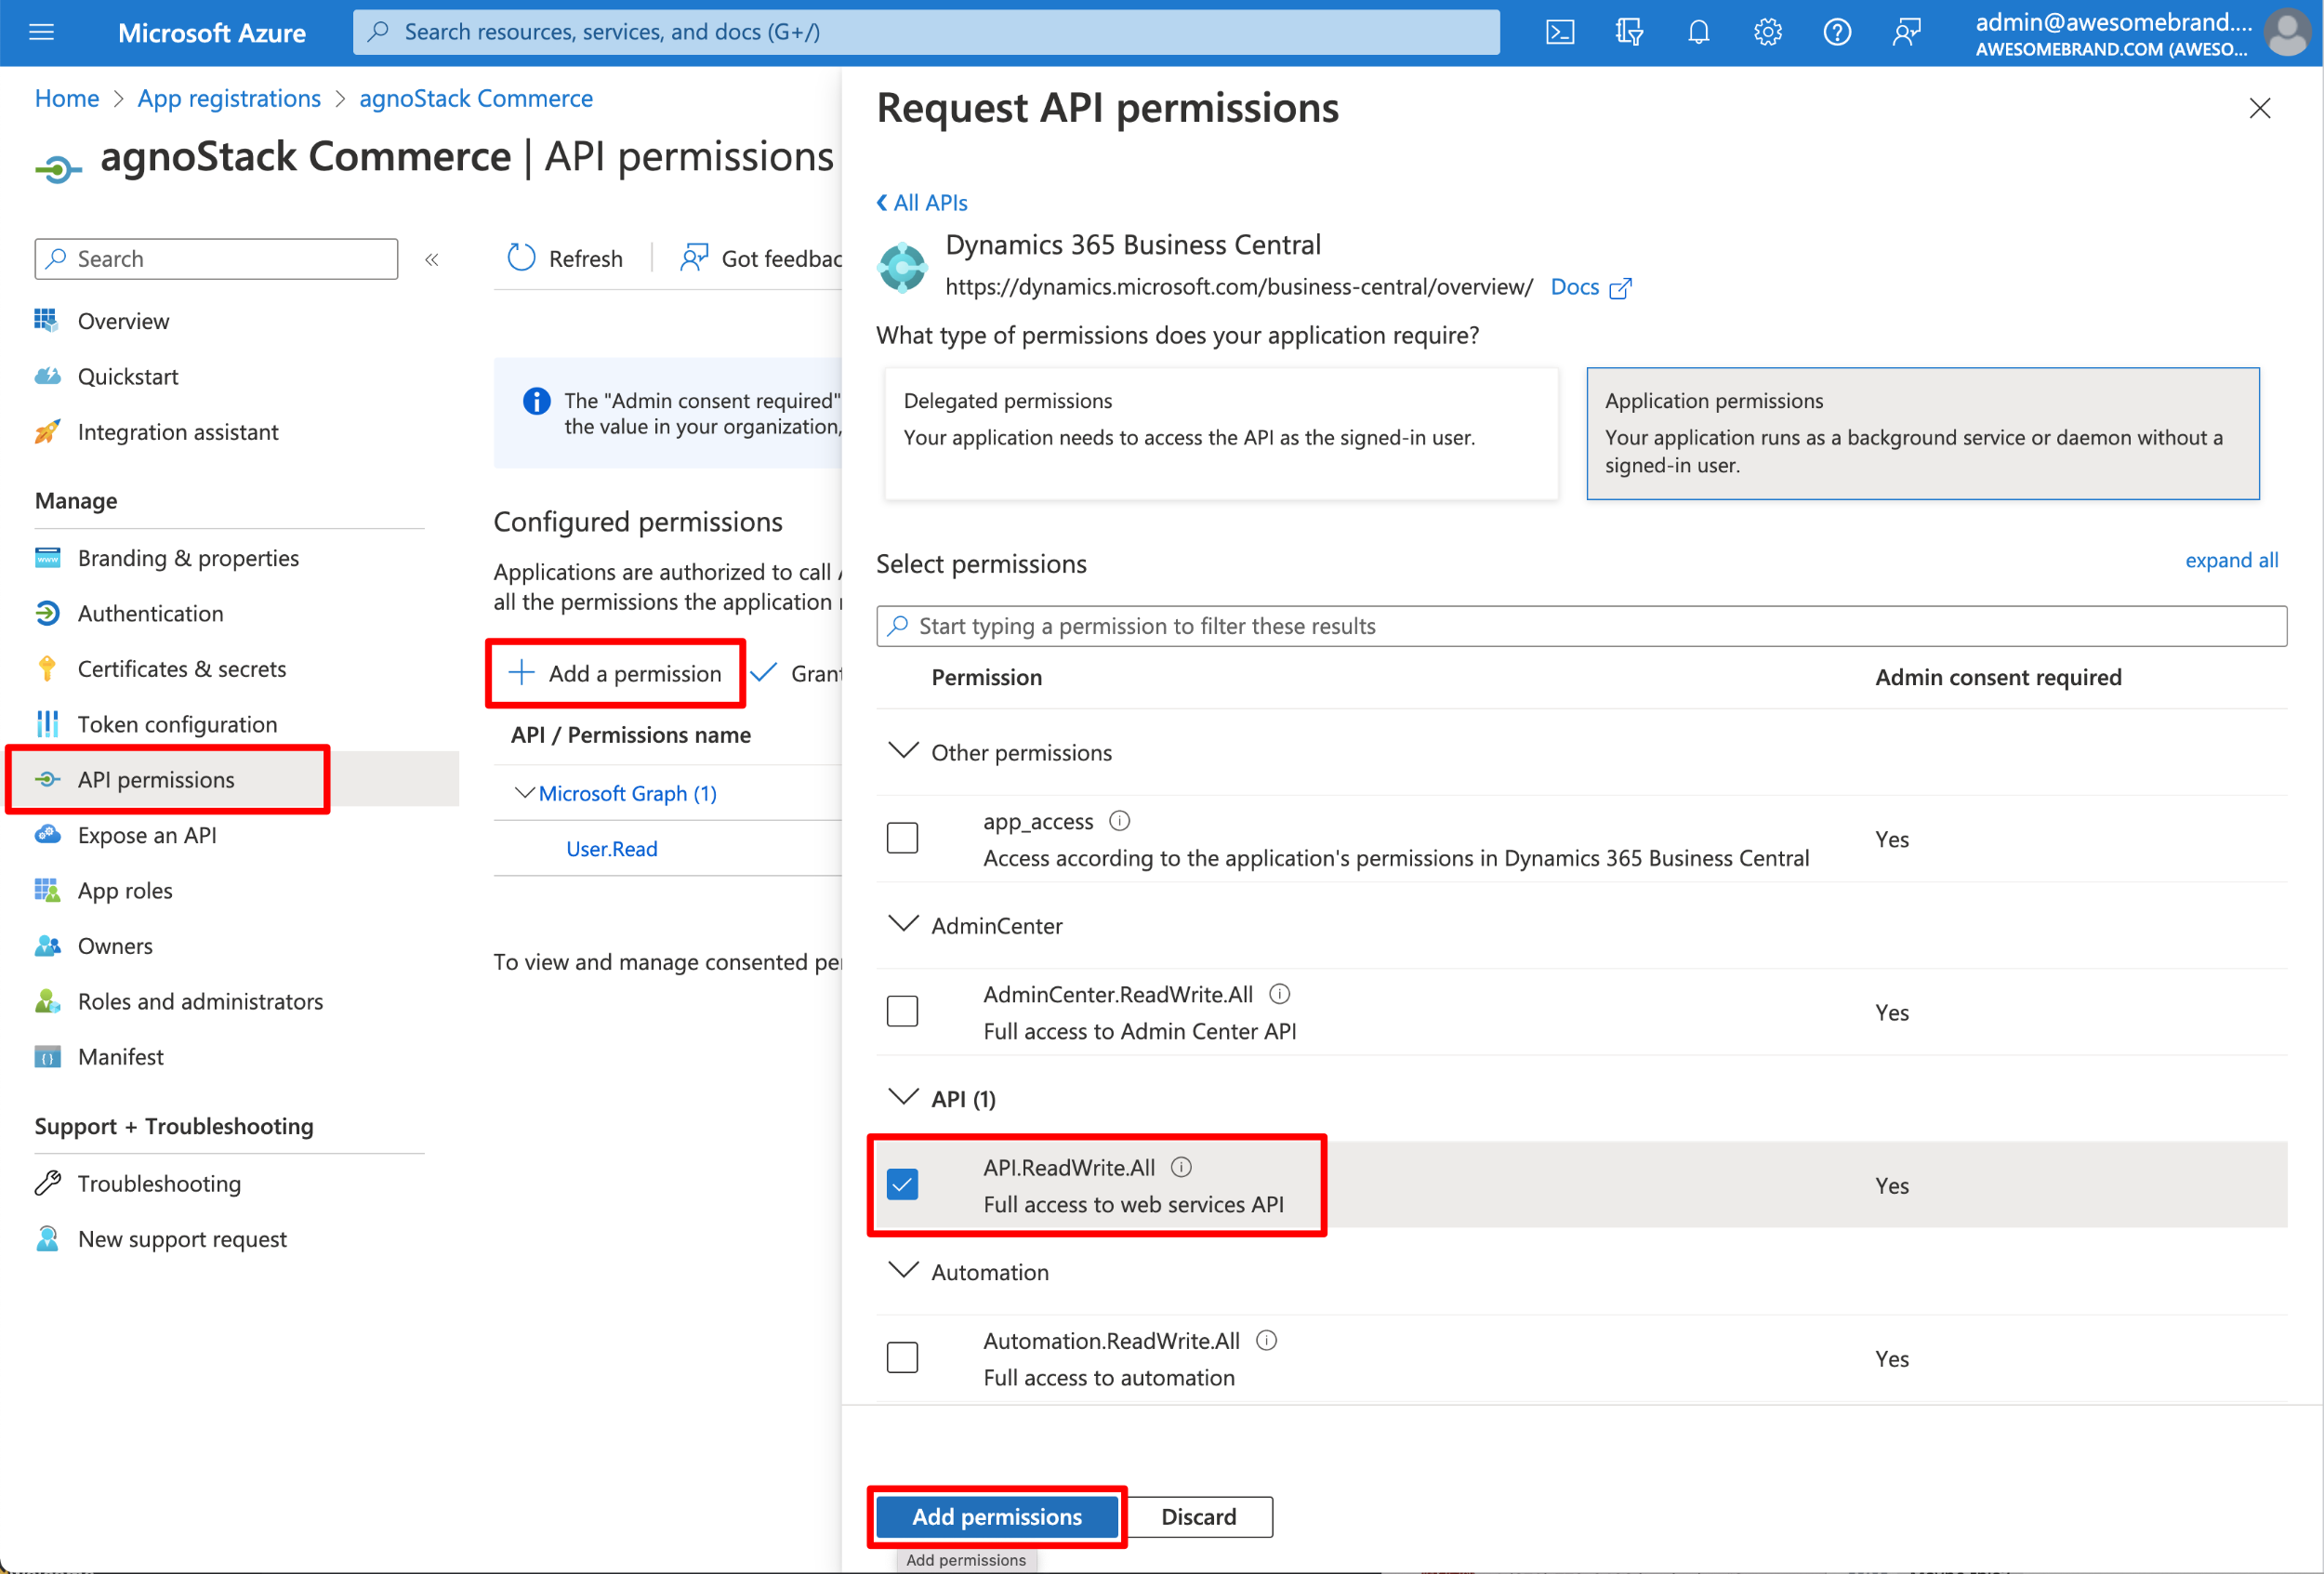
Once on your registered application's overview screen, click on the "API permissions" link in the left-hand menu. On the "Request API permissions" menu, click on "Dynamics 365 Business Central". Next scroll down and select the permission entitled "API.ReadWrite.All", and click "Add permissions".
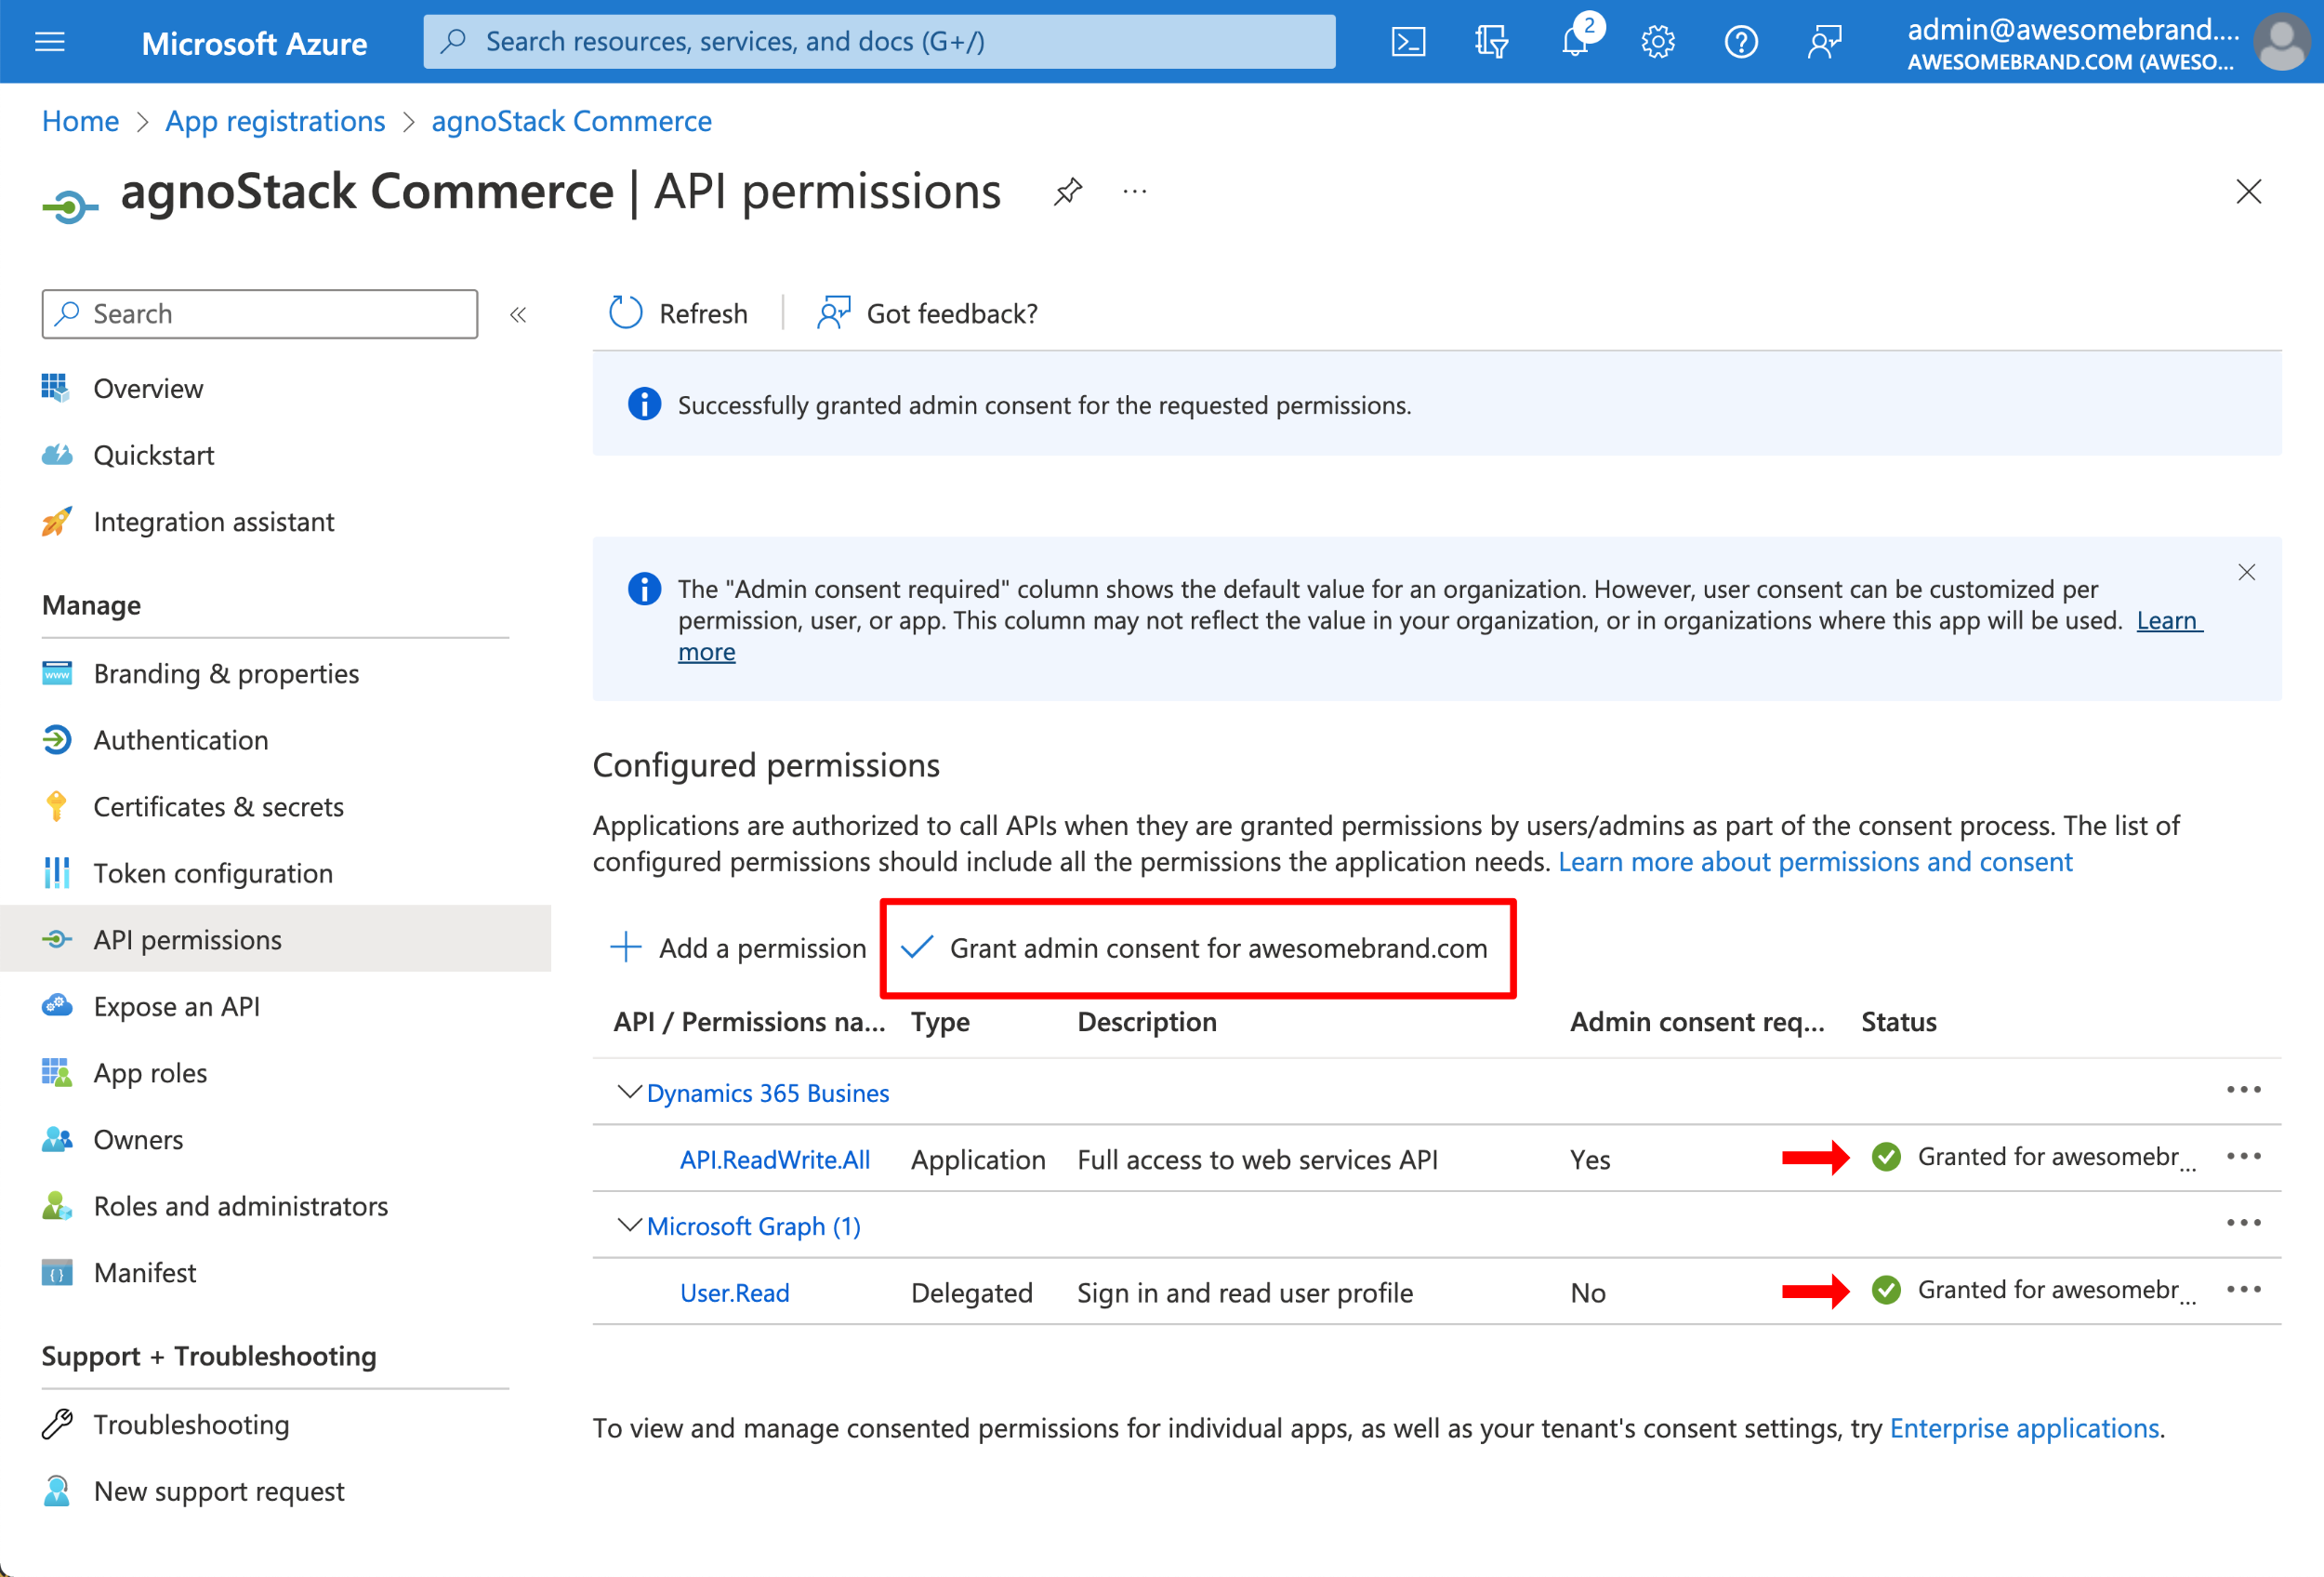
Finally, click on "Grant admin consent for [YOUR DOMAIN]". Now everything has properly been configured!
agnoStack Activation
You can navigate inside of Zendesk back into the agnoStack configuration screen (via the "Manage Your Account" link or using the icon in the left sidebar) and enter the API key obtained above.
Be sure to continue through the remainder of the configuration screens and click "Activate" to save your new Add-On configuration data.
If you run into any trouble or need additional assistance, please contact us any time at support@agnostack.com.
